How to Use Lighting Effects on the Foneo AI Photo Editing App
How to Use Lighting Effects on the Foneo AI Photo Editing App
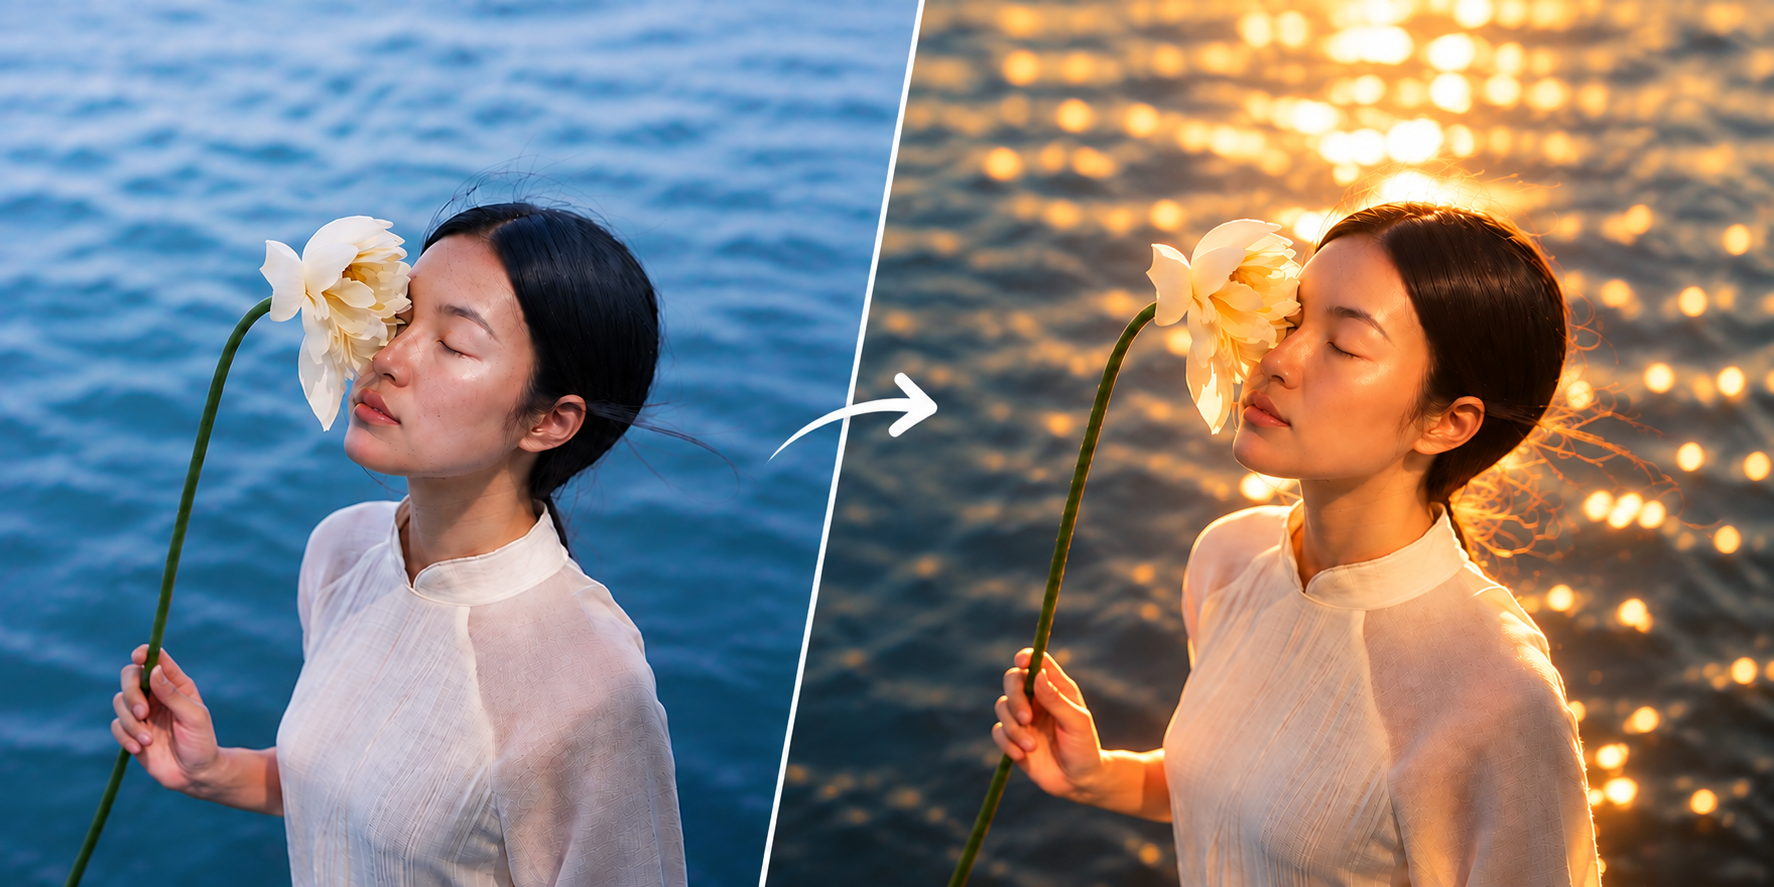
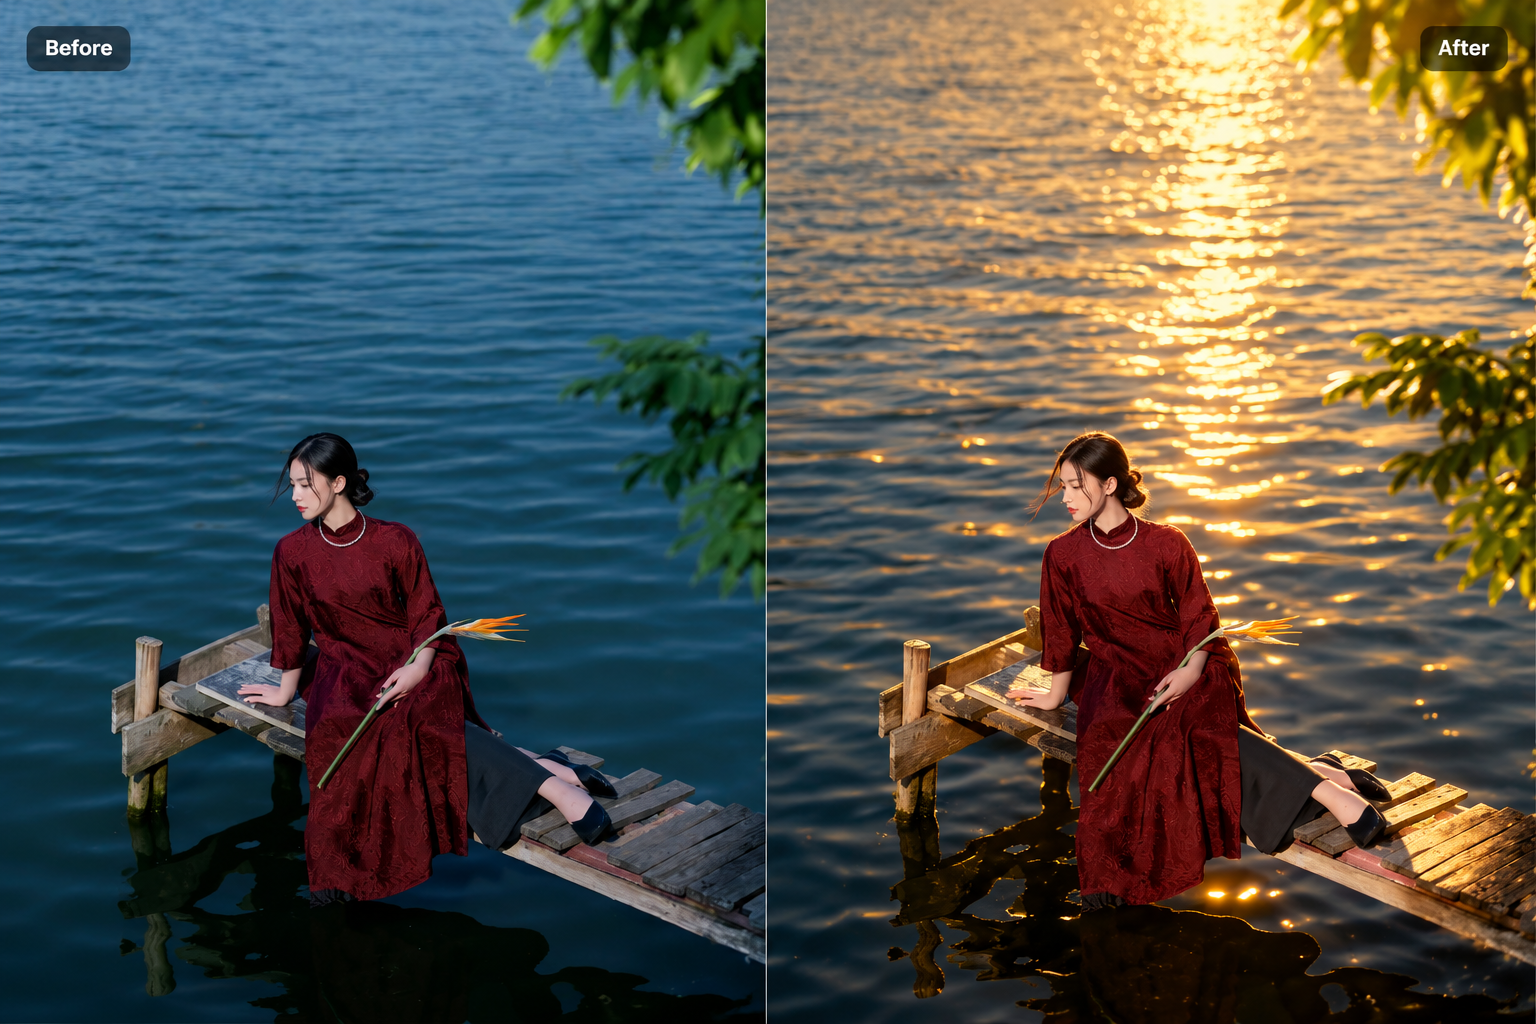
Lighting plays an important role in adding depth, highlighting the subject, and creating the right mood for a photo. With Lighting Effects on Foneo, you can add or adjust lighting in your images using AI with just a few simple steps.
Foneo provides built-in Templates and custom Prompts, allowing you to easily create different lighting styles for portraits, fashion photos, outdoor photos, or product images.
Before & After
How to Use Lighting Effects
To get started, upload the image you want to edit to Foneo and open Lighting Effects.
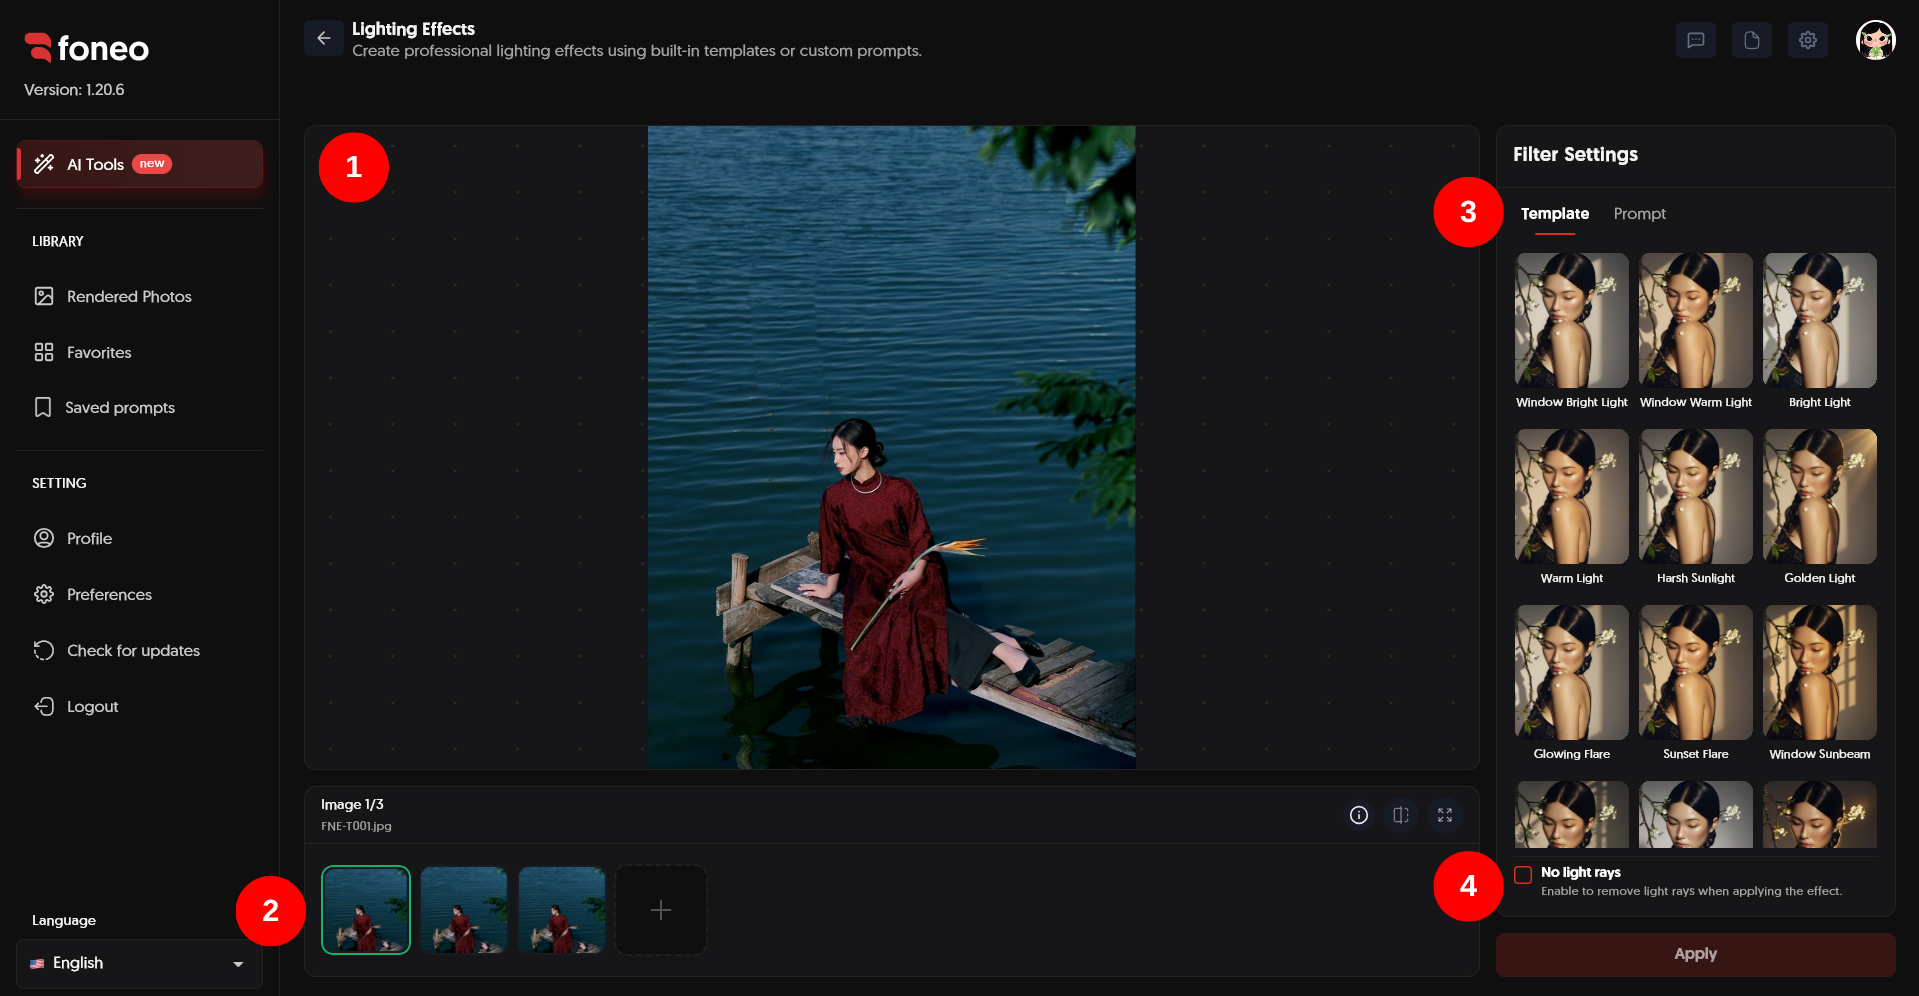
1. Preview Your Image
After uploading an image, it will be displayed in the preview area in the center of the screen.
This is where you can check the original image and view the result after Foneo finishes processing.
2. Select an Image to Edit
Uploaded images are displayed as thumbnails below the preview area.
- Click a thumbnail to select the image you want to edit.
- Click + to add a new image.
3. Choose a Lighting Template
In Filter Settings, select the Template tab.
Here, you can choose from a variety of built-in lighting effect templates. Select a Template that matches the context and style of your image, and Foneo will automatically apply the effect using AI.
4. Enable No Light Rays if You Don't Want Visible Light Rays
The No light rays option allows you to control whether light rays appear in the image.
Enable this option when you want the lighting effect to look softer and more natural, with fewer visible light rays.
If No light rays is disabled, light rays may be generated depending on the Template or Prompt you use.
5. Create an Effect Using a Prompt
In addition to built-in Templates, you can describe your desired lighting effect using a Prompt.
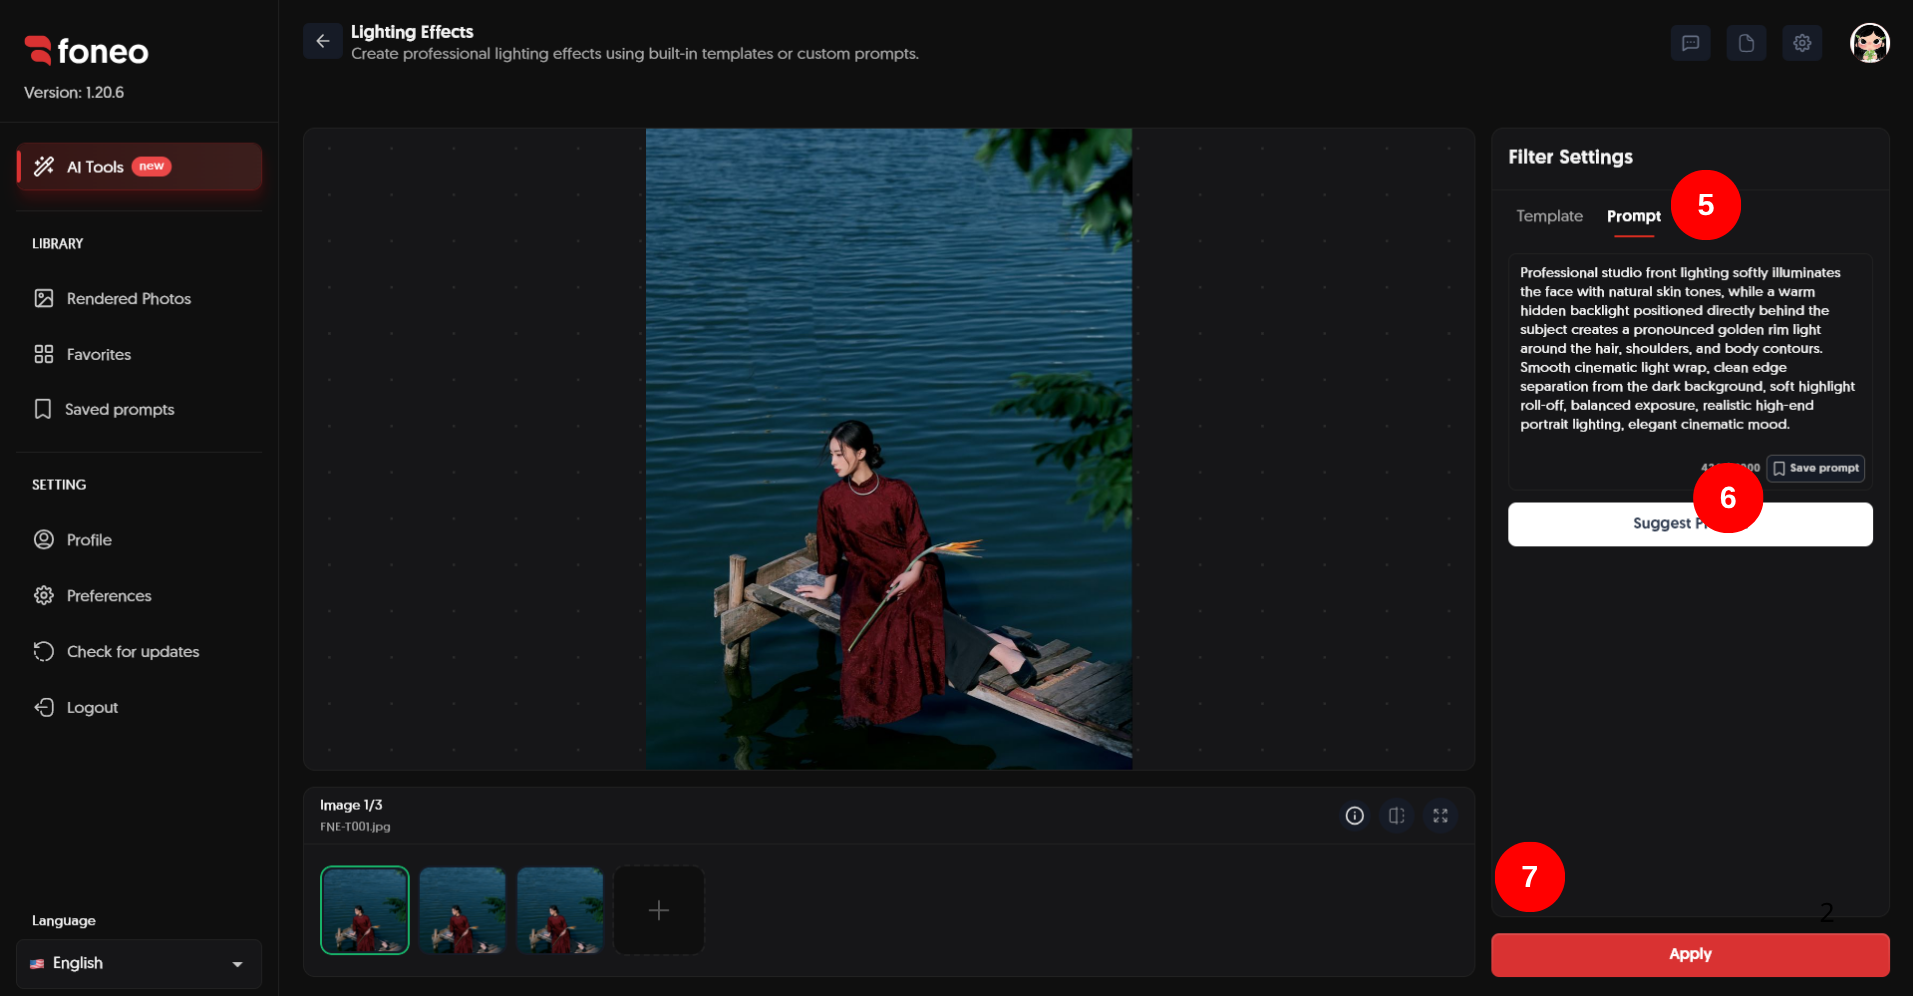
Switch to the Prompt tab and enter a description of the lighting effect you want to create.
You can describe elements such as:
- The direction and position of the light source.
- Lighting colors.
- The softness or intensity of the light.
- Highlights and shadows.
- The overall mood or atmosphere of the image.
Prompt example:
Warm golden sunlight reflecting naturally across the water surface, creating soft shimmering highlights and elegant rippling light.
If you don't have an idea yet, click Suggest Prompt to get a Prompt suggestion from Foneo.
6. Save a Prompt for Later Use
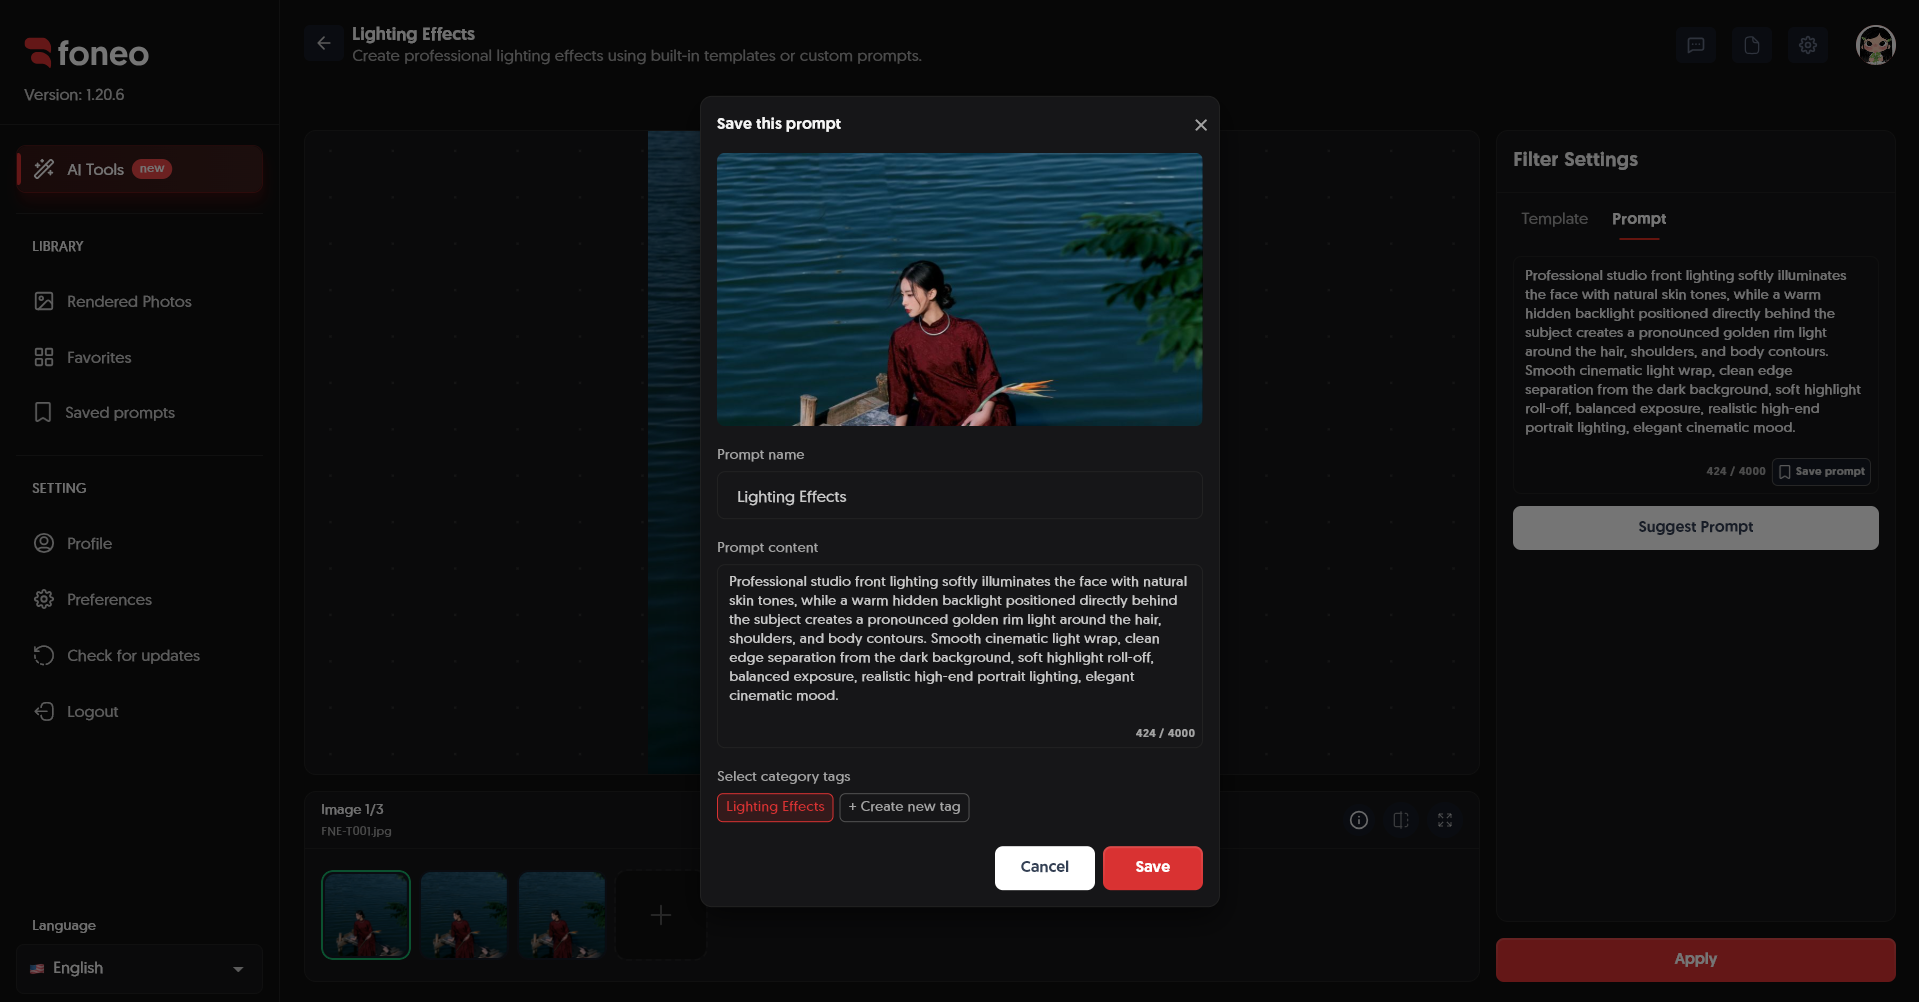
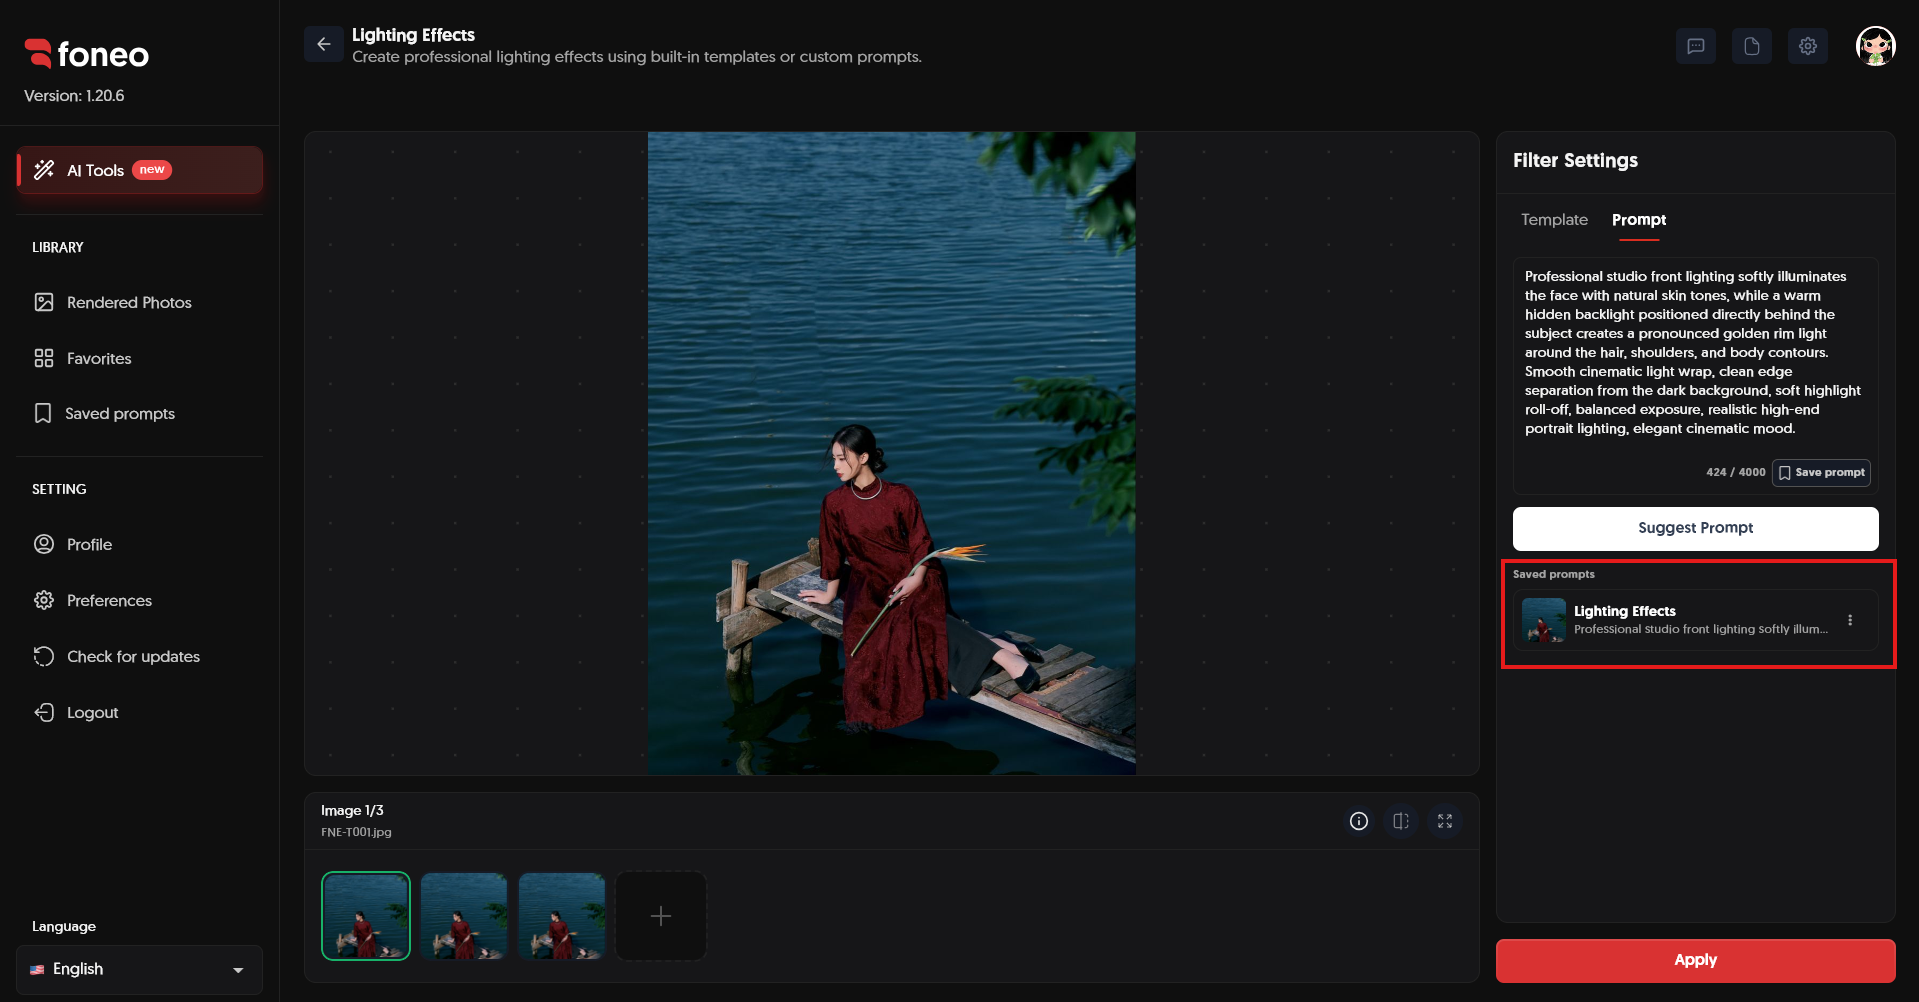
If you have created a Prompt that works well, click Save prompt to save it.
Saved Prompts can be reused in future editing sessions, which is especially useful when you want to apply the same lighting style to multiple images.
7. Apply the Effect
After selecting a Template or completing your Prompt, click Apply to start processing the image with Foneo.
Wait for the processing to finish and check the result in the preview area.
If the effect does not look right, you can:
- Choose another Template.
- Adjust the Prompt.
- Turn No light rays on or off.
- Click Apply to process the image again.
8. Export the Image
Once you are satisfied with the result, click Export file to export the image.
If you want to continue editing in Photoshop, click the Ps button to open the image and continue editing.
How to Evaluate the Result
After processing, compare the original image with the image after applying the effect.
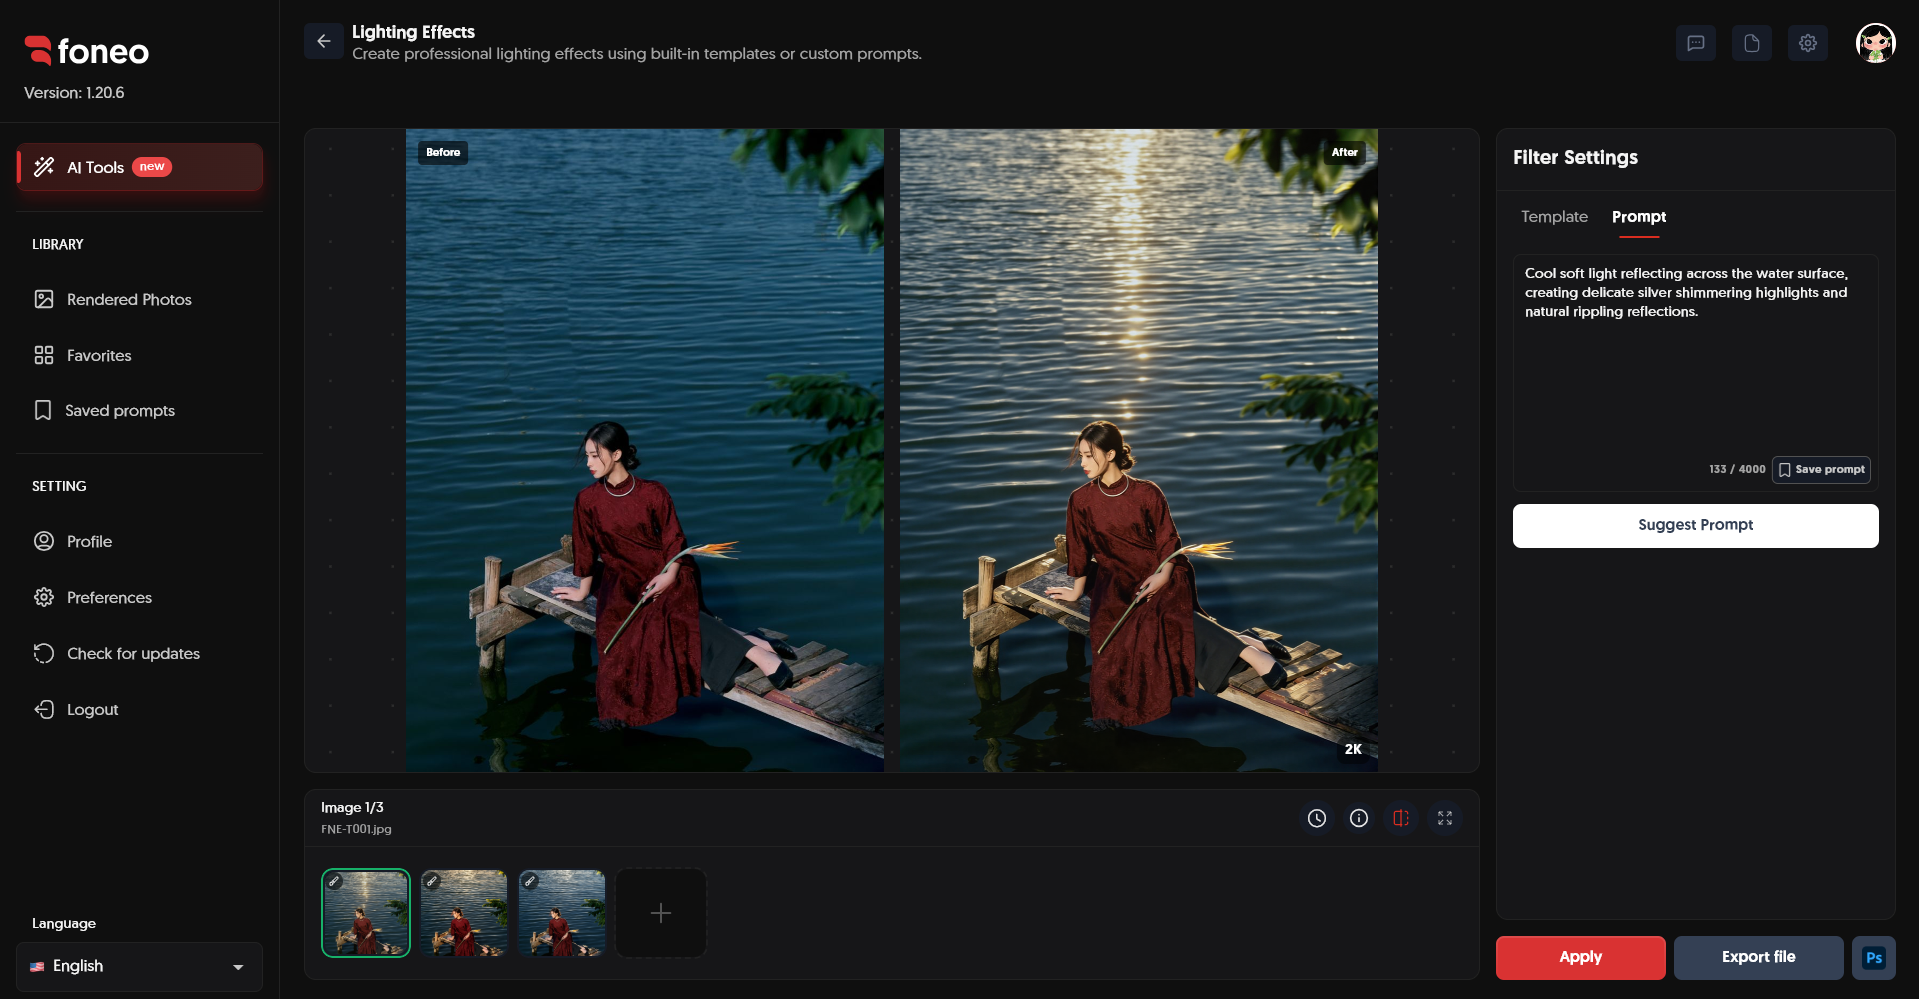
Pay attention to:
- Light direction: Does the lighting match the original direction and context of the image?
- Natural appearance: Do the highlights and shadows blend naturally with the subject?
- Contrast: Does the lighting make the subject stand out without making the image look too harsh?
- Overall look: Do the colors and atmosphere of the effect fit the image?
If the lighting is too strong or does not fit the image, try another Template or adjust the Prompt.
Tips for Creating Natural-Looking Lighting Effects
1. Use a Clear, High-Quality Image
Use an image with good quality, a clearly defined subject, and minimal noise or excessive darkness.
Images with more visible details help Foneo better understand the subject and environment, resulting in more natural lighting effects.
2. Choose Lighting That Matches the Context
Choose an effect with lighting colors and direction that match the environment in the original image.
For example:
- Indoor photos: Try window light or soft diffused lighting.
- Outdoor photos: Try warm sunlight or light filtering through the environment.
- Fashion photos: Try directional lighting to emphasize the subject.
- Product photos: Prefer soft lighting that highlights the product while preserving its details.
3. Use No Light Rays When Needed
If you want the lighting to look natural without clearly visible light rays, enable No light rays before clicking Apply.
4. Write a Short and Specific Prompt
When using a Prompt, focus on important elements such as the light source, lighting direction, color, and softness.
You don't need to write a very long Prompt. A clear description helps the AI better understand the effect you want to create.
5. No Reference Image Required
Lighting Effects does not require a Reference image.
Simply upload the image you want to edit to Foneo, then choose a Template or enter a Prompt. Foneo will use the original image to create a suitable lighting effect.
Frequently Asked Questions
What is Lighting Effects on Foneo used for?
Lighting Effects uses AI to add or adjust lighting in an image, helping create depth, highlight the subject, and enhance the overall mood of the photo.
Do I need a Prompt to use Lighting Effects?
No. You can directly choose from the available Templates.
If you want to create a custom effect, switch to the Prompt tab and enter your desired description.
Can I create my own lighting effect?
Yes. You can use a Prompt to describe the light source, lighting direction, colors, shadows, and desired lighting style.
When should I enable No light rays?
Enable No light rays when you want to reduce or remove visible light rays, creating a softer and more natural-looking lighting effect.
Can I save a Prompt for later use?
Yes. After creating a suitable Prompt, click Save prompt to save and reuse it in future editing sessions.
Does Lighting Effects require a Reference image?
No. You only need to upload the image you want to edit to Foneo. No additional Reference image is required.
Can I continue editing the image after applying the effect?
Yes. After processing, you can export the image using Export file or click Ps to continue editing in Photoshop.
Foneo · AI Photo Editing
Ready to try it on your own photos?
Download the Foneo app to edit photos with AI in just a few taps, or see the plan that fits your needs.