How to Use Detail Enhance on Foneo AI Photo Editing App
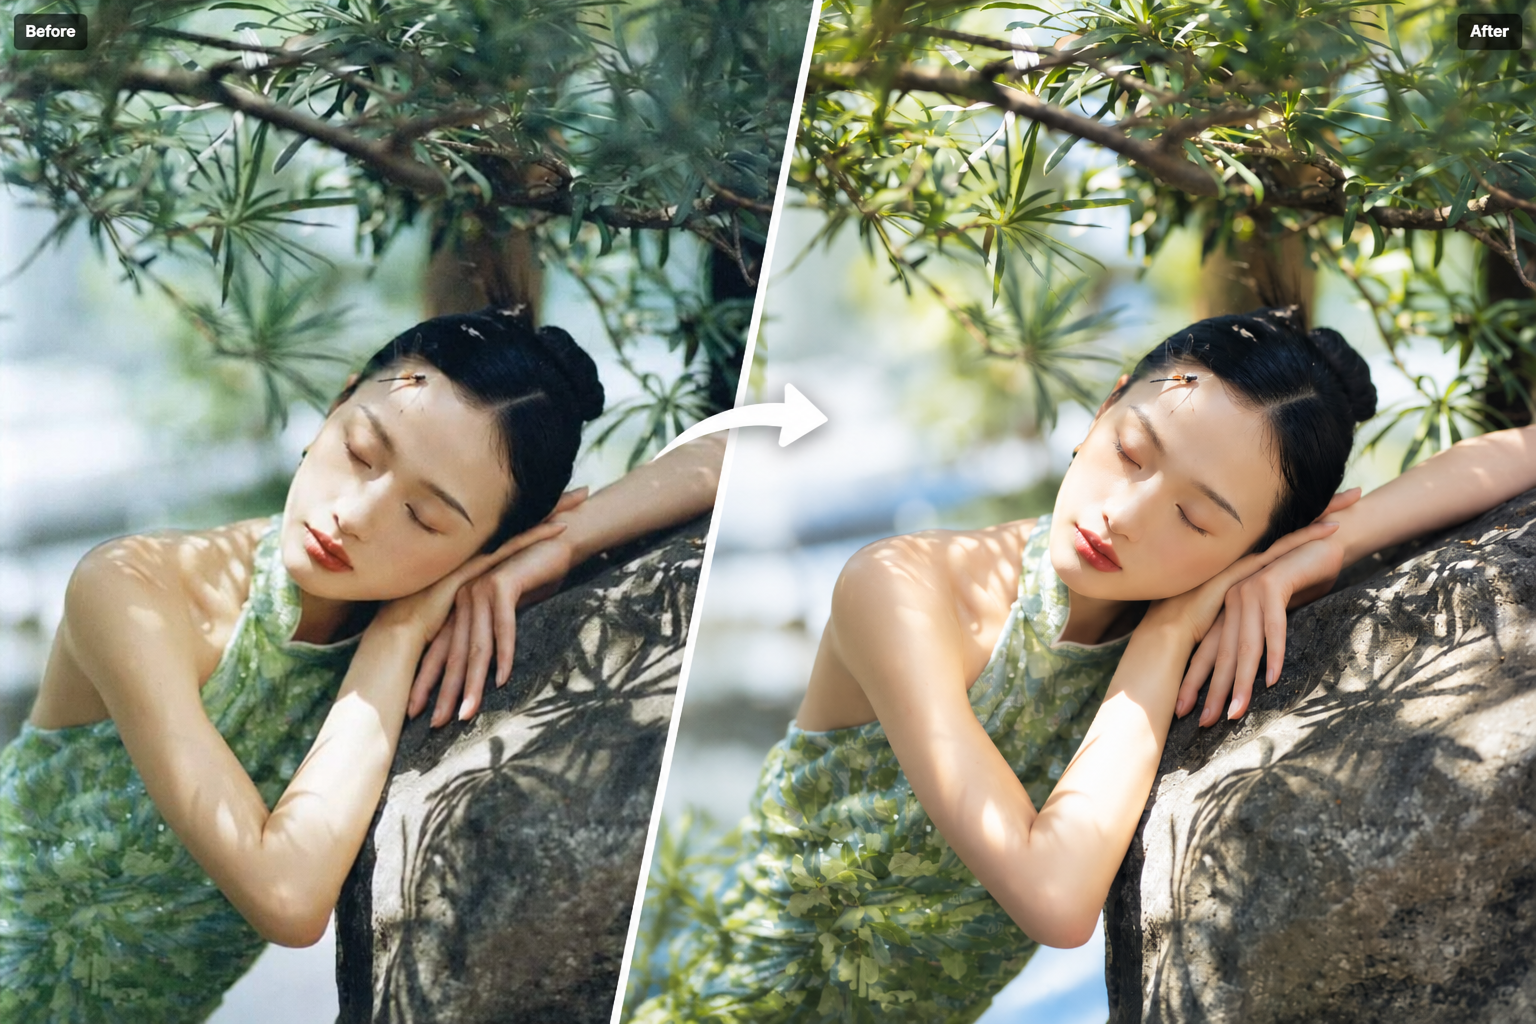
Images can become blurry, lose sharpness, or lack fine details due to low image quality, low resolution, or the way they were captured and saved. With Detail Enhance on Foneo, you can use AI to increase sharpness, bring out image details, and improve the overall clarity of your photos.
Detail Enhance is designed to be simple and automatic. You do not need to choose an effect, adjust settings, or enter a Prompt. Simply upload an image, select the image you want to process, and click Apply. Foneo will automatically analyze the image and enhance its details with AI.
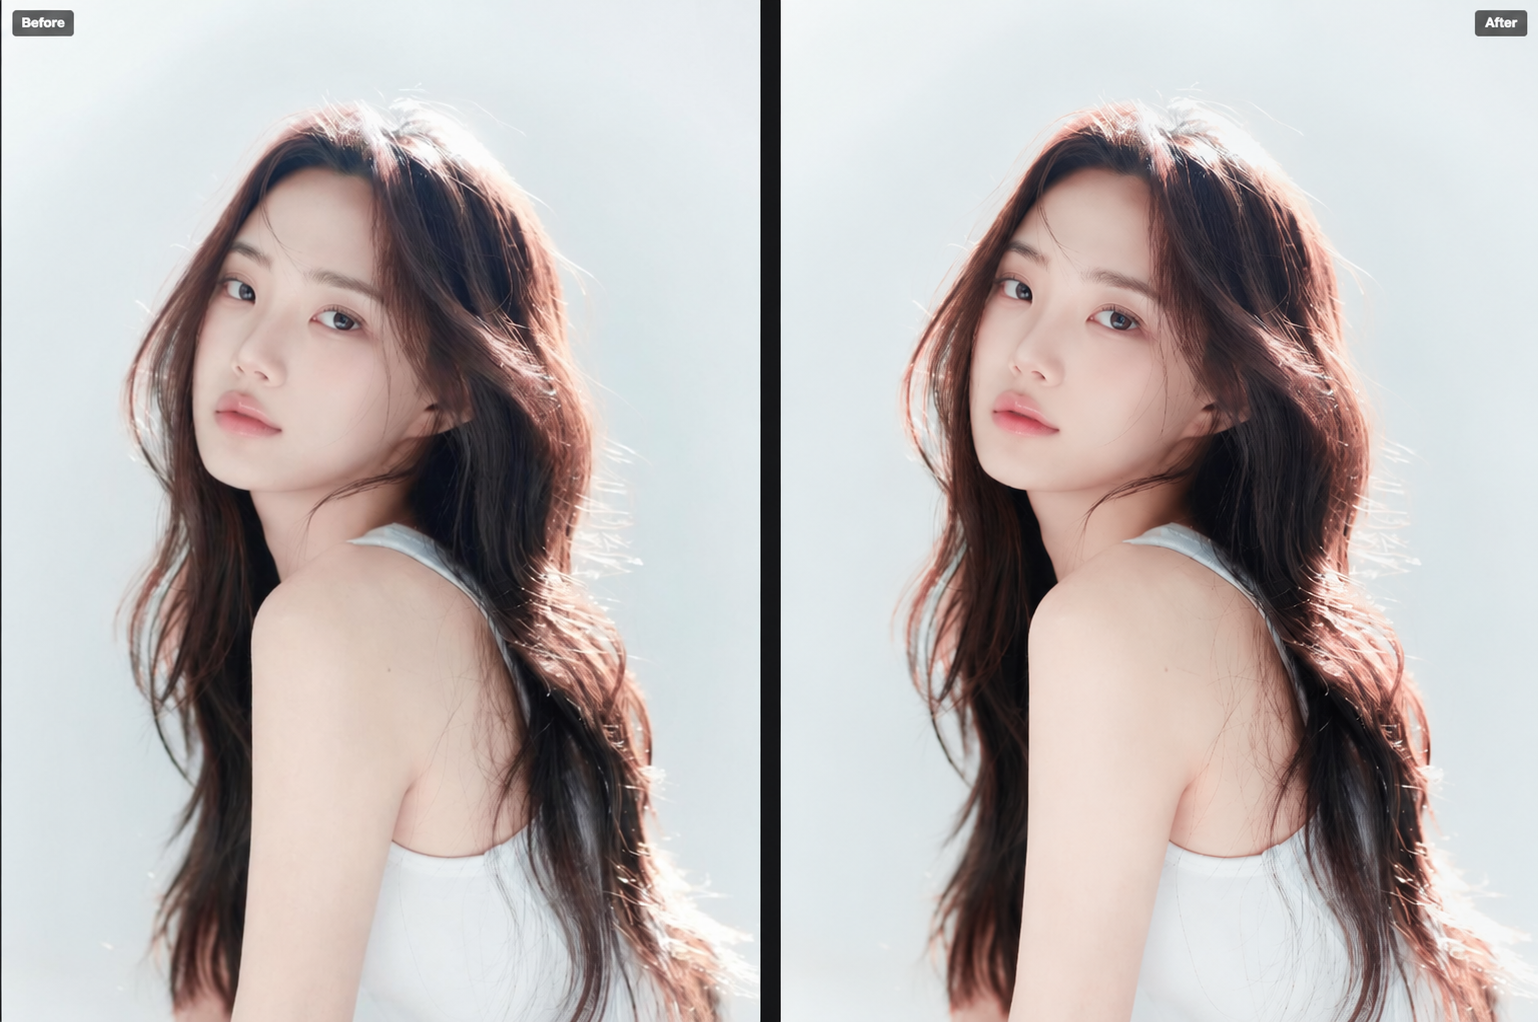
Before & After
How to Use Detail Enhance
After opening Detail Enhance on Foneo, you only need a few simple steps to improve your image.
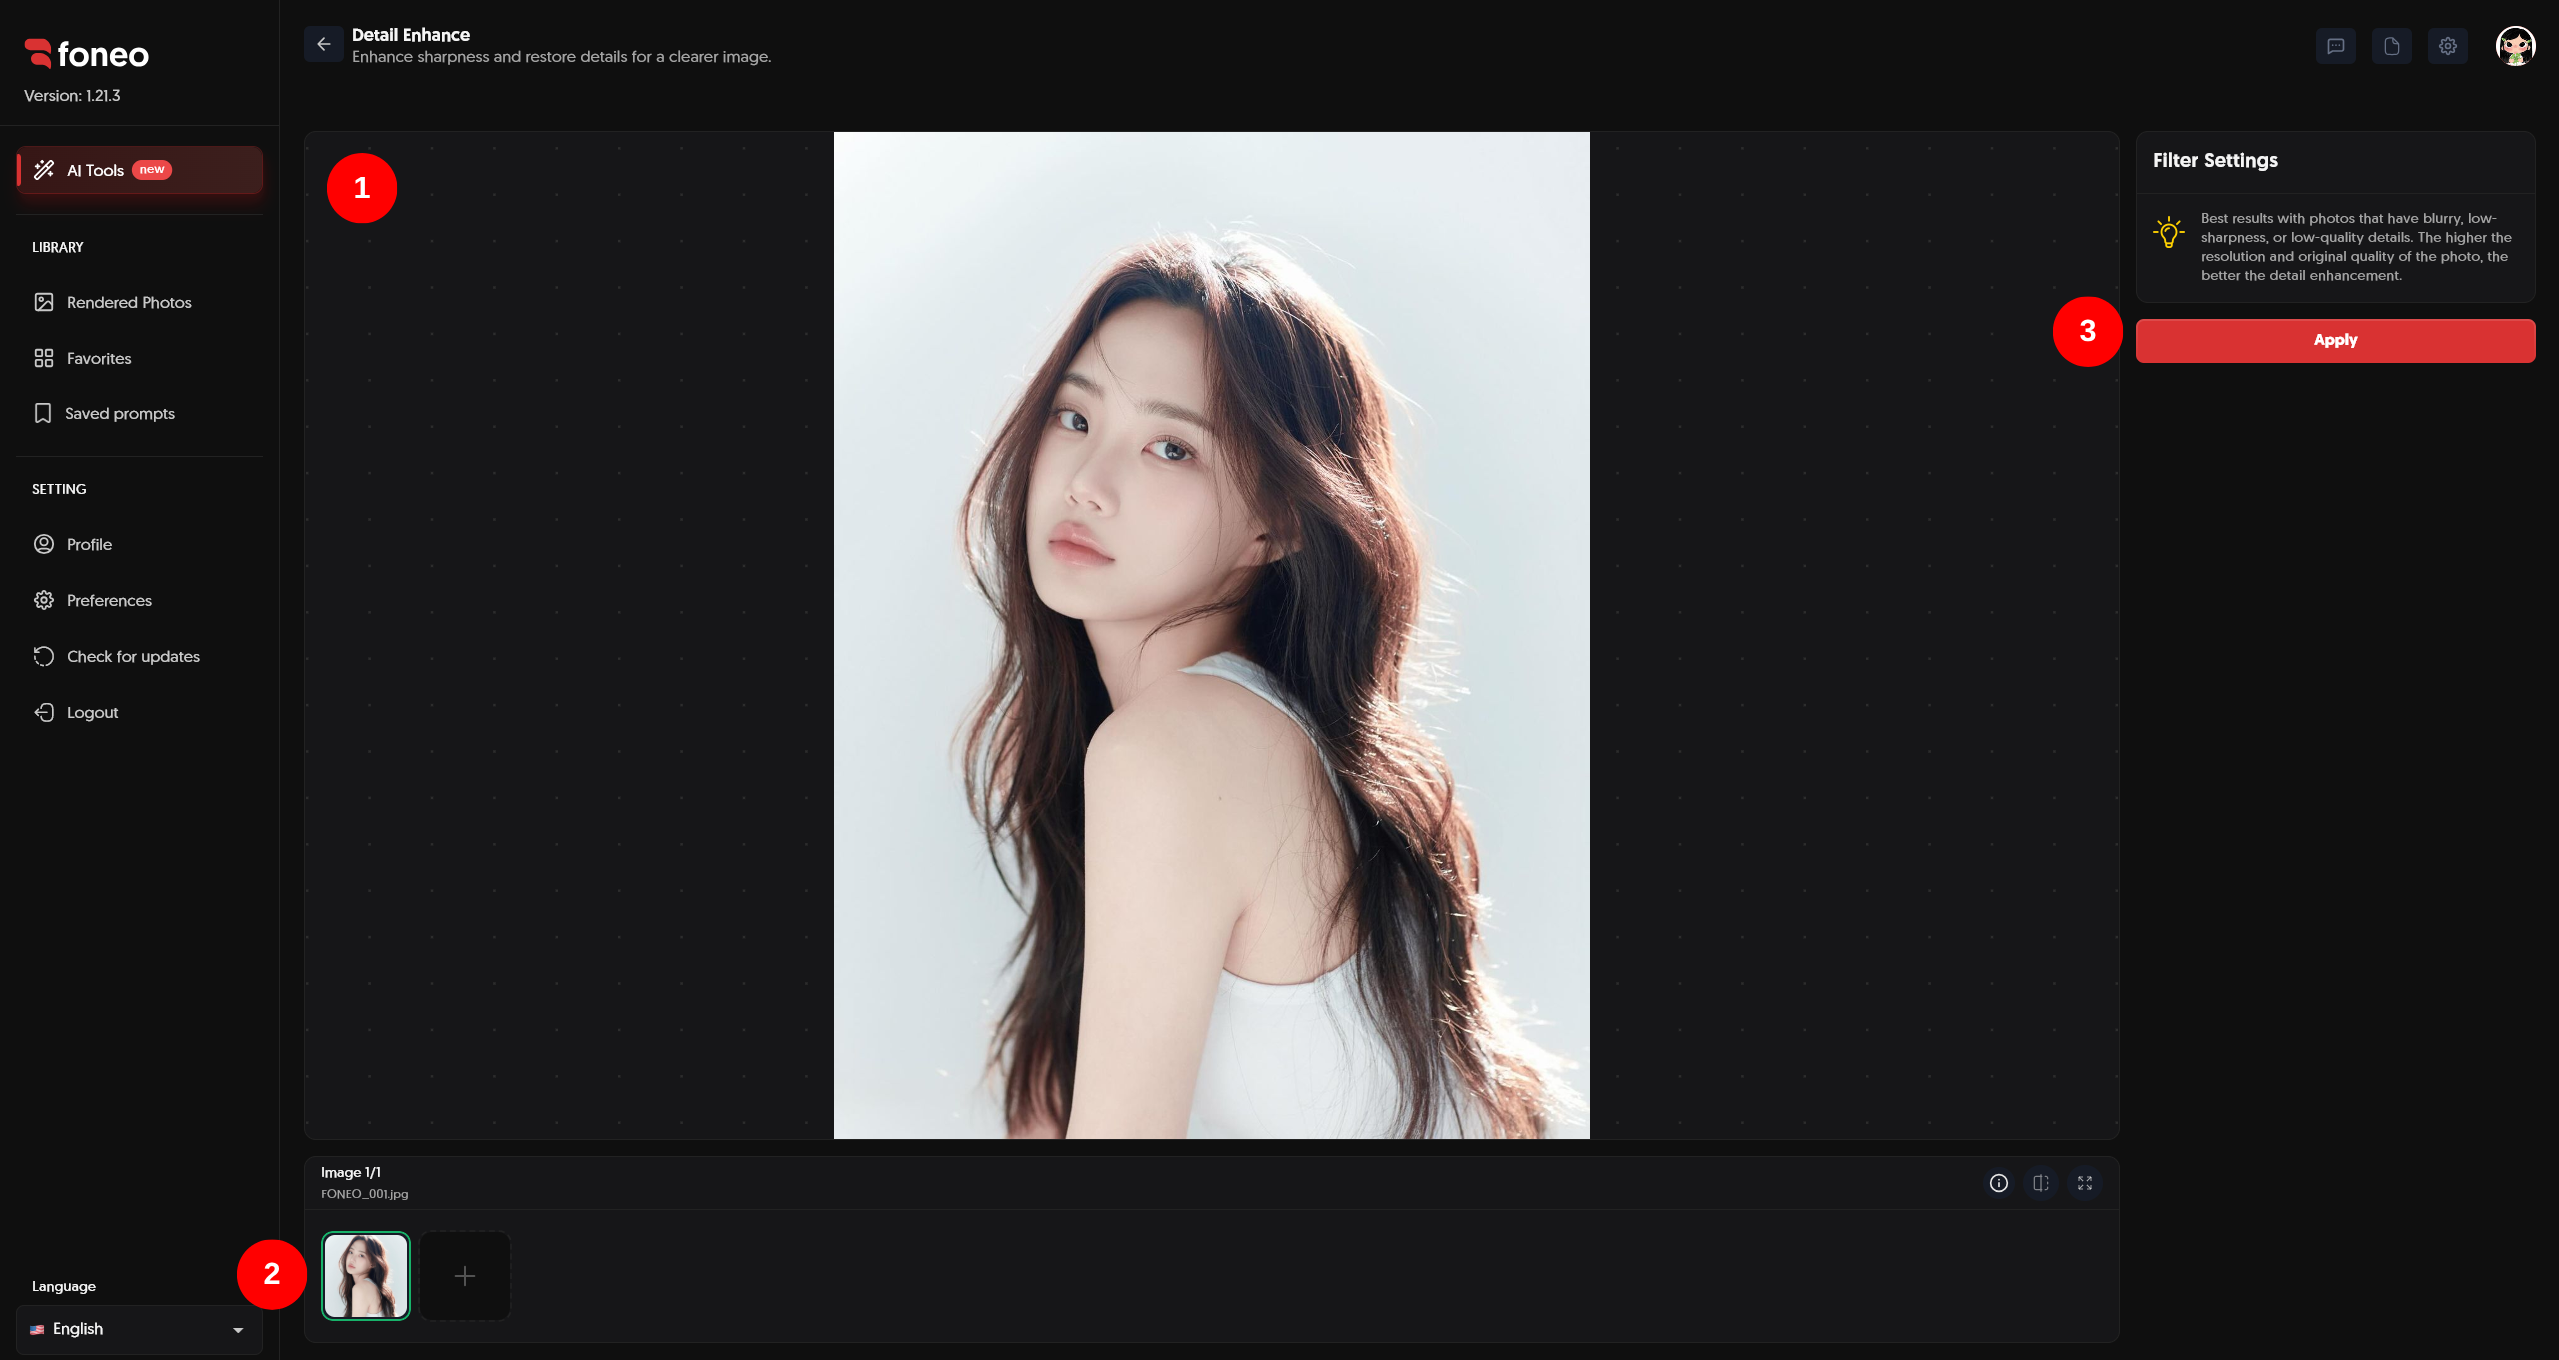
1. Upload an Image to Foneo
Start by uploading the image you want to improve to Foneo.
After uploading, the image will appear in the image area at the bottom of the screen. You can upload one or multiple images depending on your needs.
Detail Enhance is suitable for images that:
- Are blurry or lack sharpness.
- Have unclear or missing details.
- Have relatively low image quality.
- Need clearer details.
- Need to be improved before further editing.
The better the quality of the original image, the more information AI has to analyze and process.
2. Select the Image to Enhance
After uploading your images, select the image you want to process from the image area at the bottom of the screen.
The selected image will be displayed in the main preview area in the center of the screen.
If you upload multiple images, you can click each image to select the one you want to process with Detail Enhance.
Before processing, check the preview to make sure you have selected the correct image.
3. Click Apply
After selecting your image, you do not need to configure any additional settings.
Simply click Apply in the Filter Settings panel.
Foneo will automatically analyze the image and use AI to enhance its details.
The process can help:
- Increase image sharpness.
- Make image details clearer.
- Improve areas that lack clarity.
- Enhance appropriate details within the image.
- Improve the overall visual clarity of the image.
You do not need to enter a Prompt or adjust any settings before clicking Apply.
Once processing is complete, the enhanced image will appear in the preview area for you to review.
4. Check the Result
After AI finishes processing, check the image before exporting it.
You can use Before / After to directly compare the original image with the enhanced result.
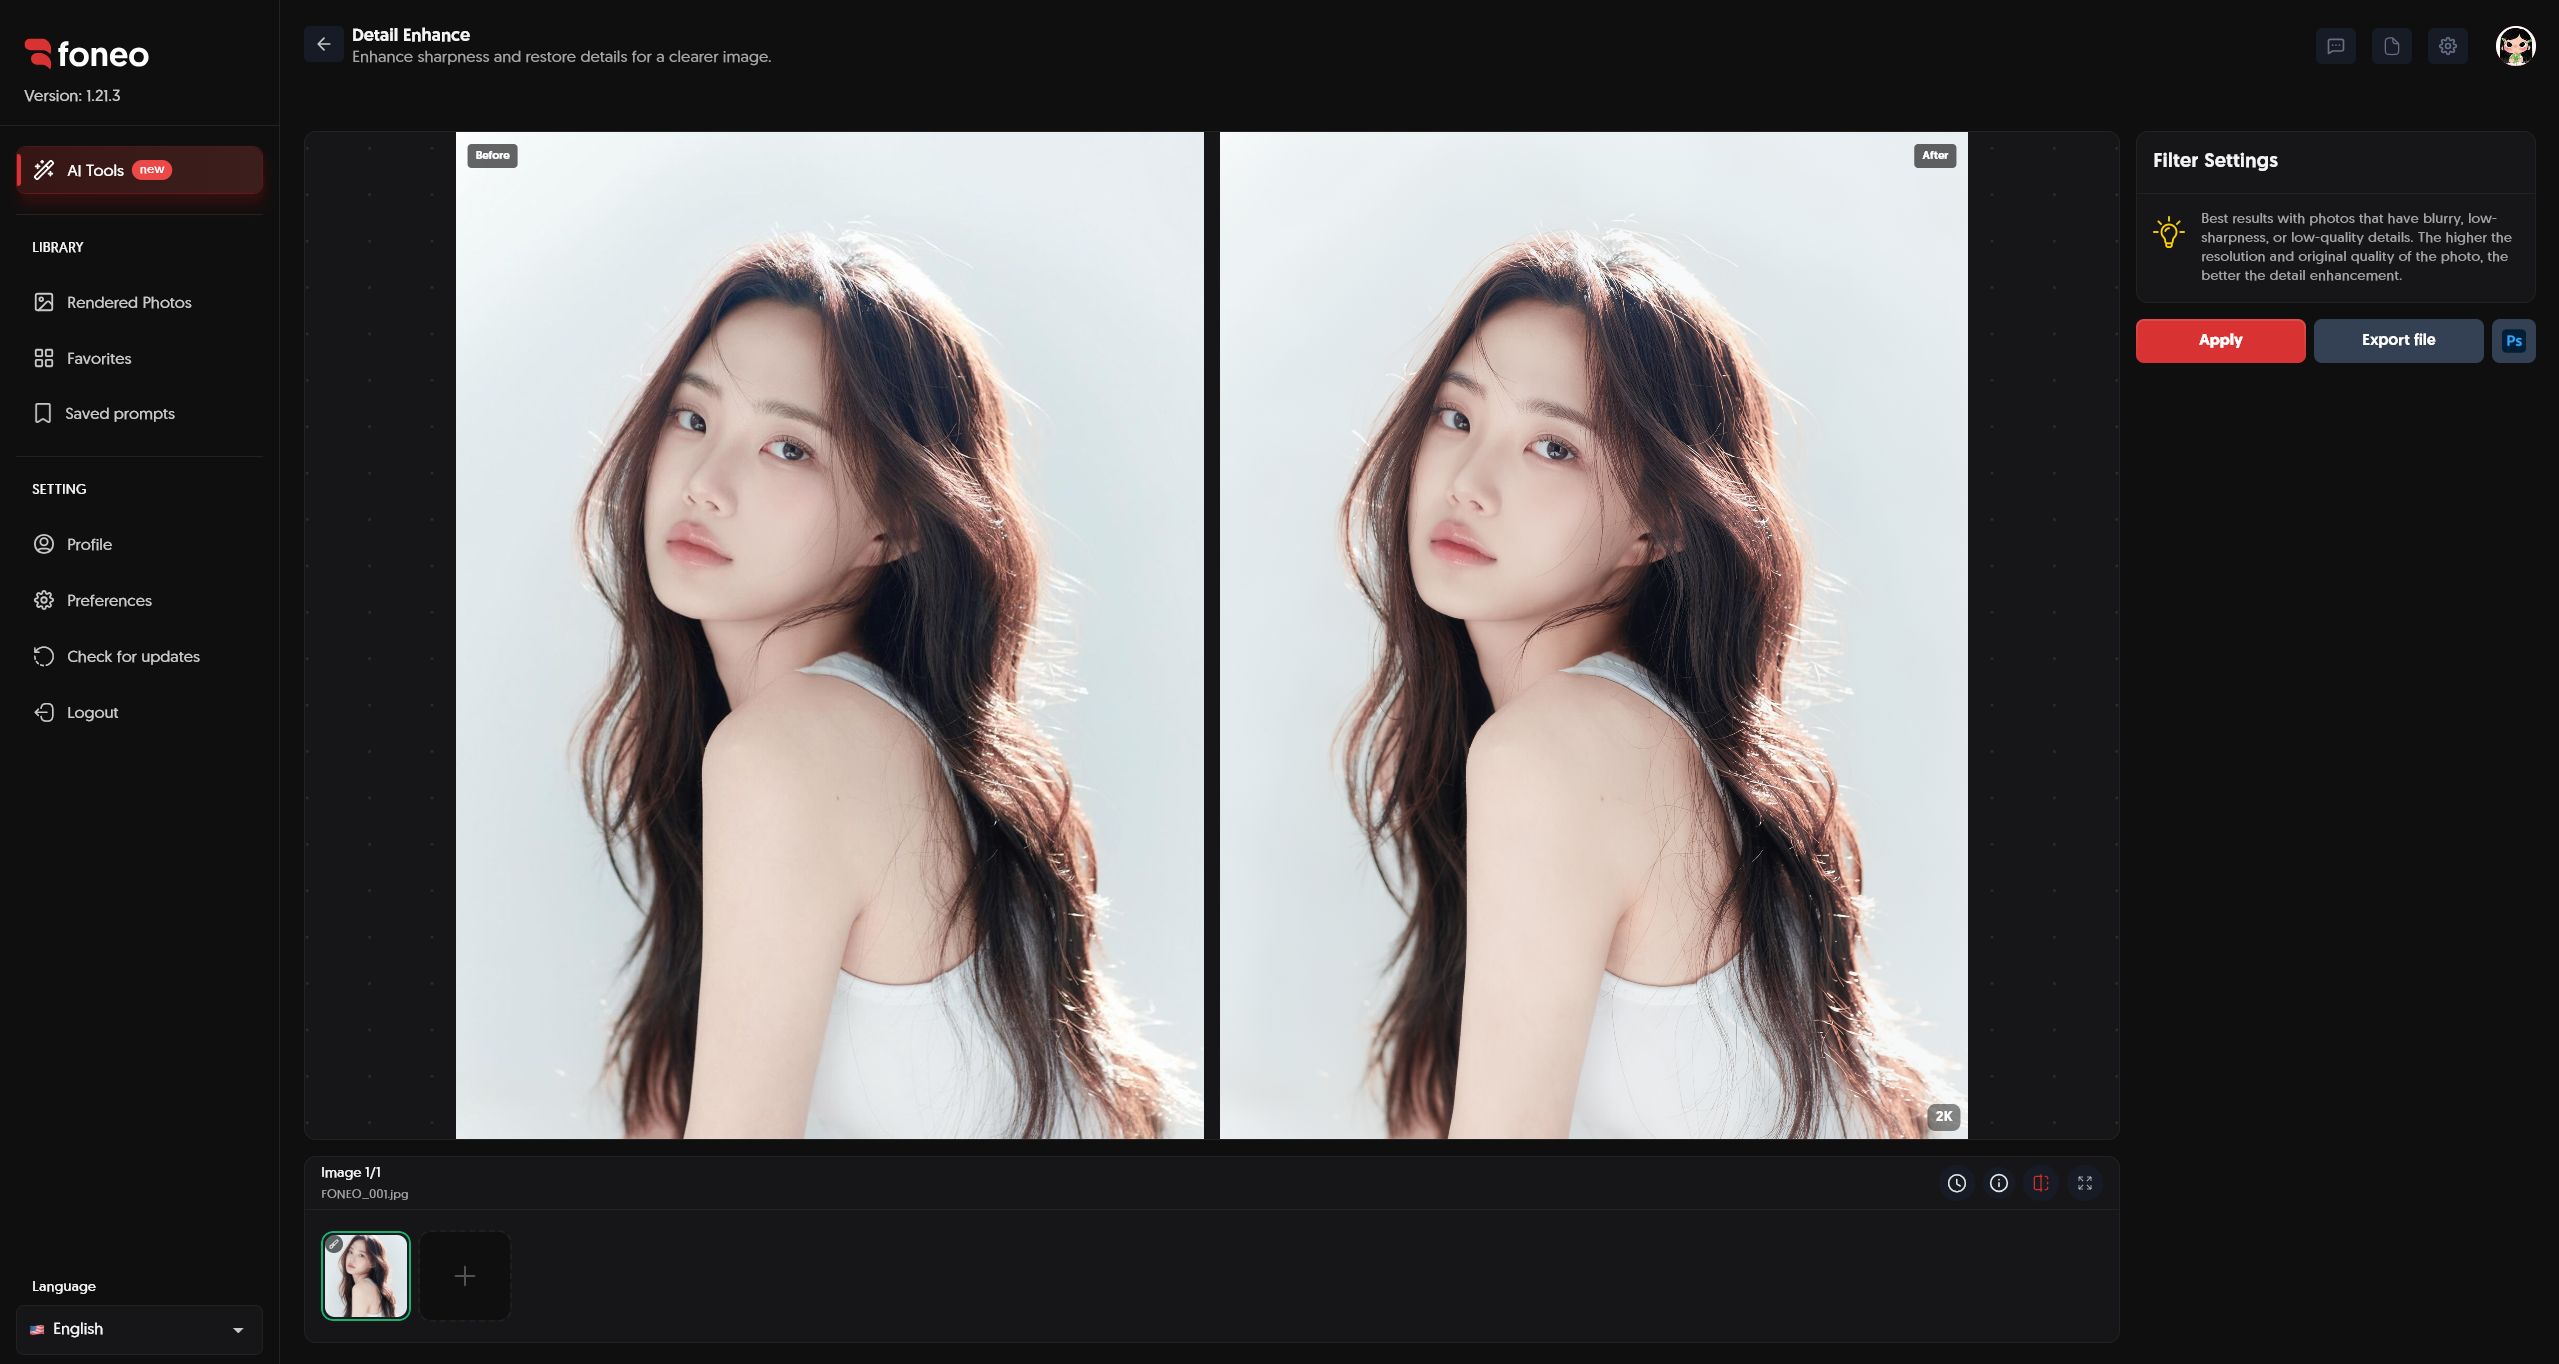
Pay particular attention to:
- Overall image sharpness.
- Fine details.
- Facial features and details in portrait photos.
- Hair and clothing details.
- Objects and edges within the image.
- Areas containing a lot of fine detail.
- The natural appearance of the image after processing.
If the result does not meet your expectations, you can select the image again and process it again.
5. Export File / Ps
Once you are satisfied with the result, you can export the image or continue editing it.
- Click Export file to export the enhanced image.
- Click Ps if you want to continue editing the image in Photoshop.
Before exporting, check the entire image once more to make sure the sharpness and details meet your needs.
How Does Detail Enhance Work?
Detail Enhance uses AI to analyze an image and improve areas that lack clarity or sharpness.
Instead of requiring users to adjust multiple settings, Foneo automatically processes the image after you click Apply.
This makes the image enhancement process quick and simple. You only need to upload an image → select the image → click Apply, and Foneo handles the rest automatically.
When Should You Use Detail Enhance?
1. Slightly Blurry Images
If an image is slightly blurry or lacks sharpness, you can use Detail Enhance to improve its overall clarity.
2. Images with Unclear Details
For images where certain areas lack clarity, the feature can help enhance the visibility of details.
After processing, you can check areas such as hair, faces, clothing, objects, and fine edges more closely.
3. Low-Quality Images
Detail Enhance can be used to improve images with relatively low quality or insufficient sharpness.
However, the quality of the original image still affects the processing result. Images with more visual information give AI more information to analyze.
4. Portraits That Need More Clarity
For portrait photos, Detail Enhance can help improve the clarity of details such as:
- Facial features.
- Hair.
- Eyes and facial details.
- Clothing.
- Other fine details in the image.
After processing, check the face and fine details carefully to make sure the result remains natural.
5. Images That Need Improvement Before Further Use
If you want to continue editing an image or use it for another purpose, you can use Detail Enhance first to improve its clarity and details.
Tips for Getting Better Results with Detail Enhance
1. Use a Good-Quality Original Image
Although AI can improve clarity and details, a better-quality input image gives the system more information to analyze.
Whenever possible, use images that are not heavily distorted or missing too much visual information.
2. Use It for Images That Need More Sharpness
Detail Enhance is suitable for images that have issues with clarity, sharpness, or visible details.
If an image is already highly sharp and detailed, the difference after processing may be less noticeable.
3. Check the Image at a Larger Zoom
After processing, zoom in on the image to inspect areas containing fine details.
Pay particular attention to:
- Facial features.
- Hair.
- Clothing.
- Objects.
- Edges.
- Fine details.
4. Compare Before / After
Using Before / After makes it easier to see the difference between the original image and the enhanced result.
It is also a quick way to check the improvement before exporting the image.
5. Check the Image Before Exporting
Before clicking Export file, review the entire image one more time.
Make sure the details have been enhanced while the image still looks natural.
Frequently Asked Questions
What is Detail Enhance used for?
Detail Enhance uses AI to increase sharpness and improve details in an image, making the image clearer and easier to view.
Do I need to select any options in Filter Settings?
No.
You do not need to configure any additional settings. Simply upload an image, select the image, and click Apply. Foneo will automatically process the image using AI.
Do I need to enter a Prompt when using Detail Enhance?
No.
Detail Enhance is designed for automatic processing. Simply upload the image → select the image → click Apply.
What types of images are suitable for Detail Enhance?
The feature is suitable for images that are blurry, lack sharpness, have unclear details, or need improved visual clarity.
Can I use Detail Enhance for portrait photos?
Yes.
You can use Detail Enhance on portrait photos to improve the clarity of details such as facial features, hair, clothing, and other areas of the image.
Do I need to adjust Filter Settings before clicking Apply?
No.
Filter Settings for this feature are designed to keep the process simple. After selecting an image, you can click Apply immediately without making any additional adjustments.
Can I upload multiple images?
Yes.
You can upload multiple images to the image area at the bottom of the screen and select the image you want to process.
Can I continue editing the image after using Detail Enhance?
Yes.
After processing, you can click Export file to export the image or click Ps to continue editing it in Photoshop.
Can I process the image again if the result is not suitable?
Yes.
You can select the image again and click Apply to process it again.
Related Articles
- How to Use Skin Retouch on Foneo AI Photo Editing App
- How to Use Portrait Effects on Foneo AI Photo Editing App
- How to Use AI Upscale on Foneo AI Photo Editing App
- How to Use Glass Reflection Removal on Foneo AI Photo Editing App
- How to Use Old Photo Restoration & Colorization on Foneo AI Photo Editing App
- How to Use ID Photo on Foneo AI Photo Editing App
Foneo · AI Photo Editing
Ready to try it on your own photos?
Download the Foneo app to edit photos with AI in just a few taps, or see the plan that fits your needs.