How to Use Enhance Face on Foneo AI Photo Editor
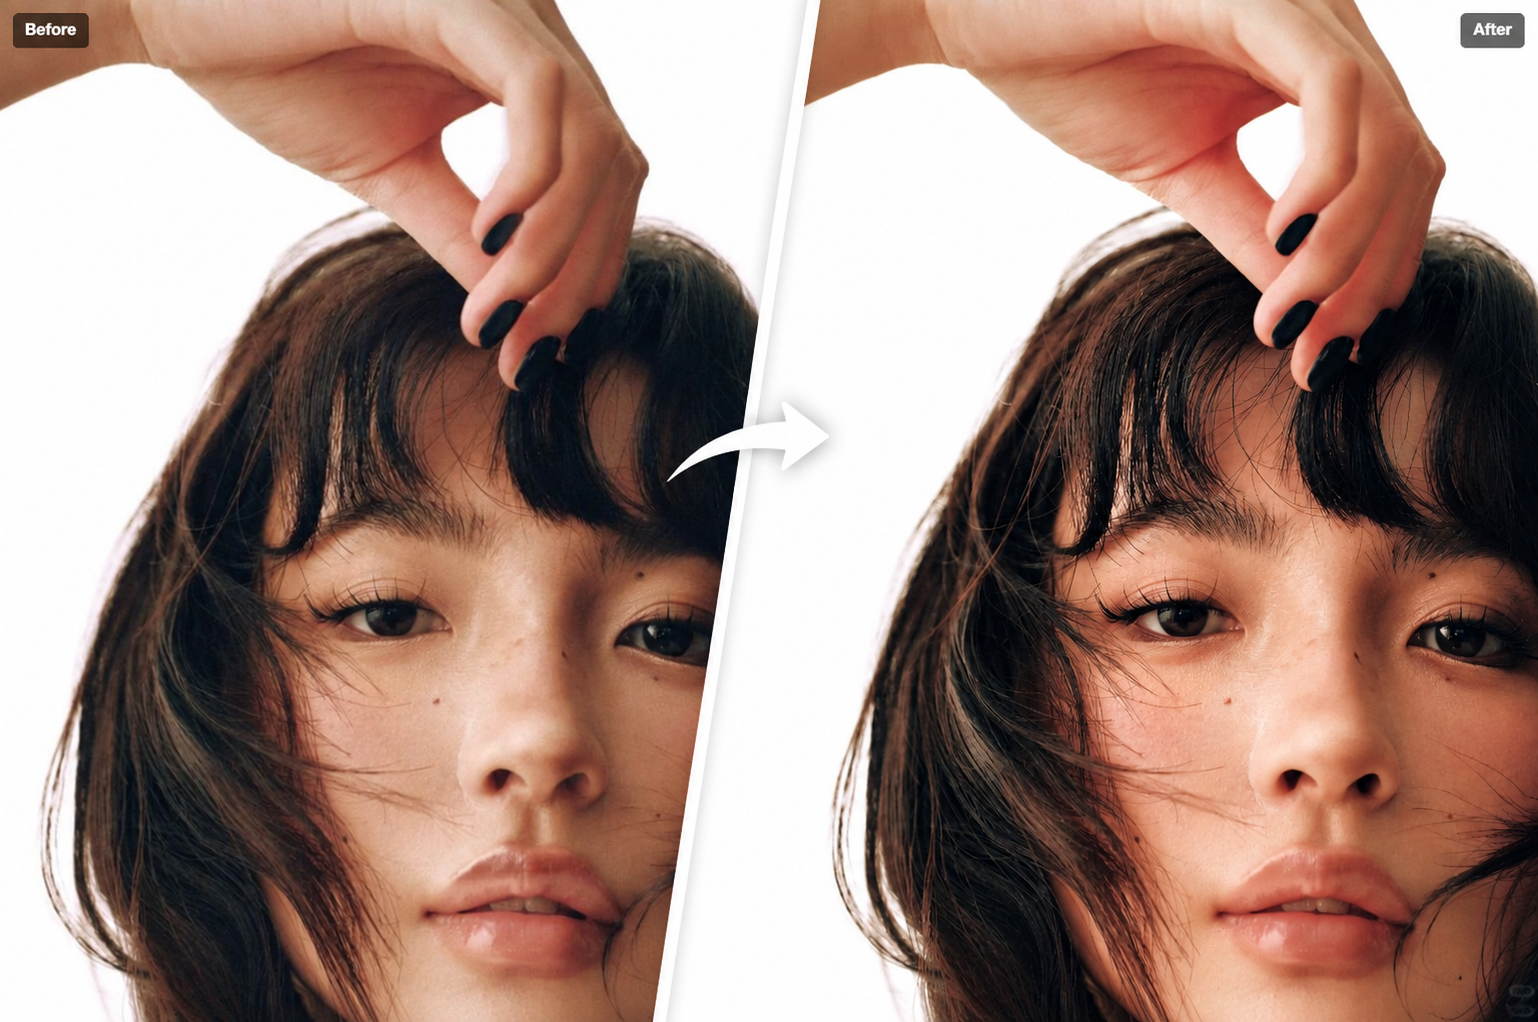
The face is one of the most important details in a portrait photo. When an image is blurry, lacks sharpness, or facial details are not clear enough, the overall photo may look less impressive.
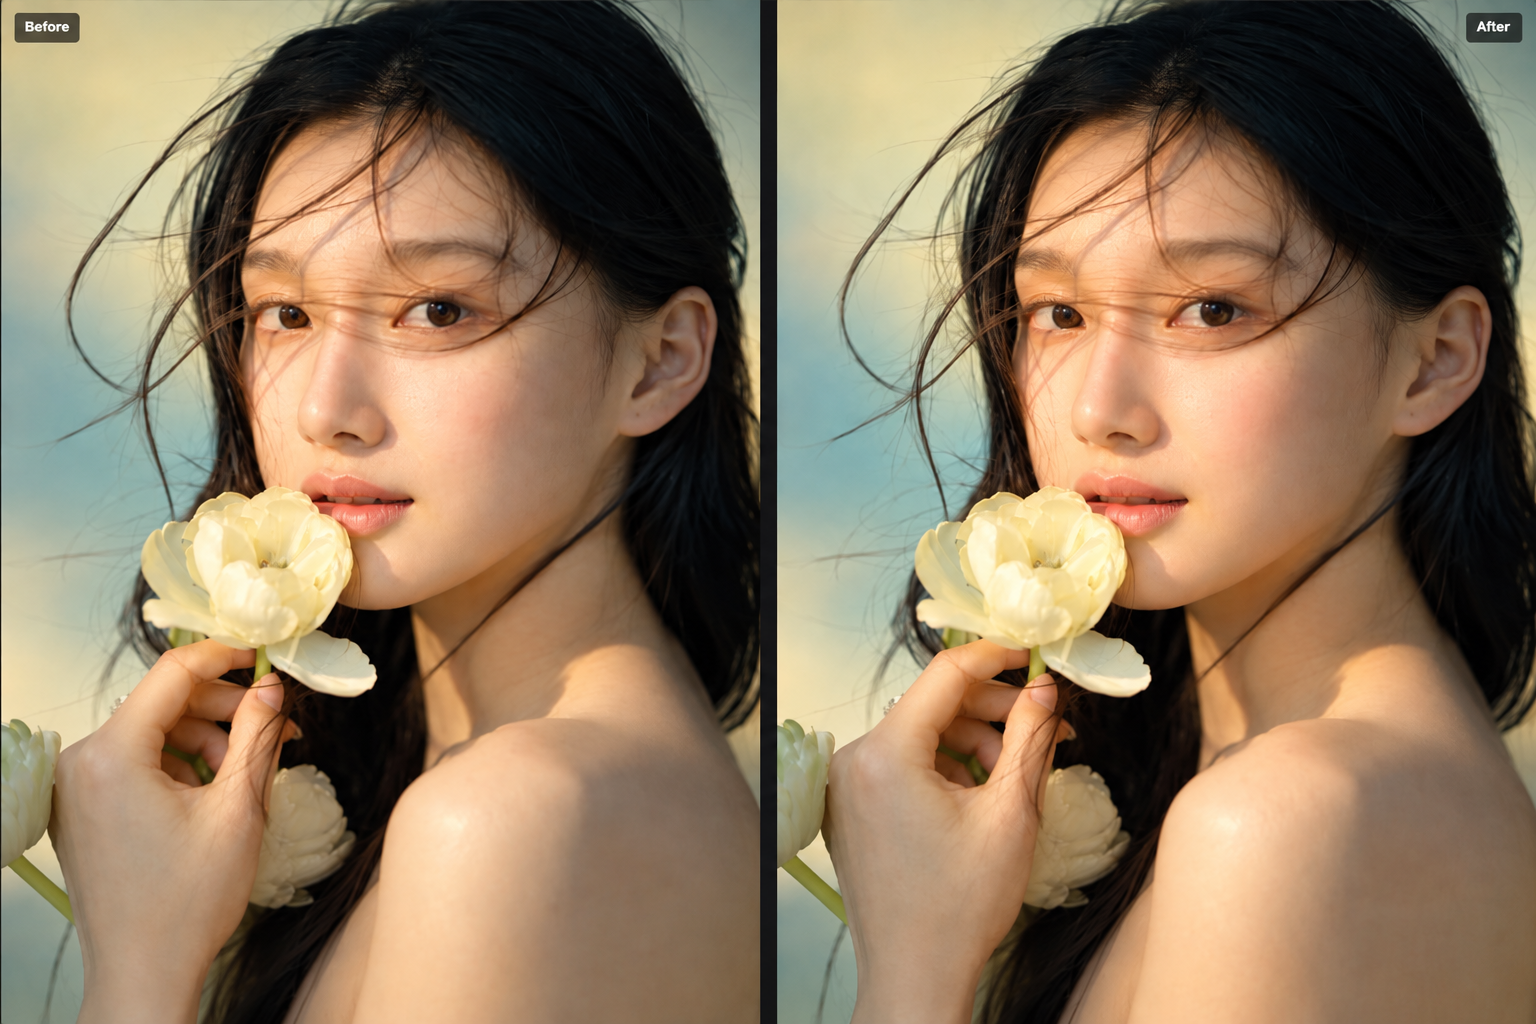
With Enhance Face on Foneo, you can use AI to increase facial sharpness and enhance facial details with just a few simple steps.
This feature is suitable for portraits, close-up photos, or images that need improved facial clarity without requiring complicated editing.
Before & After
How to Use Enhance Face
To get started, upload the photo you want to improve to Foneo and open the Enhance Face feature.
1. Preview the Image
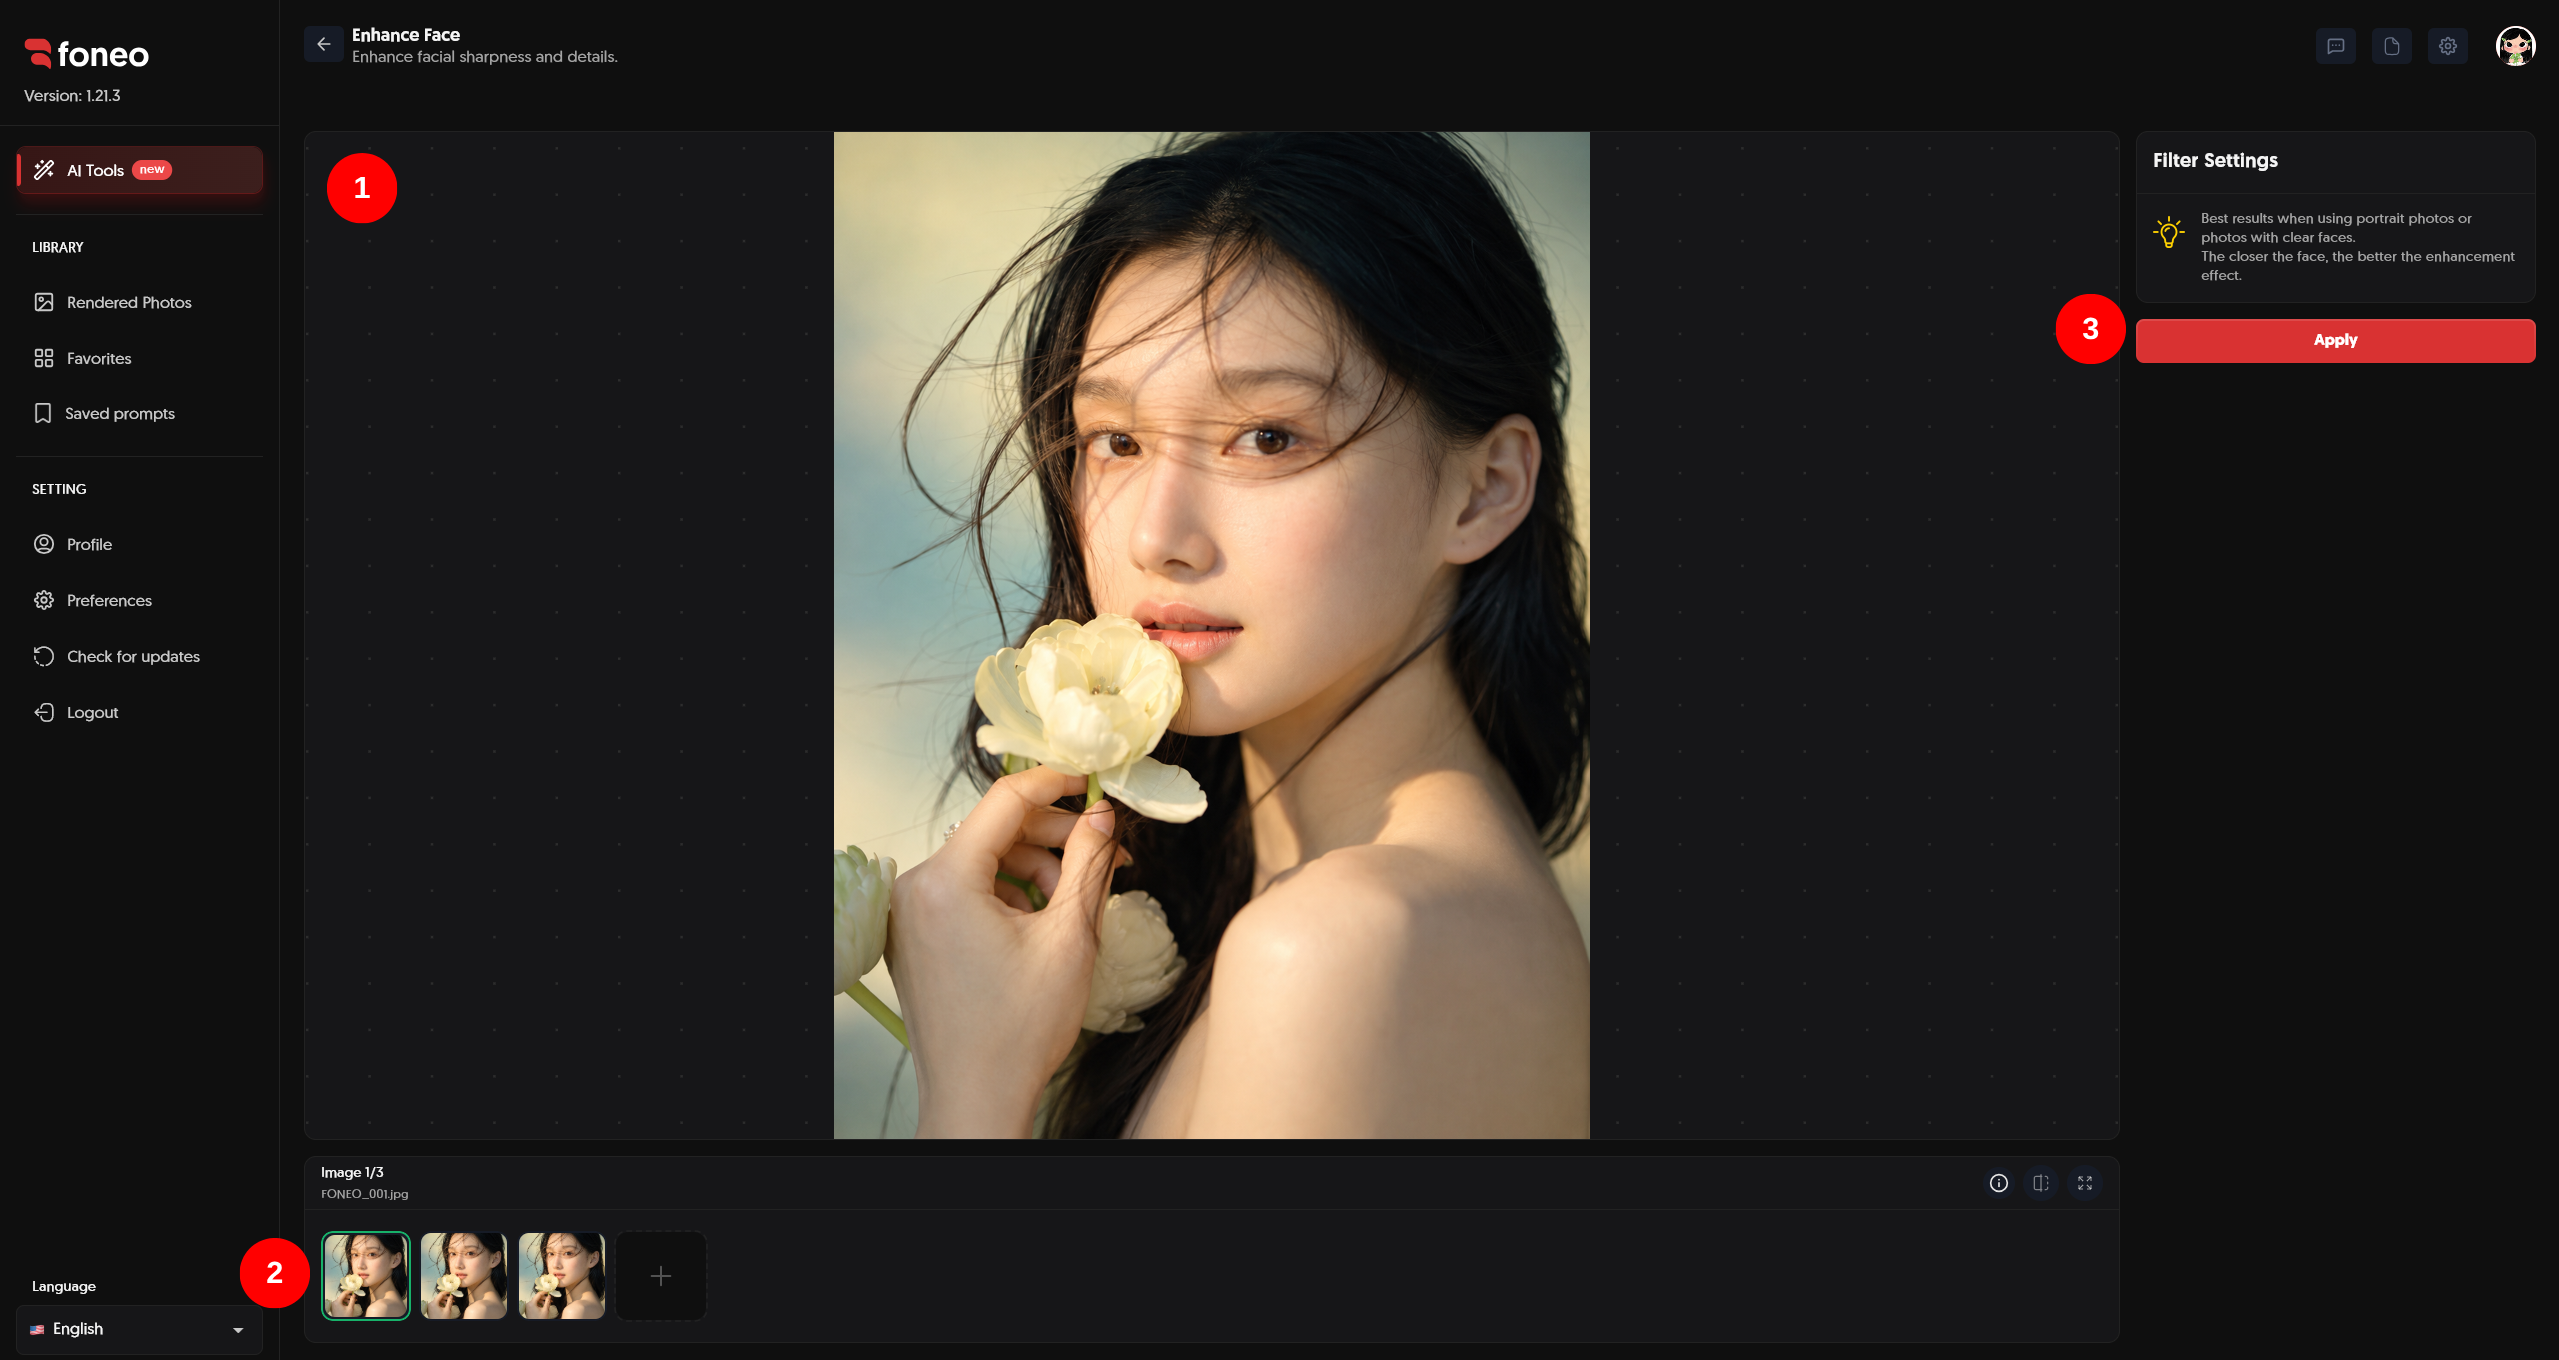
After uploading an image, it will be displayed in the preview area in the center of the screen.
This is where you can check the original image before processing and view the result after Foneo completes the enhancement process.
For better results, Foneo recommends using portrait photos or images where the face is clearly visible.
2. Select the Image to Enhance
Uploaded images will be displayed as thumbnails below the preview area.
- Click a thumbnail to select the image you want to enhance.
- Click + to add a new image.
- Select the appropriate image before starting the processing.
Once you select an image, Foneo will use it as the source to analyze and improve facial sharpness.
3. Click Apply to Enhance the Face
After selecting the image, you do not need to configure any additional Template or Prompt.
Simply click Apply to let Foneo start processing.
AI will automatically analyze the face in the image and enhance its sharpness, making facial details clearer.
The processing time may vary depending on the image.
Once processing is complete, the result will be displayed directly in the preview area for you to review.
4. Check the Result
After Foneo finishes processing, you can use the Before & After view to compare the image before and after enhancement.
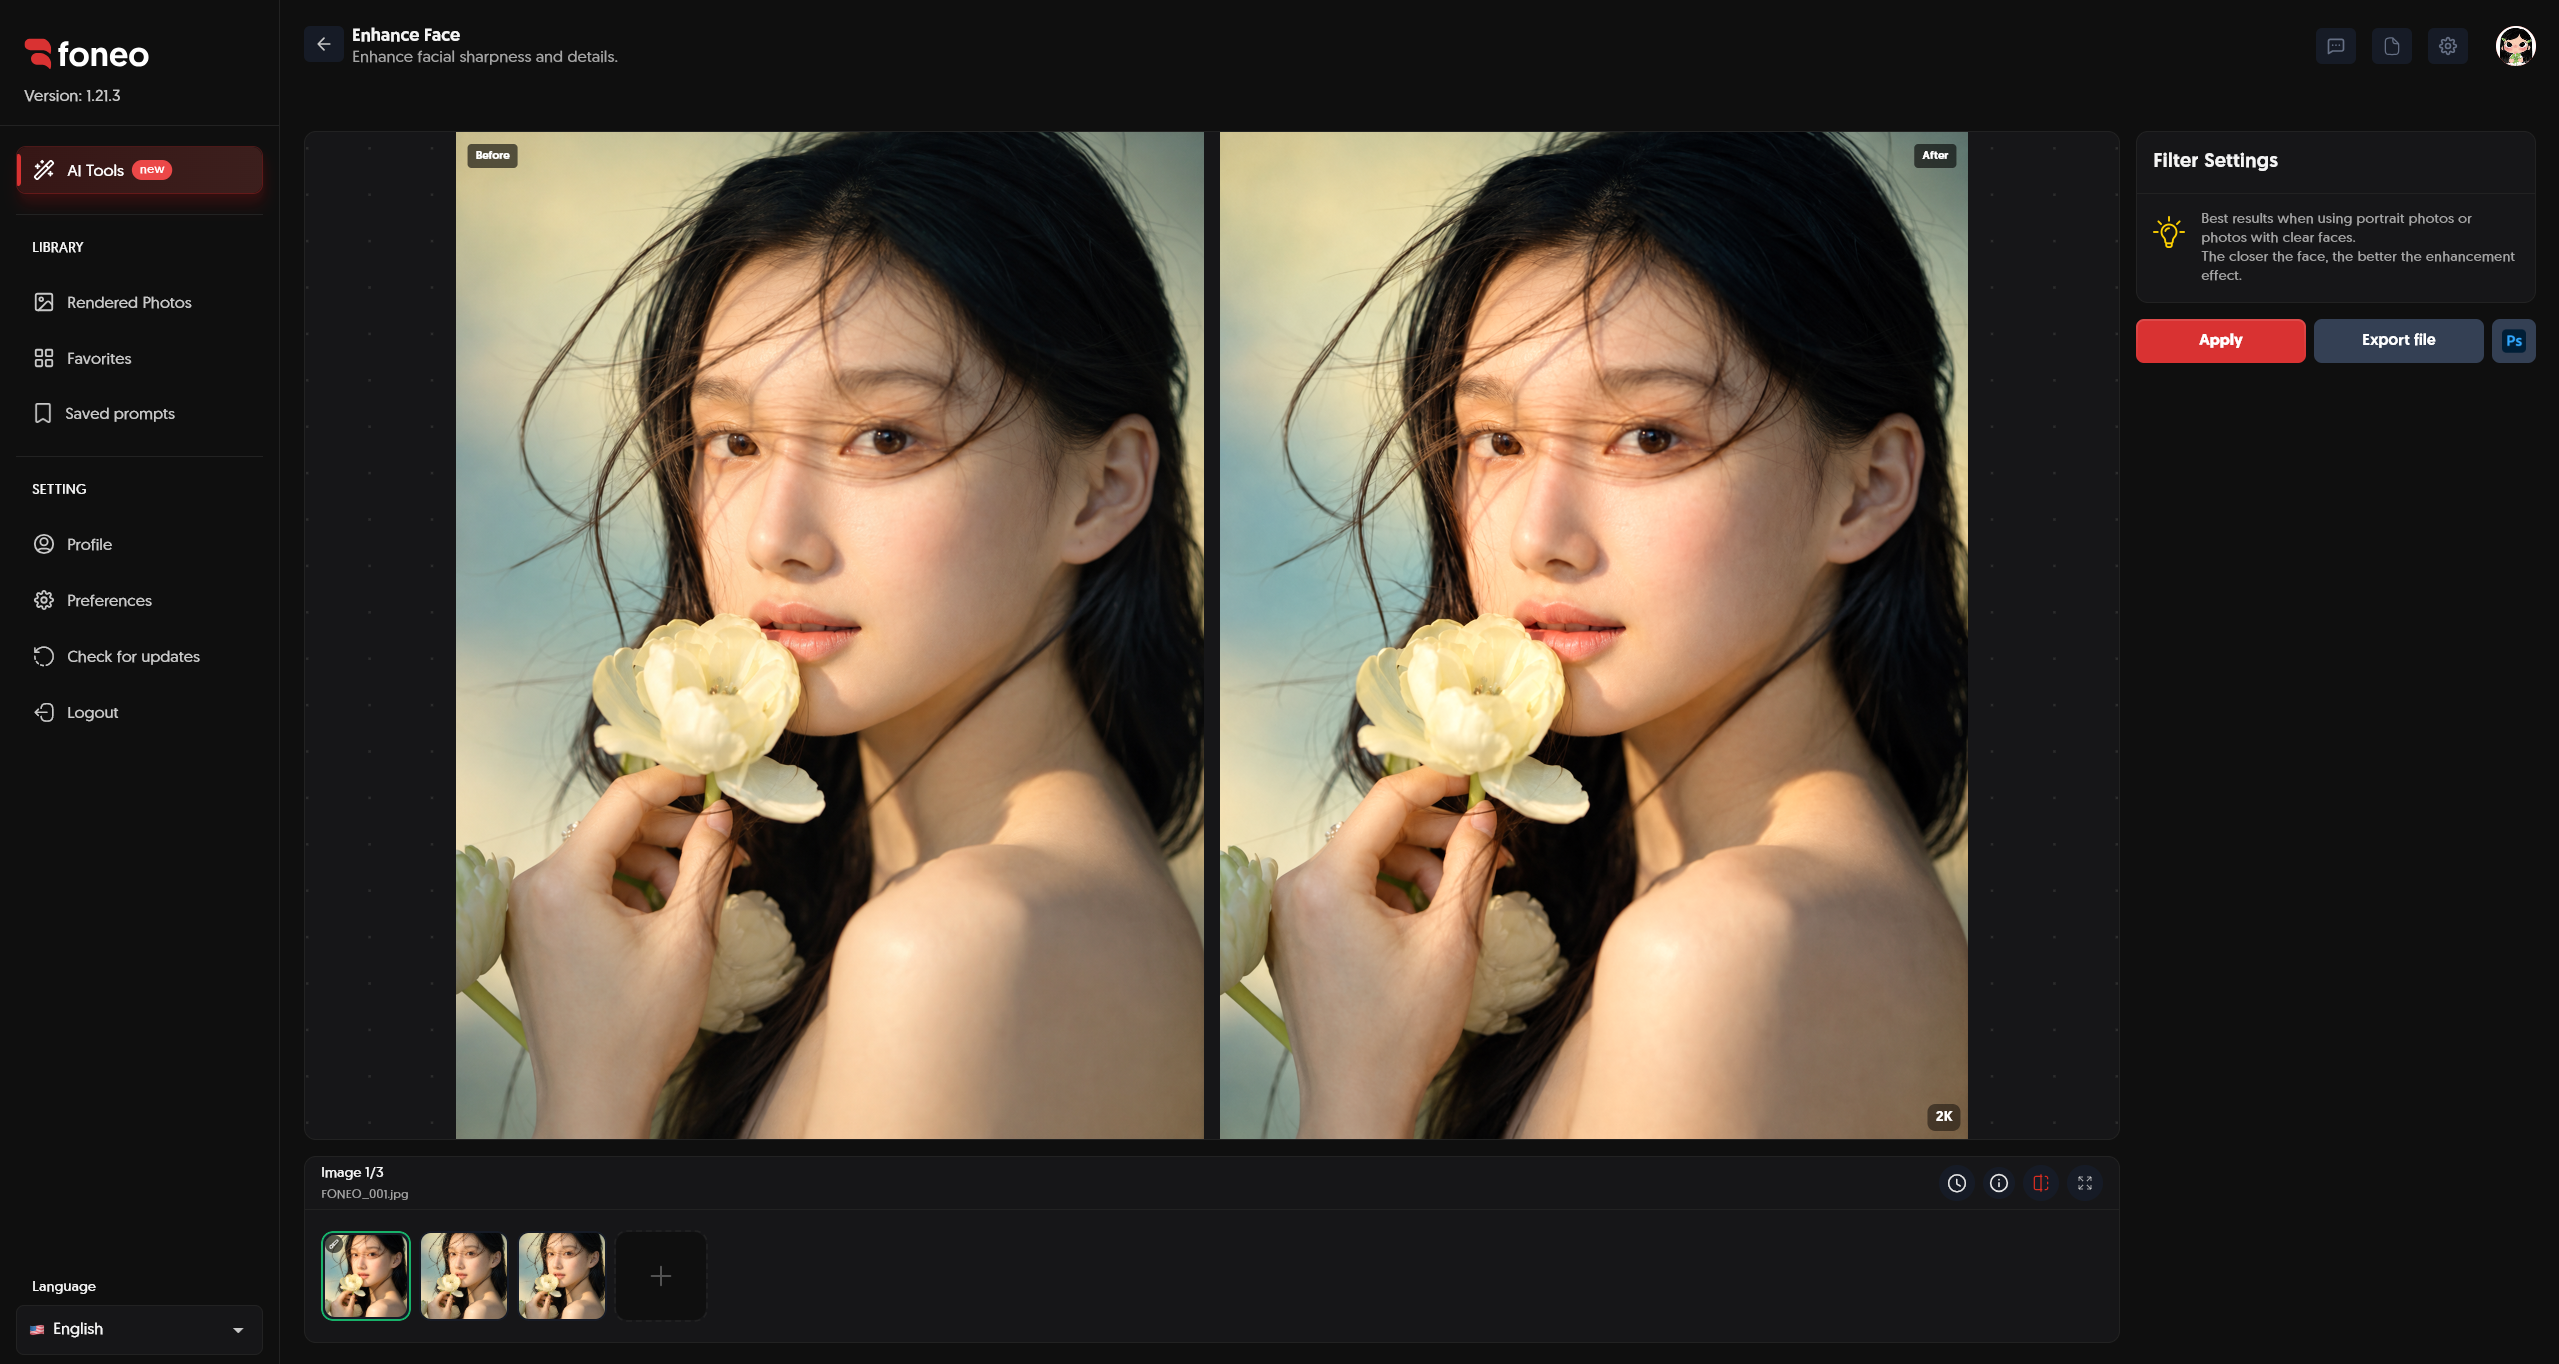
Pay attention to the following facial details:
- Sharpness: Are the facial features clearer than in the original image?
- Details: Have the eyes, lips, hair, and other small details been improved?
- Natural appearance: Does the face still look natural after processing?
- Overall appearance: Does the enhanced face blend well with the quality and lighting of the entire image?
If the result meets your expectations, you can proceed to export the image.
5. Export the Image
Once you are satisfied with the result, click Export file to save the image to your device.
If you want to continue editing in Photoshop, you can use the Ps button to open the image and continue with further edits.
How to Evaluate the Result After Processing
After using Enhance Face, you should carefully review the face before exporting the image.
Here are some factors to check:
- Sharpness: Is the face clearer compared to the original image?
- Details: Are small facial details reproduced more clearly?
- Natural appearance: Does the result preserve the natural characteristics of the face?
- Proportions: Are the facial features still balanced and consistent?
- Overall appearance: Does the enhanced face blend naturally with the rest of the image?
If the result is not suitable, you can check the input image and process it again using a higher-quality image.
Tips for Better Face Enhancement Results
1. Use an Image With a Clear Face
Use an image where the face is relatively clear and not heavily obstructed.
A clearly visible face helps Foneo analyze facial features more effectively.
2. Prioritize High-Resolution Images
A high-quality input image provides more details for AI to process.
Avoid using images that are too small, heavily blurred, or strongly compressed if you want better enhancement results.
3. Avoid Images With an Obstructed Face
If the face is covered by hair, objects, or other elements, the enhancement result may be affected.
Whenever possible, use images where the face is relatively fully visible.
4. No Prompt Is Required
The Enhance Face feature is designed for automatic processing.
You do not need to enter a Prompt or select a Template. Simply add an image, select the image you want to process, and click Apply.
5. Check Before & After Before Exporting
After processing, compare the original image with the enhanced version to make sure the result meets your needs.
If you are satisfied, you can click Export file or continue editing with Ps.
What Is Enhance Face Suitable For?
The Enhance Face feature can be used in various situations, such as:
- Improving the clarity of portrait photos.
- Enhancing facial details.
- Improving portraits with insufficient sharpness.
- Making faces clearer in fashion photos.
- Improving close-up portraits.
- Preparing portrait photos before applying other editing features.
Frequently Asked Questions
What is Enhance Face used for on Foneo?
The Enhance Face feature uses AI to increase facial sharpness and improve facial details in an image.
How do I use Enhance Face?
Simply add an image, select the image you want to process, and click Apply. Foneo will automatically analyze and enhance the face in the image.
Do I need to enter a Prompt when using Enhance Face?
No. The Enhance Face feature does not require a Prompt.
Simply select an image and click Apply to start processing.
Do I need to select a Template?
No. Foneo automatically processes the face using AI, so you do not need to select a Template.
What type of image produces better enhancement results?
For better results, use an image with a clear face, sufficient detail, minimal obstruction, and good overall image quality.
Does Enhance Face change the face?
The feature is designed to increase sharpness and improve facial details. You should check the Before & After result after processing to make sure the image meets your needs.
Can I compare the image before and after enhancement?
Yes. After Foneo finishes processing, you can use the preview area to check and compare the result before and after applying the enhancement.
Can I continue editing the image after enhancement?
Yes. After processing, you can click Export file to save the image or use the Ps button to continue editing in Photoshop.
What should I do if the result is not suitable?
You can check the input image and try processing it again with a higher-quality image where the face is clearer and less obstructed.
Related Articles
Foneo · AI Photo Editing
Ready to try it on your own photos?
Download the Foneo app to edit photos with AI in just a few taps, or see the plan that fits your needs.