How to Use Reflection Removal on the Foneo AI Photo Editing App

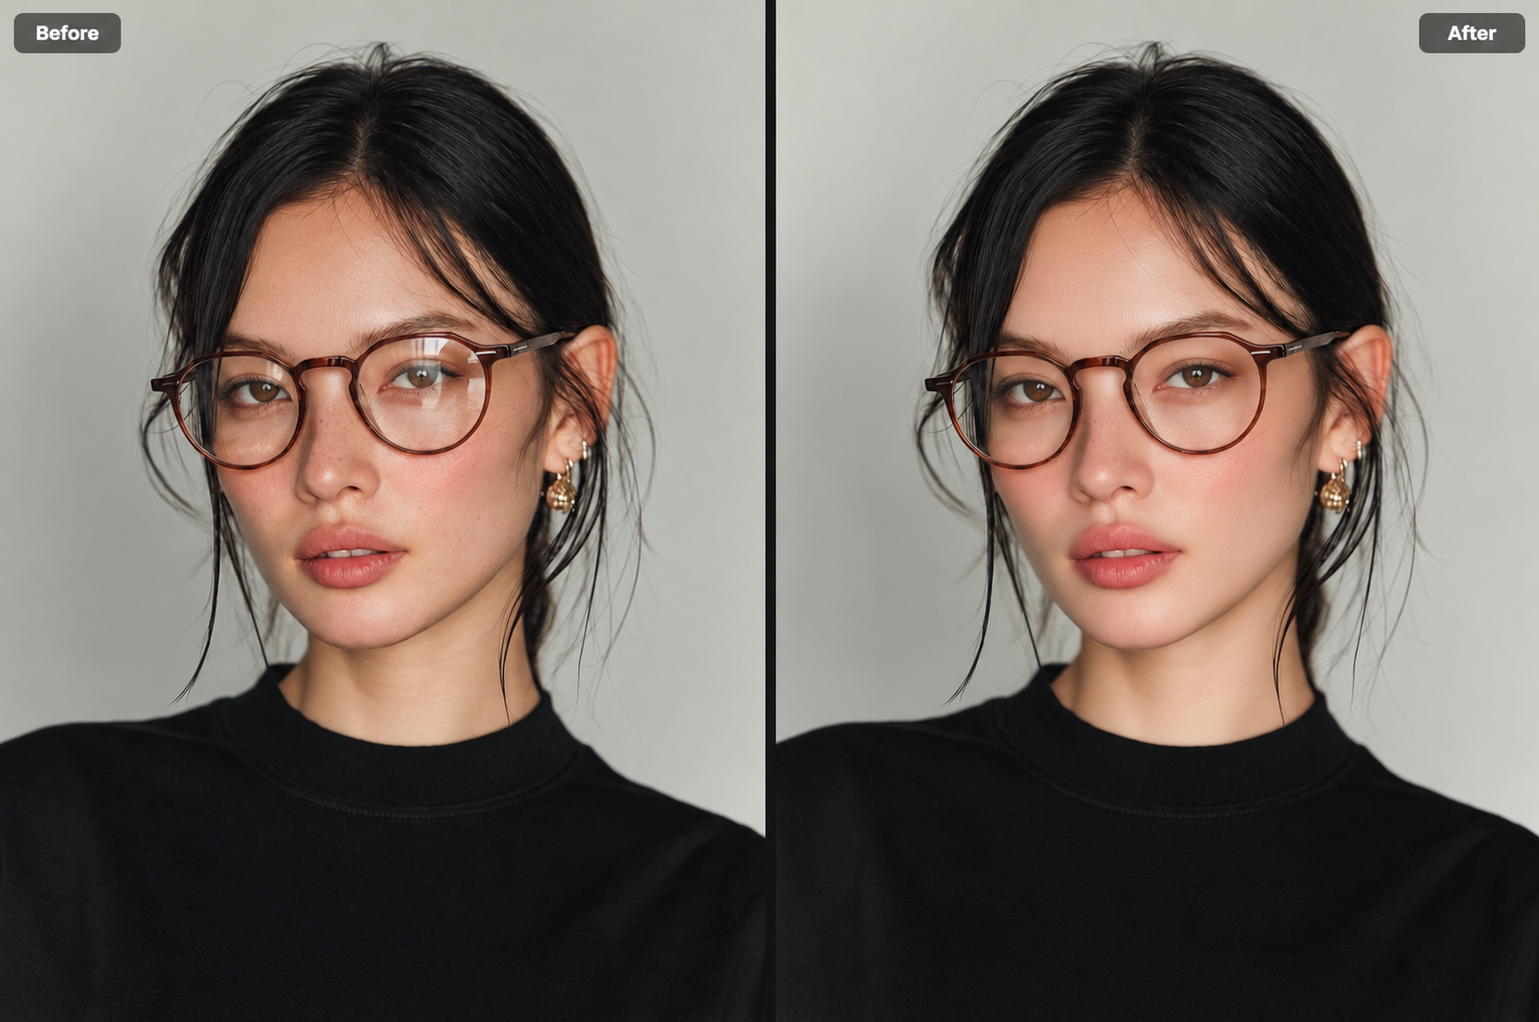
Reflections on glass can obscure faces, hide details behind the glass, or make an image difficult to see clearly. With Reflection Removal on Foneo, you can use AI to remove unwanted reflections from glass surfaces, making your images clearer and more natural.
The feature is especially useful for photos taken through glass doors, windows, or display glass where reflections interfere with the content behind the glass.
Before & After
How to Use Reflection Removal
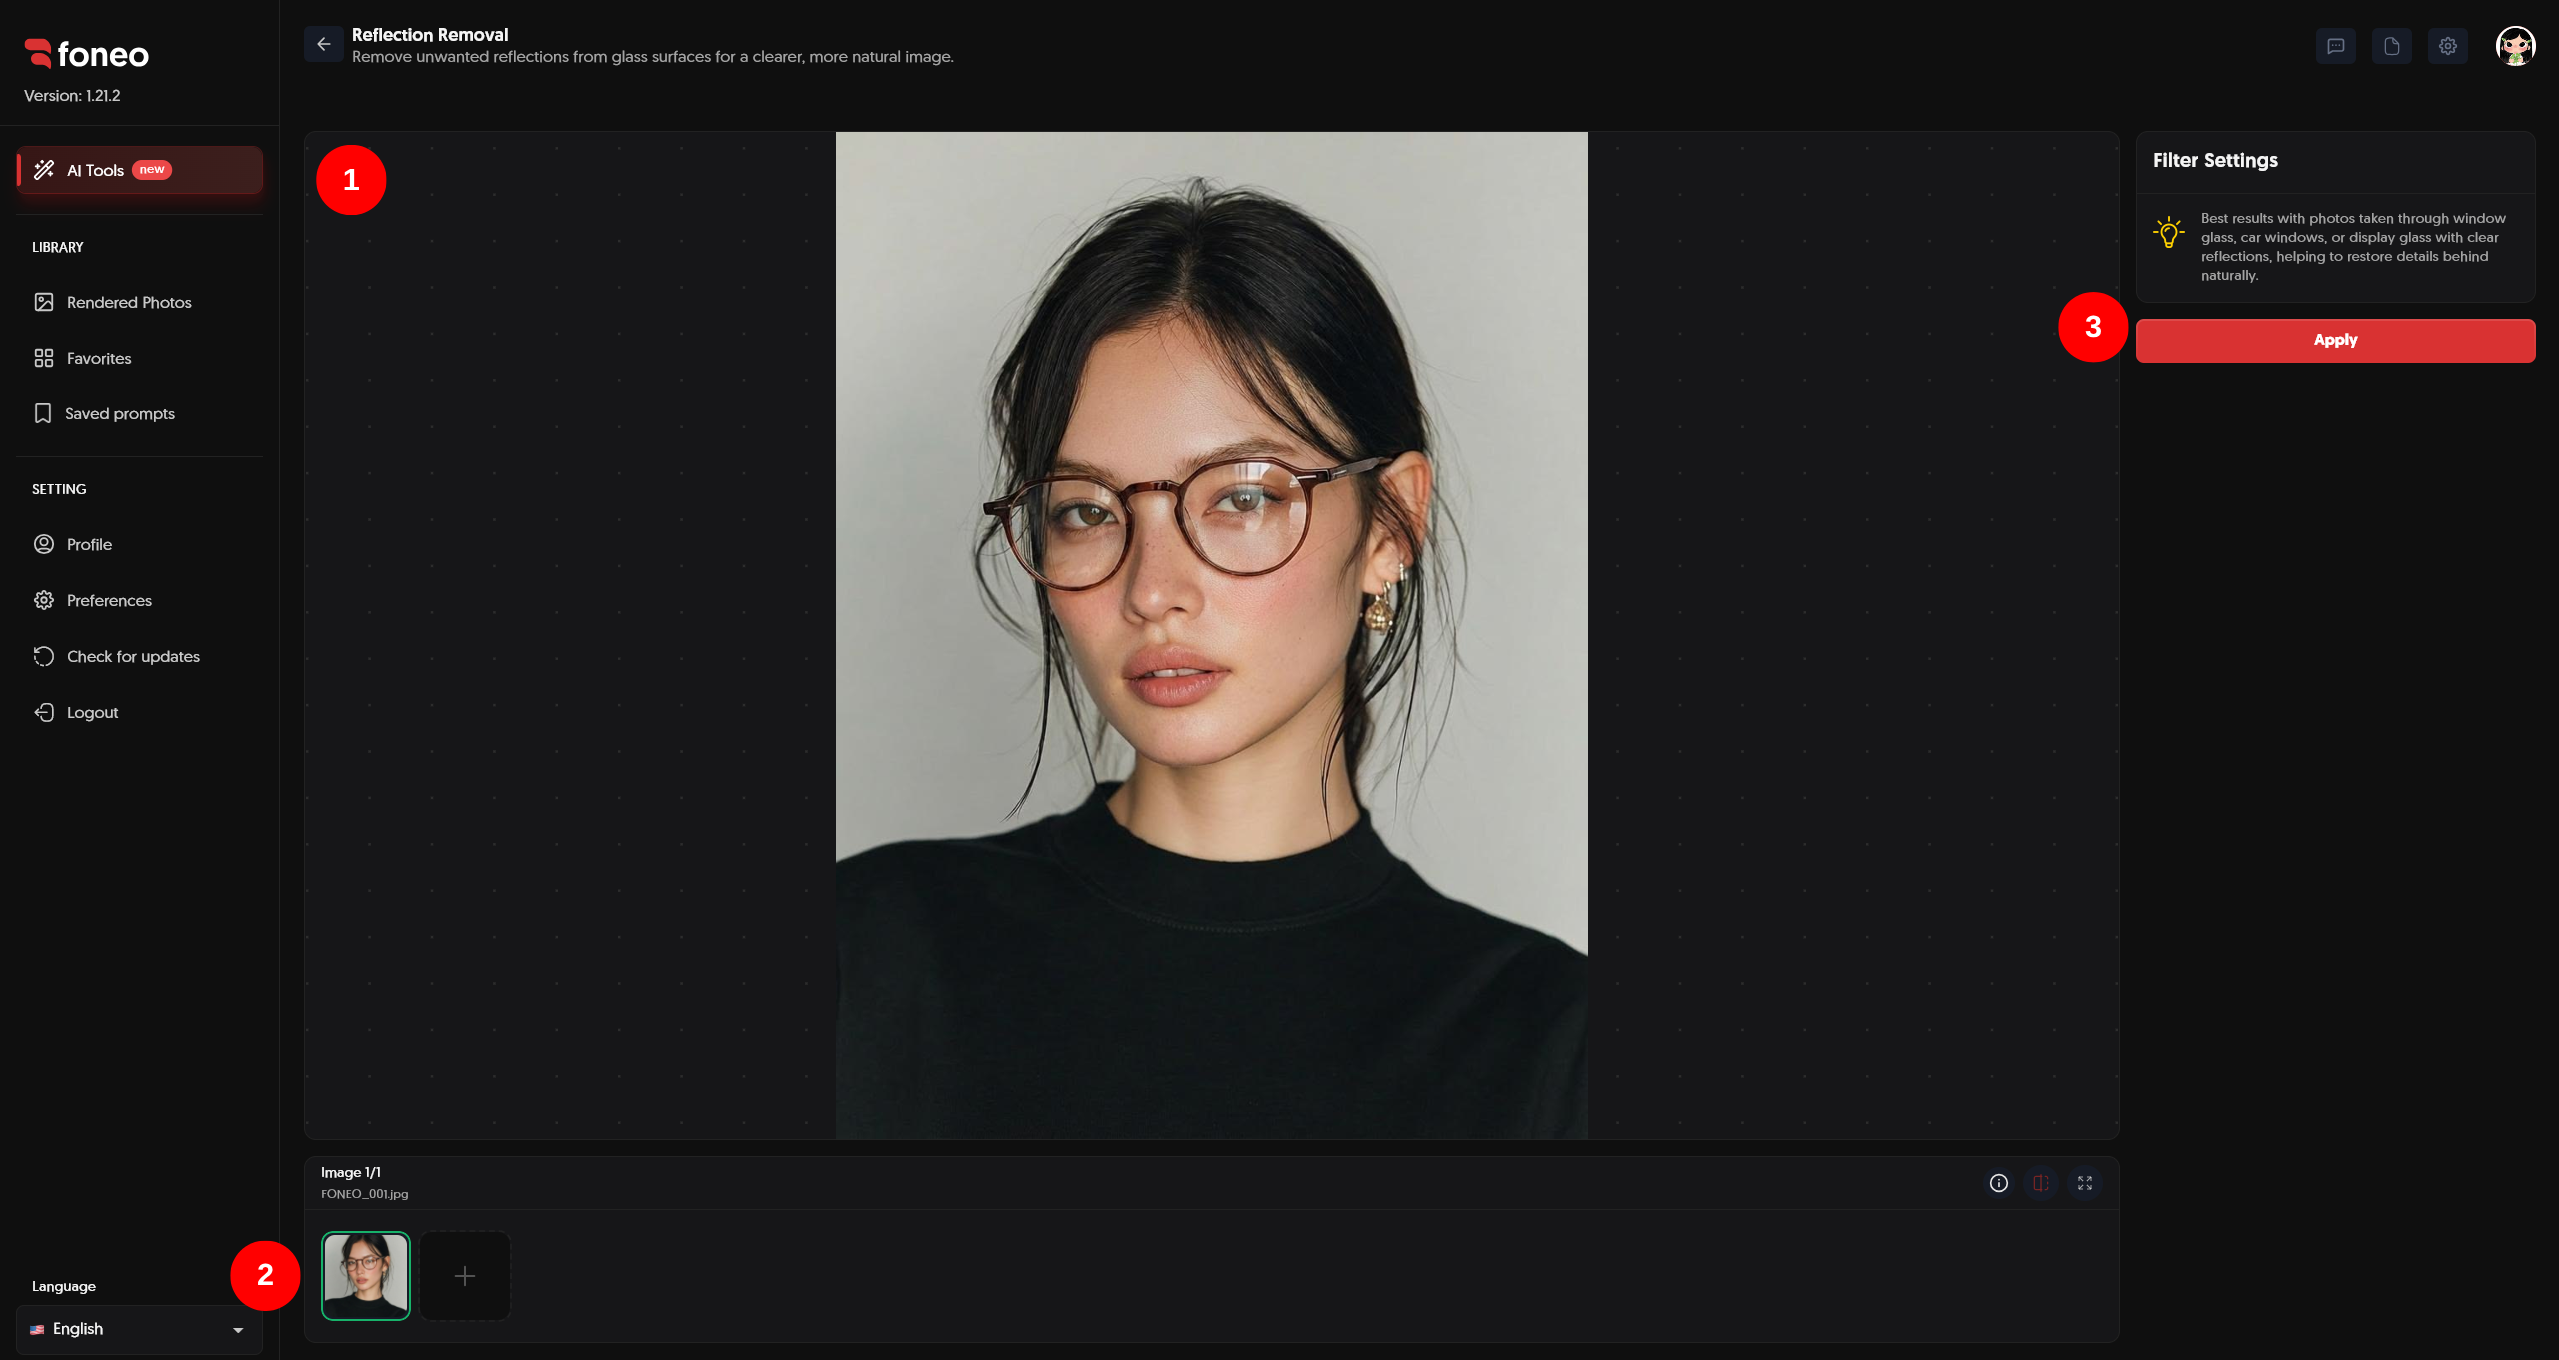
After uploading your photo to Foneo and opening Reflection Removal, you only need to complete 3 simple steps: preview your photo, select the photo or photos you want to process, and click Apply.
1. Preview Your Photo
After uploading an image, it will be displayed in the preview area in the center of the screen.
Check the image to identify areas affected by glass reflections.
Reflection Removal is suitable for images with:
- Reflections on glass doors.
- Reflections on windows.
- Reflections on display glass.
- Light or reflected images that obscure details behind the glass.
Preview the image first to determine the level of reflection before processing.
2. Select the Photo to Process
Uploaded images are displayed in the image area at the bottom of the screen.
You can:
- Select one photo to process.
- Select multiple photos to process at the same time.
- Click + to add more photos if needed.
After selecting the photos, you can proceed directly to processing.
There is no need to enter a Prompt, choose a Template, or make any additional adjustments.
3. Apply
After selecting the photo or photos you want to process, click Apply to start AI processing.
Foneo will analyze the reflections on the glass and remove unwanted reflected areas.
During processing, the system may display a processing status.
Once processing is complete, the result will be displayed in the preview area.
Review the Result Before Exporting
After processing is complete, carefully review the image before exporting it.
Pay particular attention to:
- Areas where reflections were previously visible.
- The face and other important details of the subject.
- Objects behind the glass.
- Lines and textures in the image.
- The transition between the processed area and surrounding areas.
If the reflection has been removed while the image still retains natural details, you can proceed to export the image.
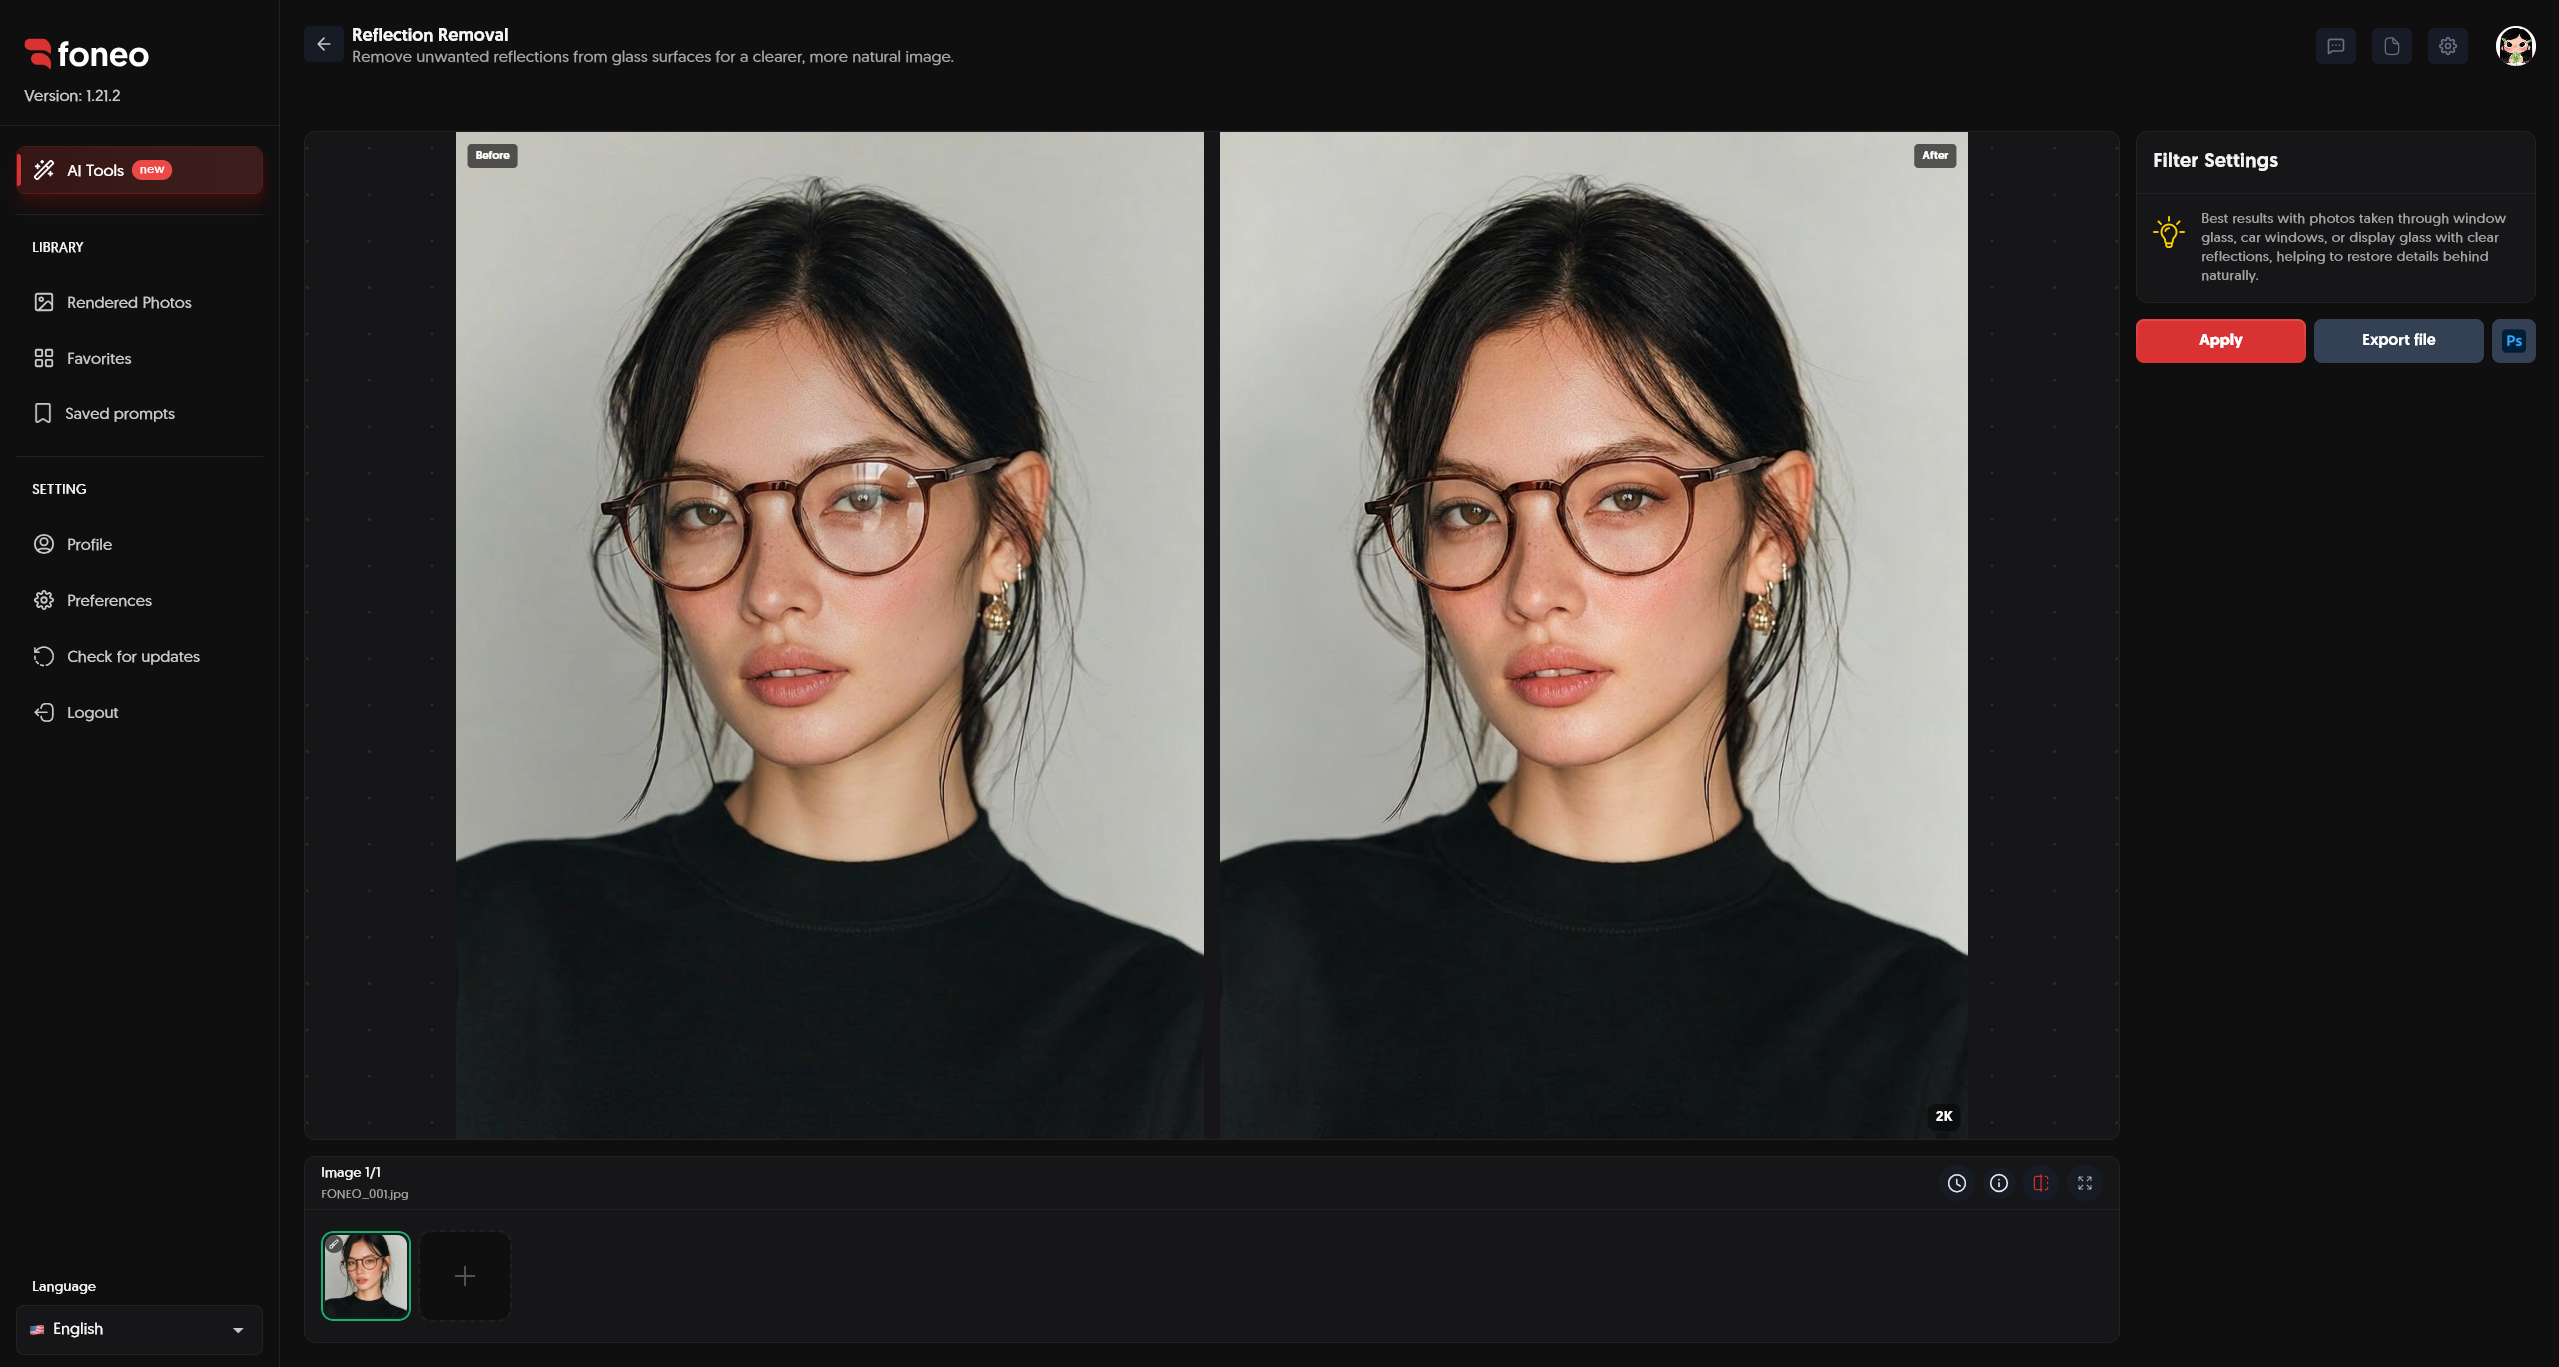
Export file / Ps
Once you are satisfied with the result, you can:
- Click Export file to export the processed image.
- Click Ps if you want to continue editing the image in Photoshop.
Before exporting, check:
- Whether the unwanted reflection has been removed.
- Whether the details behind the glass still look natural.
- Whether the face and subject remain natural.
- The overall colors and lighting.
- The areas surrounding the processed region.
How to Evaluate the Reflection Removal Result
After Foneo finishes processing, carefully check the areas that were previously affected by reflections.
- Reflection removal: Unwanted reflections should be clearly reduced or removed.
- Details behind the glass: Previously obscured details should be reconstructed consistently with the surrounding image.
- Face: If the image contains a person, check the face to make sure the facial features remain natural.
- Lighting: Check the transition between the processed area and the surrounding areas.
- Overall image: The processed image should look clearer while maintaining the original composition and natural appearance.
Tips for Natural Reflection Removal
1. Use Images with Clearly Visible Reflections
Use images where the reflected area can be easily identified.
This gives the AI more information to determine which areas need to be processed.
2. Prioritize Photos Taken Through Glass Doors or Windows
Reflection Removal is suitable for photos taken through:
- Glass doors.
- Windows.
- Display glass.
These are common situations where unwanted reflections can interfere with the image.
3. Use High-Quality Images
Images with better resolution and quality provide more information for AI analysis.
If you have multiple versions of the same image, use the highest-quality version available.
4. Check the Areas Behind the Glass
After processing, do not only check whether the reflection has been removed. Also inspect the details behind the glass.
Pay particular attention to:
- Faces.
- People or objects behind the glass.
- Straight lines and object edges.
- Small details.
- Areas with strong lighting.
5. Compare Before and After
Use the Before / After view to directly compare the original image with the processed result.
This makes it easier to see the changes and check whether the image still looks natural.
6. Avoid Images with Extremely Complex Reflections
If reflections cover most of the image or completely obscure the details behind the glass, it may be difficult to preserve all of the original information.
Whenever possible, use images where some of the content behind the glass is still visible.
7. Check the Image Before Exporting
Before clicking Export file, review the entire image one more time.
If you notice an area that does not look suitable, you can try processing the image again with a more suitable input image.
Frequently Asked Questions
What is Reflection Removal used for?
Reflection Removal uses AI to remove unwanted reflections from glass surfaces, making images clearer and helping restore details behind the glass naturally.
What types of images is Reflection Removal suitable for?
The feature is suitable for photos taken through glass doors, windows, or display glass, especially when reflections interfere with important details in the image.
Do I need to enter a Prompt when using Reflection Removal?
No.
Reflection Removal does not require a Prompt. Simply select the photo or photos you want to process and click Apply.
Do I need to choose a Template or adjust Filter Settings?
No.
Reflection Removal does not require you to choose a Template or make any additional adjustments. After selecting the photo or photos, simply click Apply to start processing.
Can I process multiple photos at the same time?
Yes.
You can select one or multiple photos that have been uploaded, then click Apply to process them.
Can I process an image again if the result is not suitable?
Yes.
You can select the image again and click Apply to process it again.
Will Reflection Removal change the face in the image?
The feature focuses on processing reflected areas on glass. However, you should still review the face and other important details after AI processing is complete.
Can I continue editing the image after using Reflection Removal?
Yes.
After processing, you can click Export file to export the image or click Ps to continue editing it in Photoshop.
Related Articles
Foneo · AI Photo Editing
Ready to try it on your own photos?
Download the Foneo app to edit photos with AI in just a few taps, or see the plan that fits your needs.