How to Use the Skin Retouch Feature on Foneo AI Photo Editor
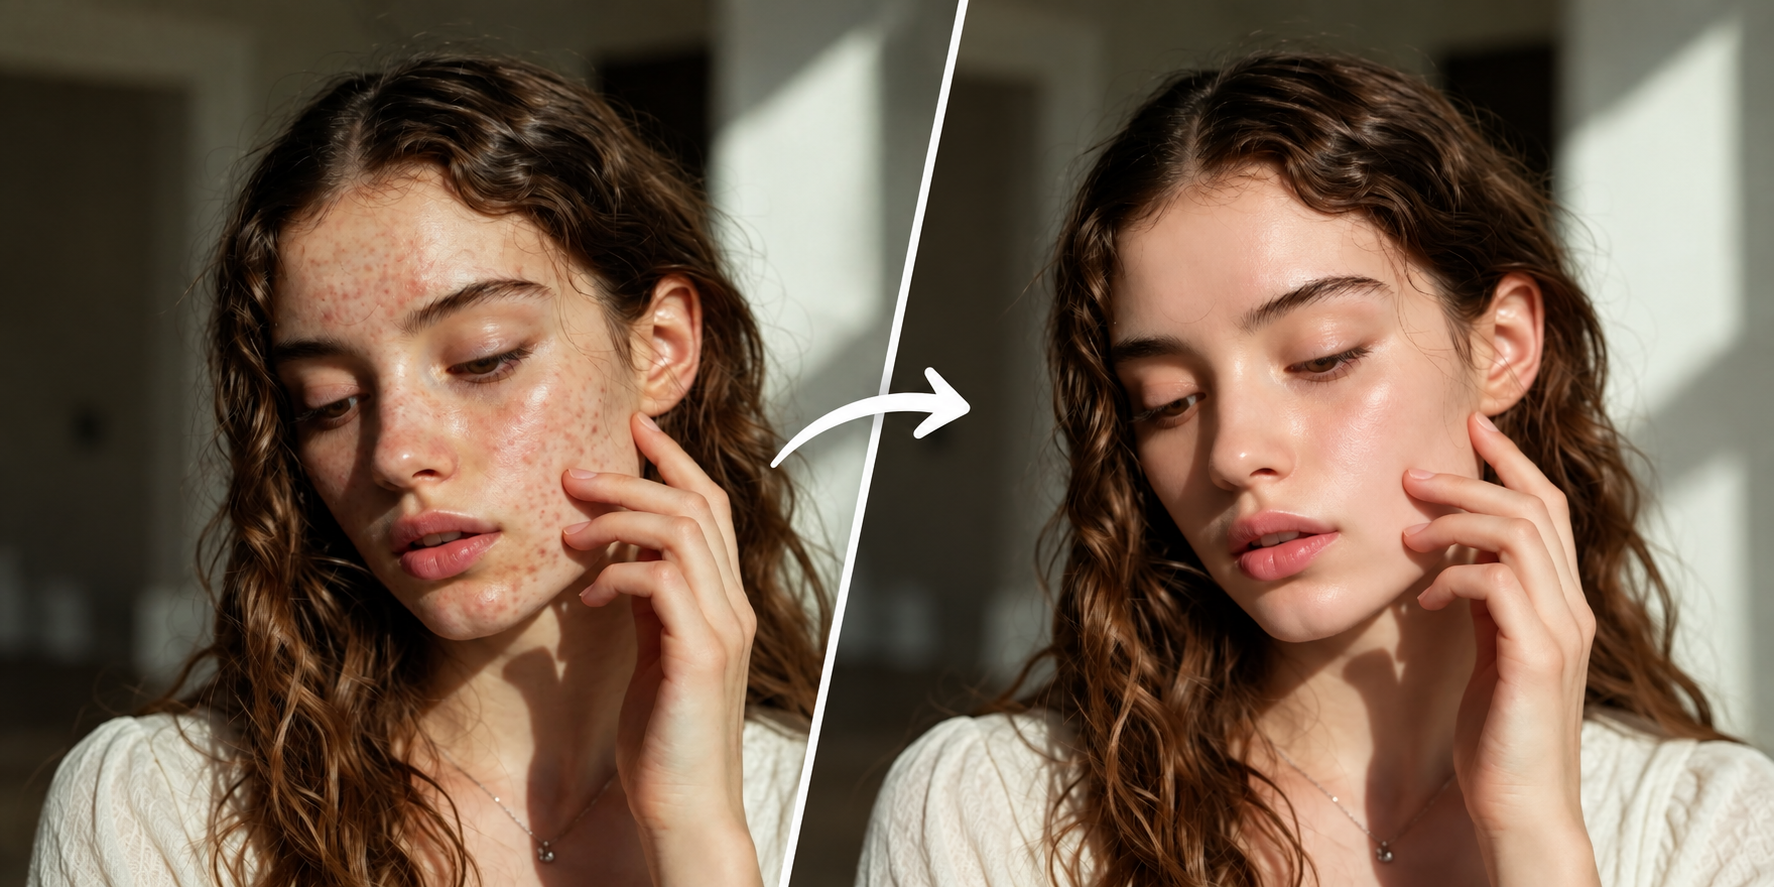
Skin in photos can sometimes show small imperfections, uneven tones, or lack brightness due to lighting conditions and image quality. With Skin Retouch on Foneo, you can use AI to smooth, brighten, even out, and enhance skin details while maintaining a natural-looking appearance.
Foneo offers flexible ways to process your image. You can use the default settings, customize available effects in Custom, or enter a Prompt to describe the skin retouching result you want.
Before & After
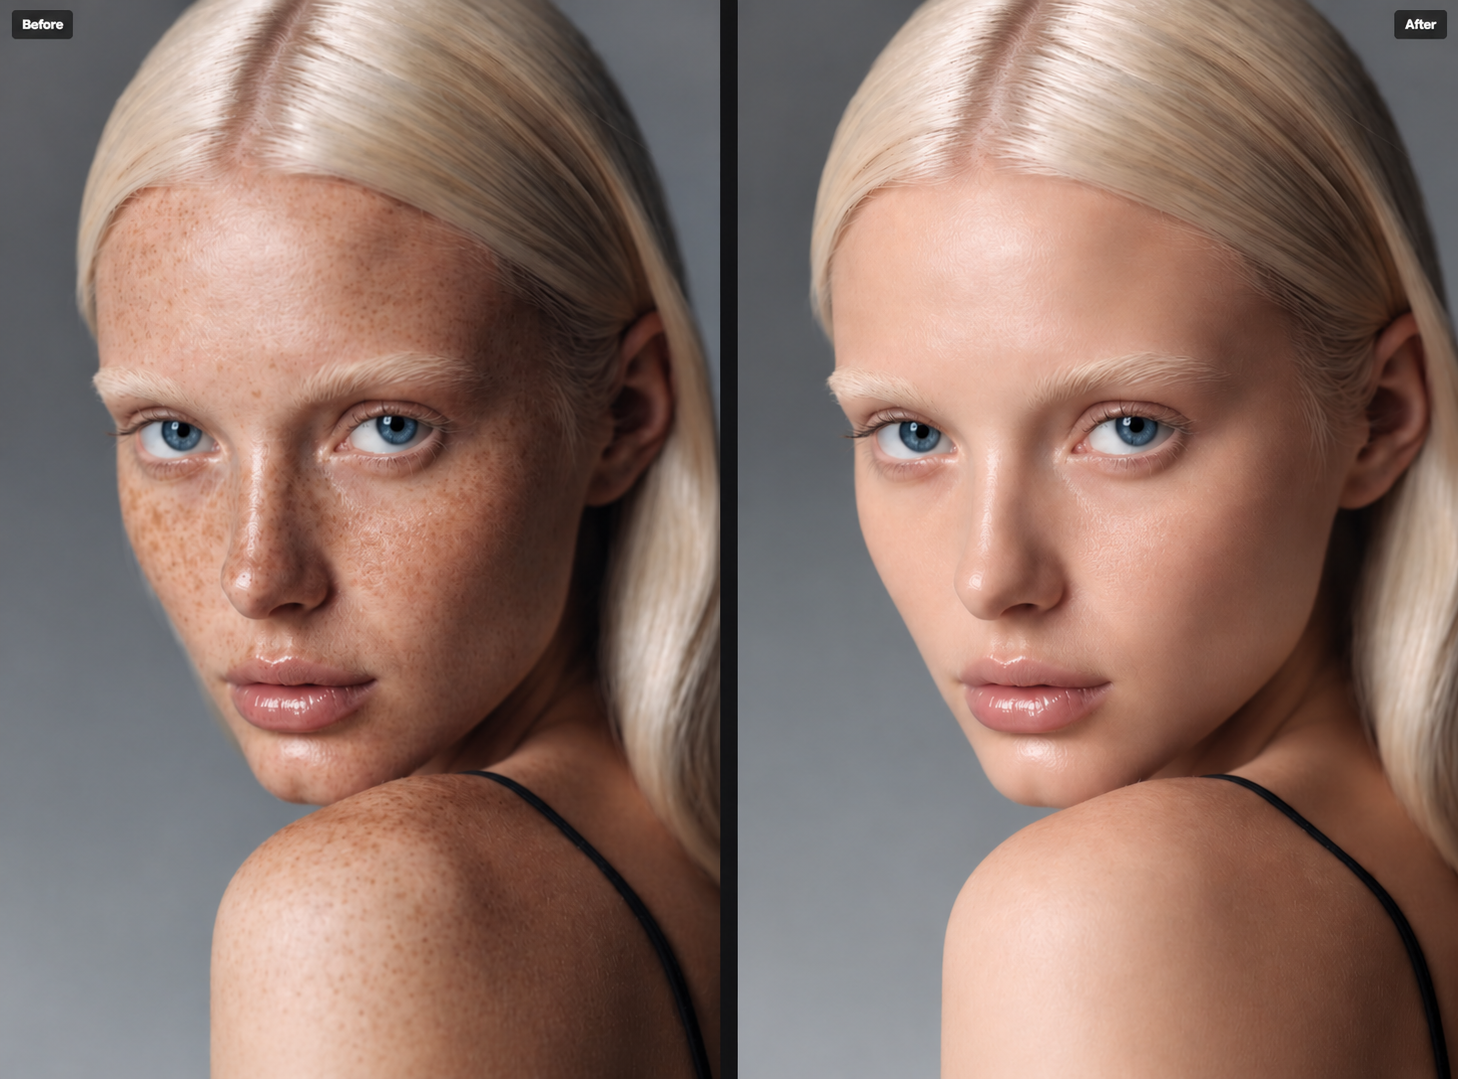
How to Use Skin Retouch
After uploading an image to Foneo and opening Skin Retouch, follow the steps below.
1. Preview Your Image
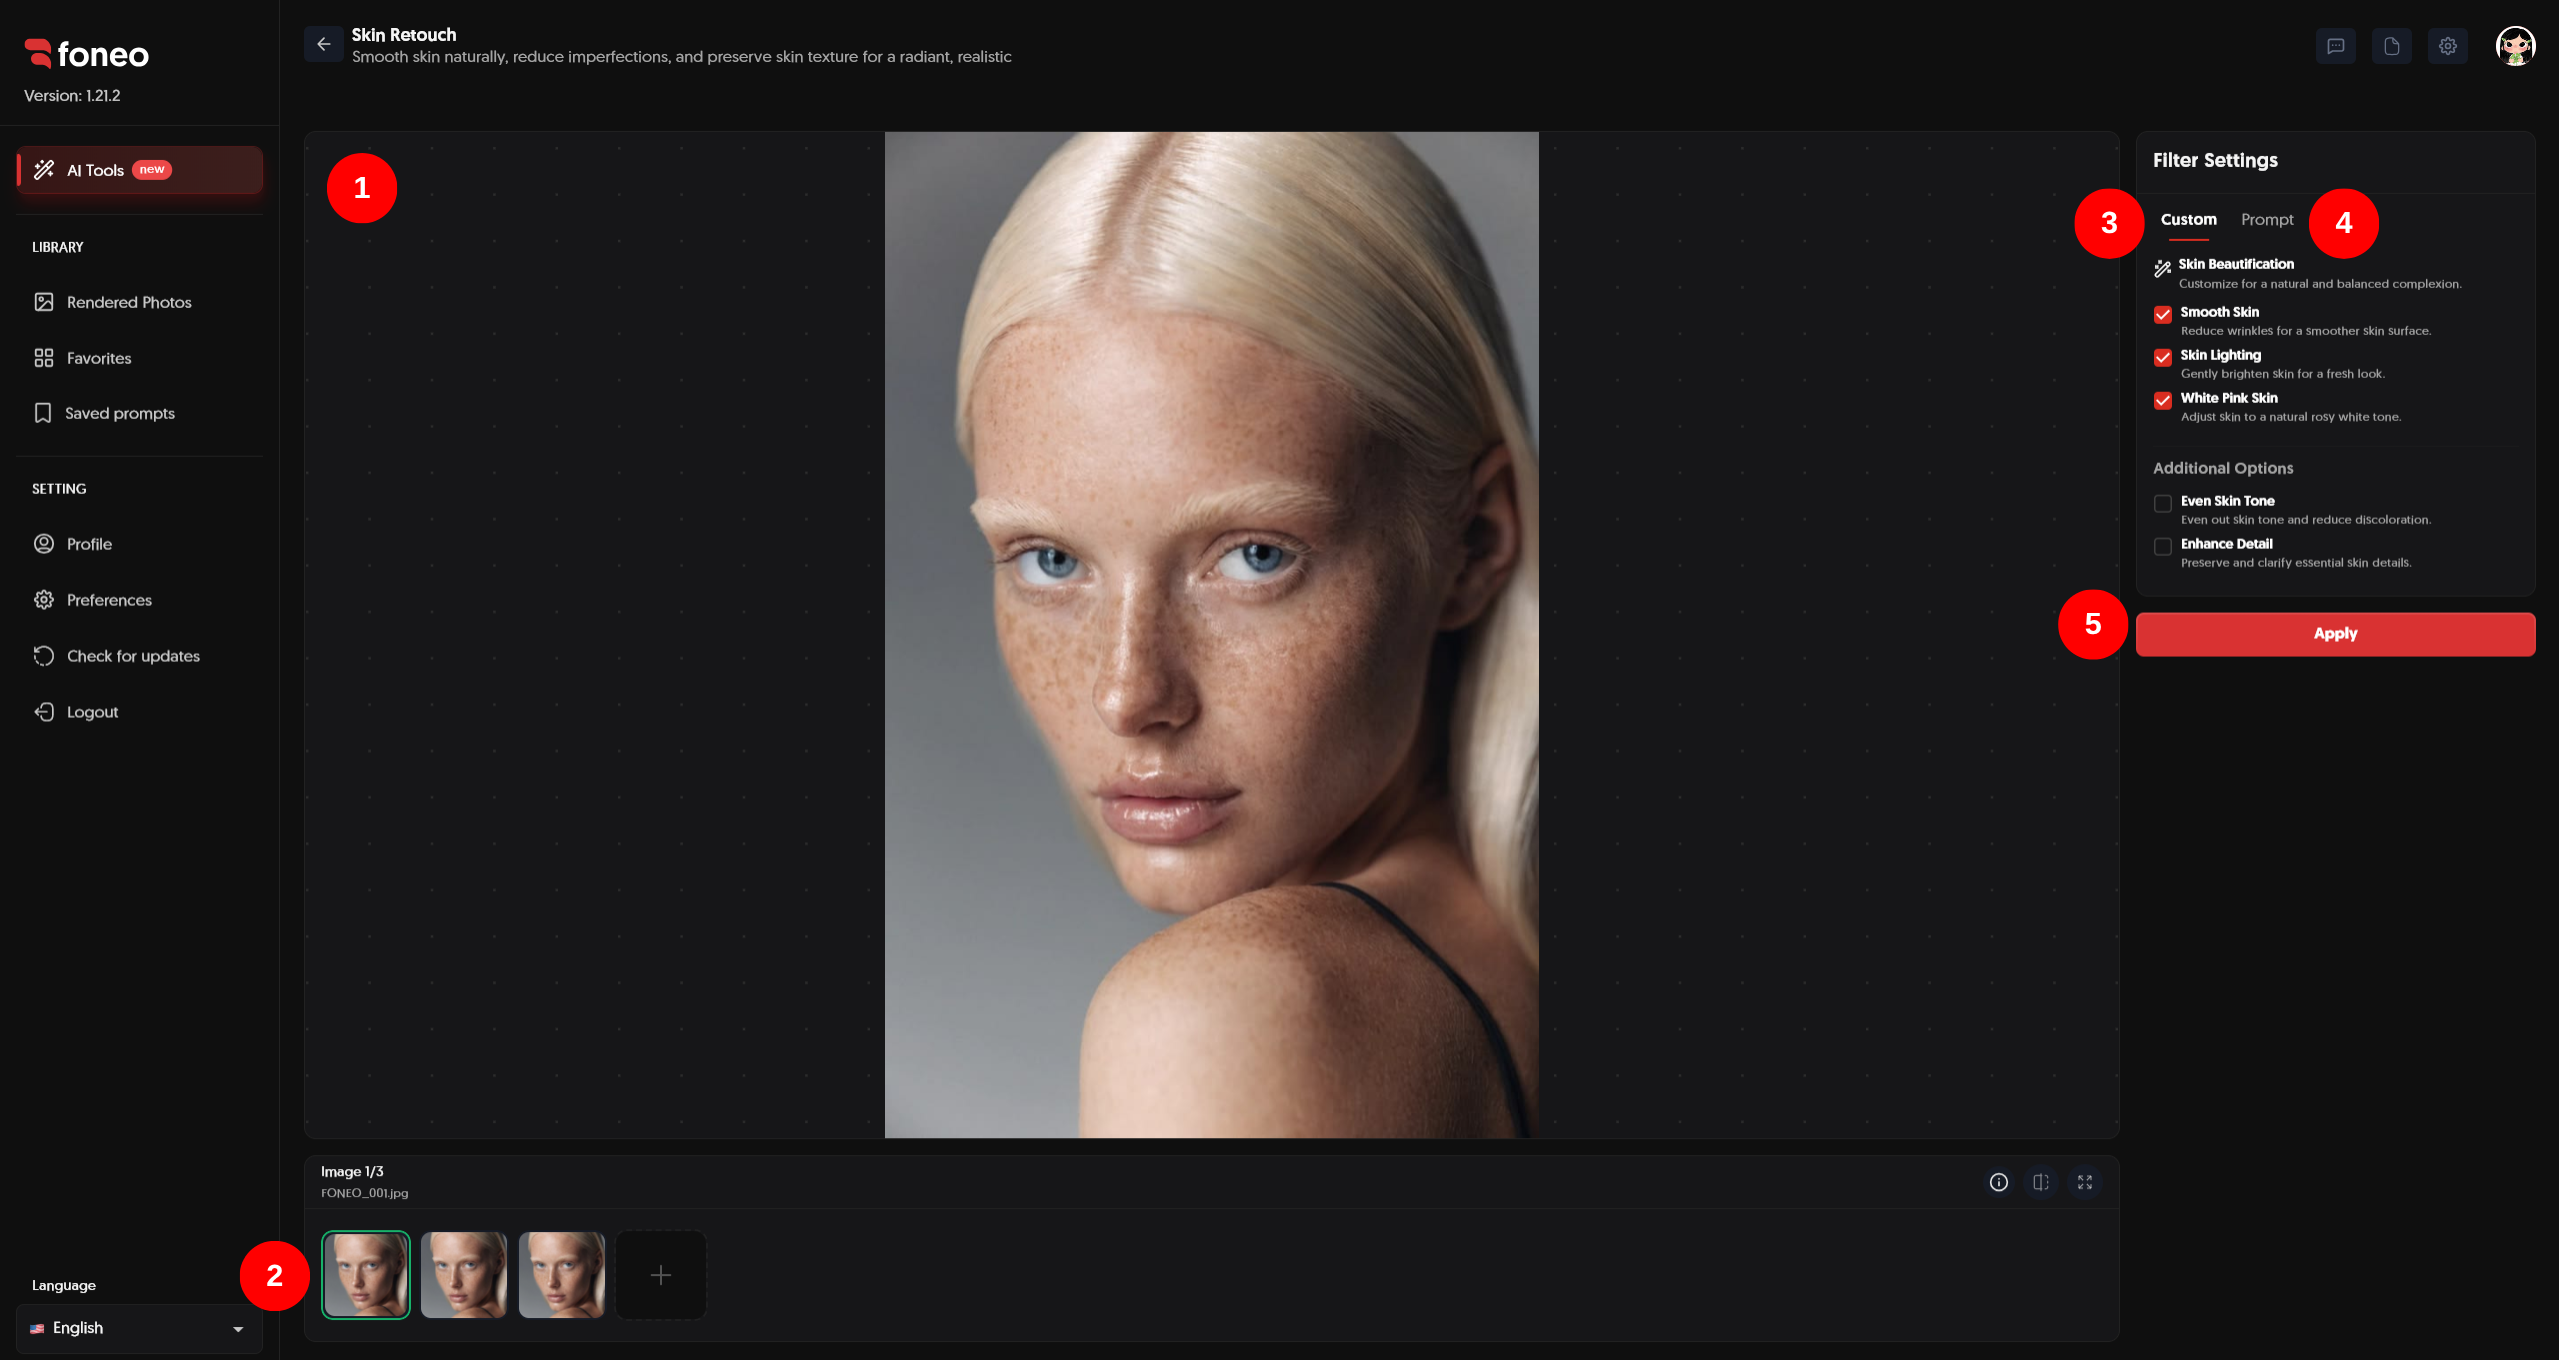
After uploading an image, it will appear in the preview area in the center of the screen.
Check the image to identify the current skin condition and the areas you want to improve.
For better results, use an image that:
- Has a clearly visible face.
- Contains sufficient skin detail.
- Is not excessively blurry or distorted.
- Has good overall image quality.
The clearer the input image, the more information AI has to analyze and process the skin.
2. Select the Image to Edit
Uploaded images will appear in the image area at the bottom of the screen.
You can:
- Select the thumbnail of the image you want to edit.
- Click + to add a new image.
- Select individual images to preview and process them.
After selecting an image, you can click Apply immediately or configure additional Skin Retouch options if you want more control over the result.
3. Choose How to Retouch the Skin
In Filter Settings, you can choose the processing method that best suits your needs.
There are three ways to use Skin Retouch:
Use the Default Settings
You do not need to select any additional options.
Simply select an image and click Apply. Foneo will automatically process and enhance the skin using AI.
This is the simplest option when you want to quickly improve the skin without making detailed adjustments.
Customize with Custom
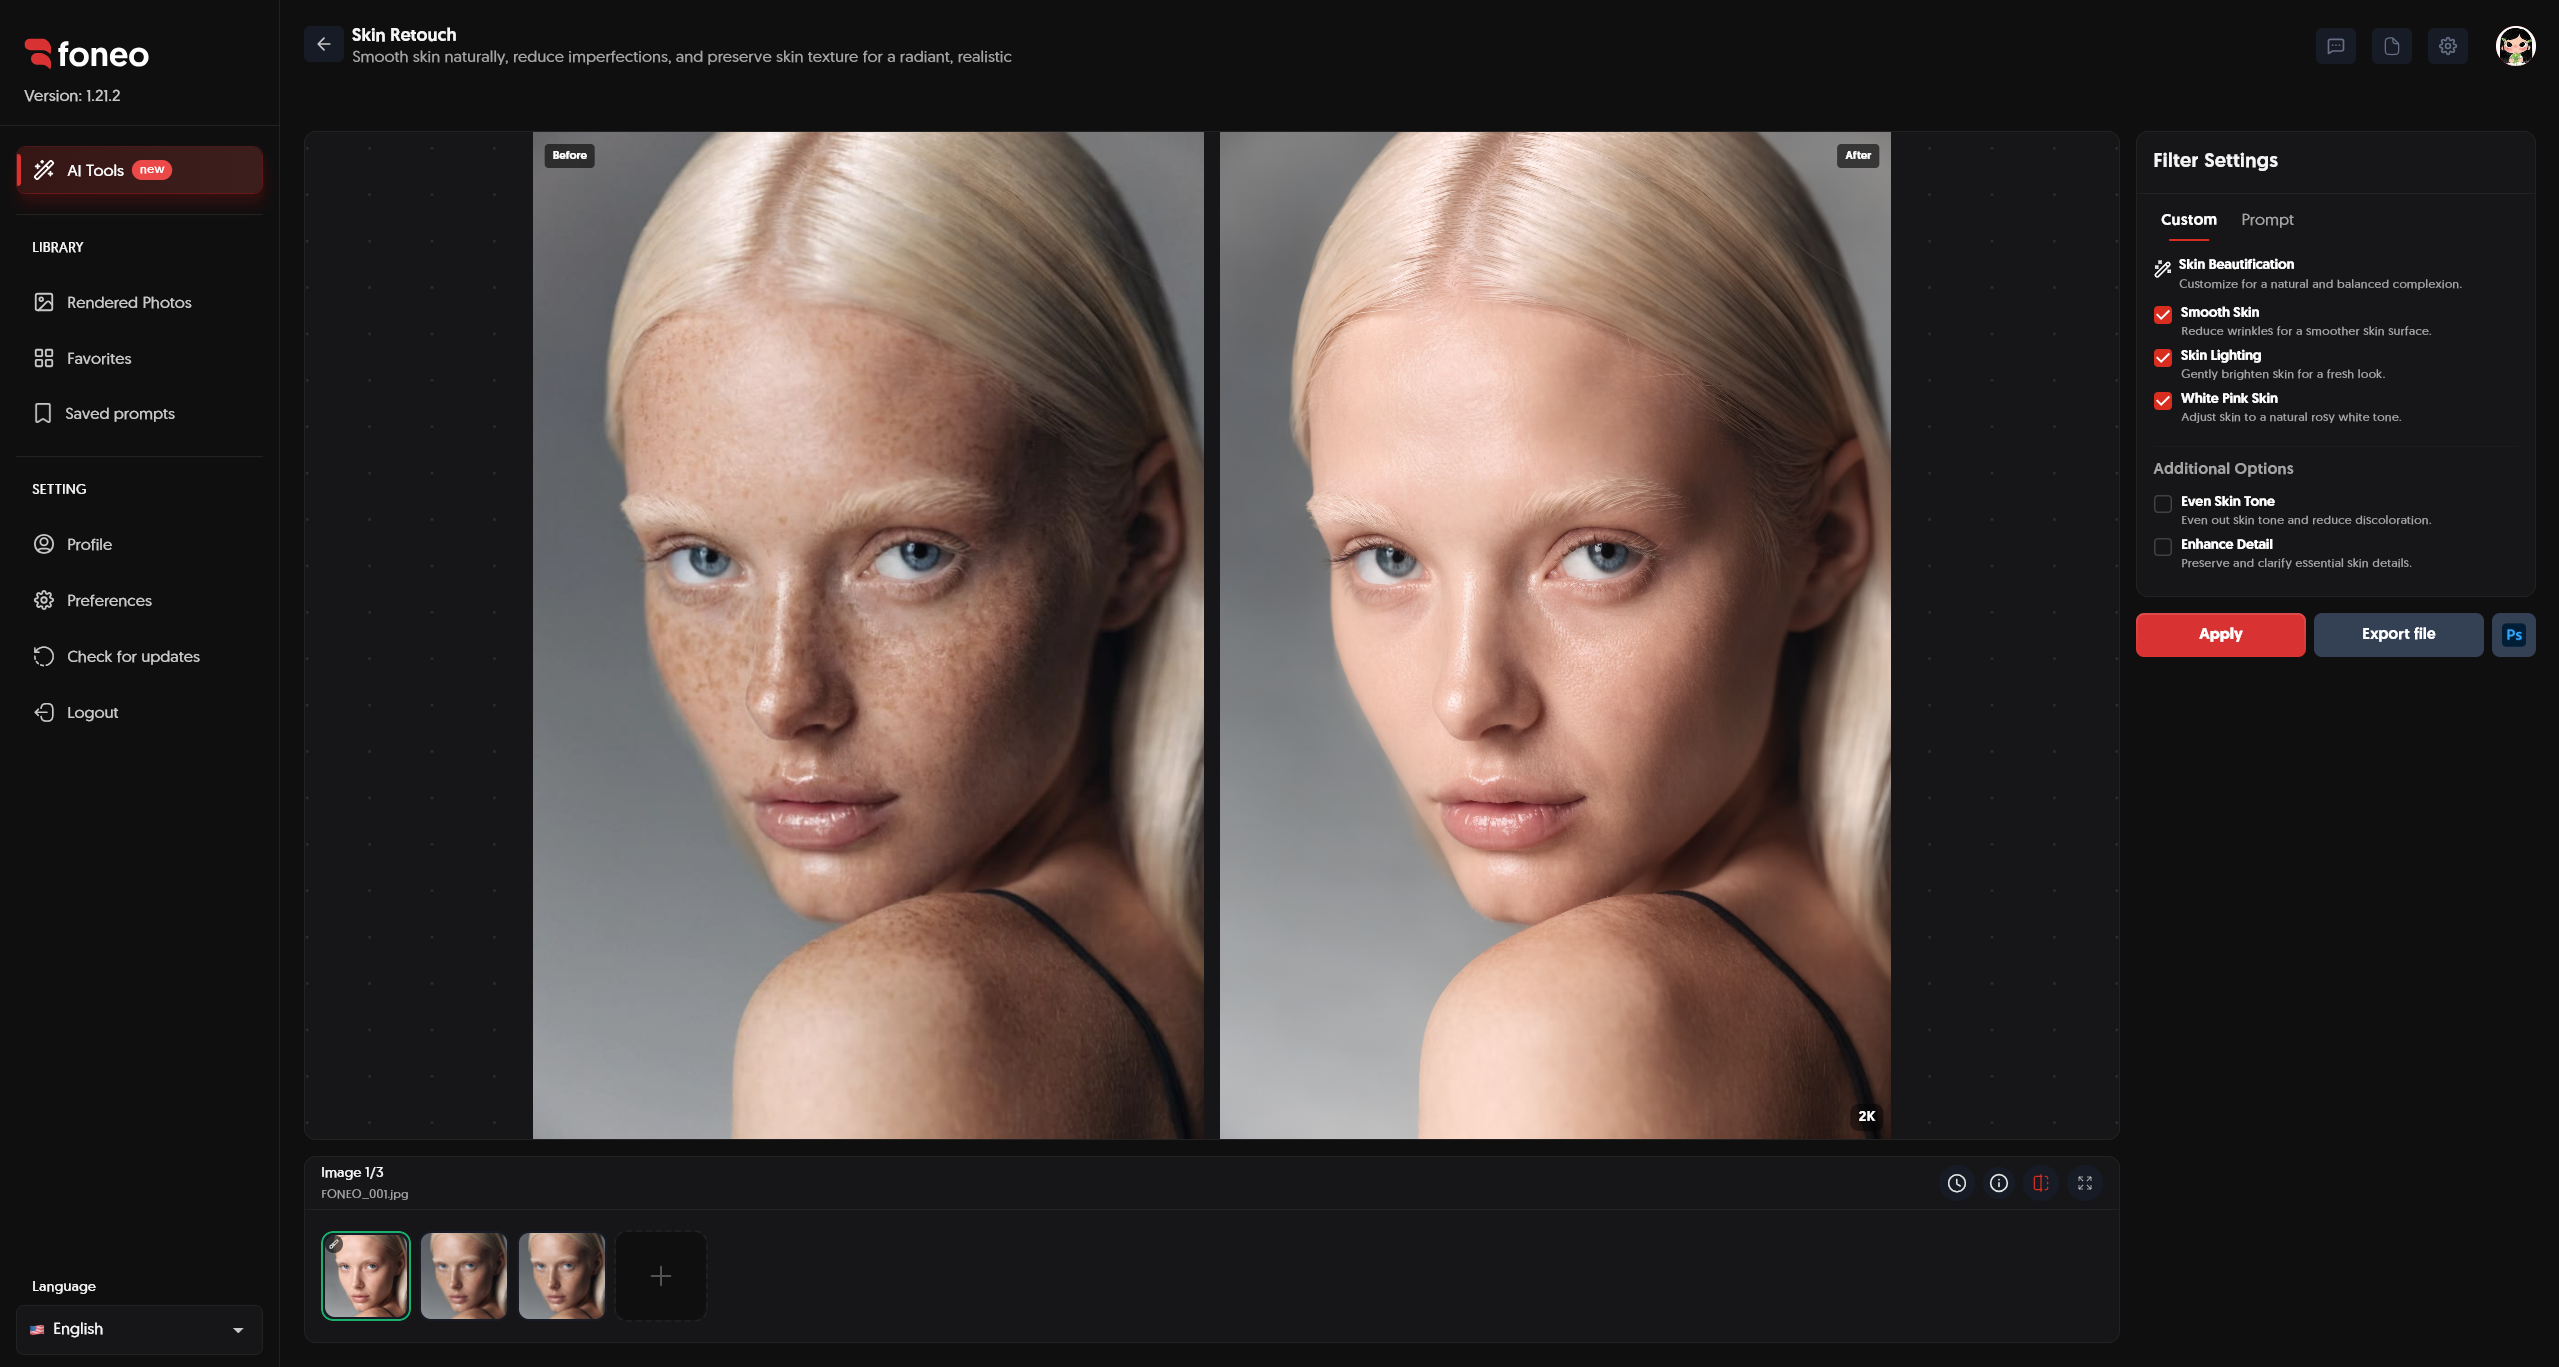
You can select Custom to manually choose the available skin enhancement options.
The available options include:
- Skin Beautification: Improves the overall appearance of the skin.
- Smooth Skin: Smooths the skin surface.
- Skin Lighting: Brightens the skin.
- White Pink Skin: Adjusts the skin toward a natural white-pink tone.
- Even Skin Tone: Helps create a more even skin tone.
- Enhance Detail: Preserves and enhances important skin details.
You can select one or multiple options based on your desired result, then click Apply.
4. Customize with Prompt
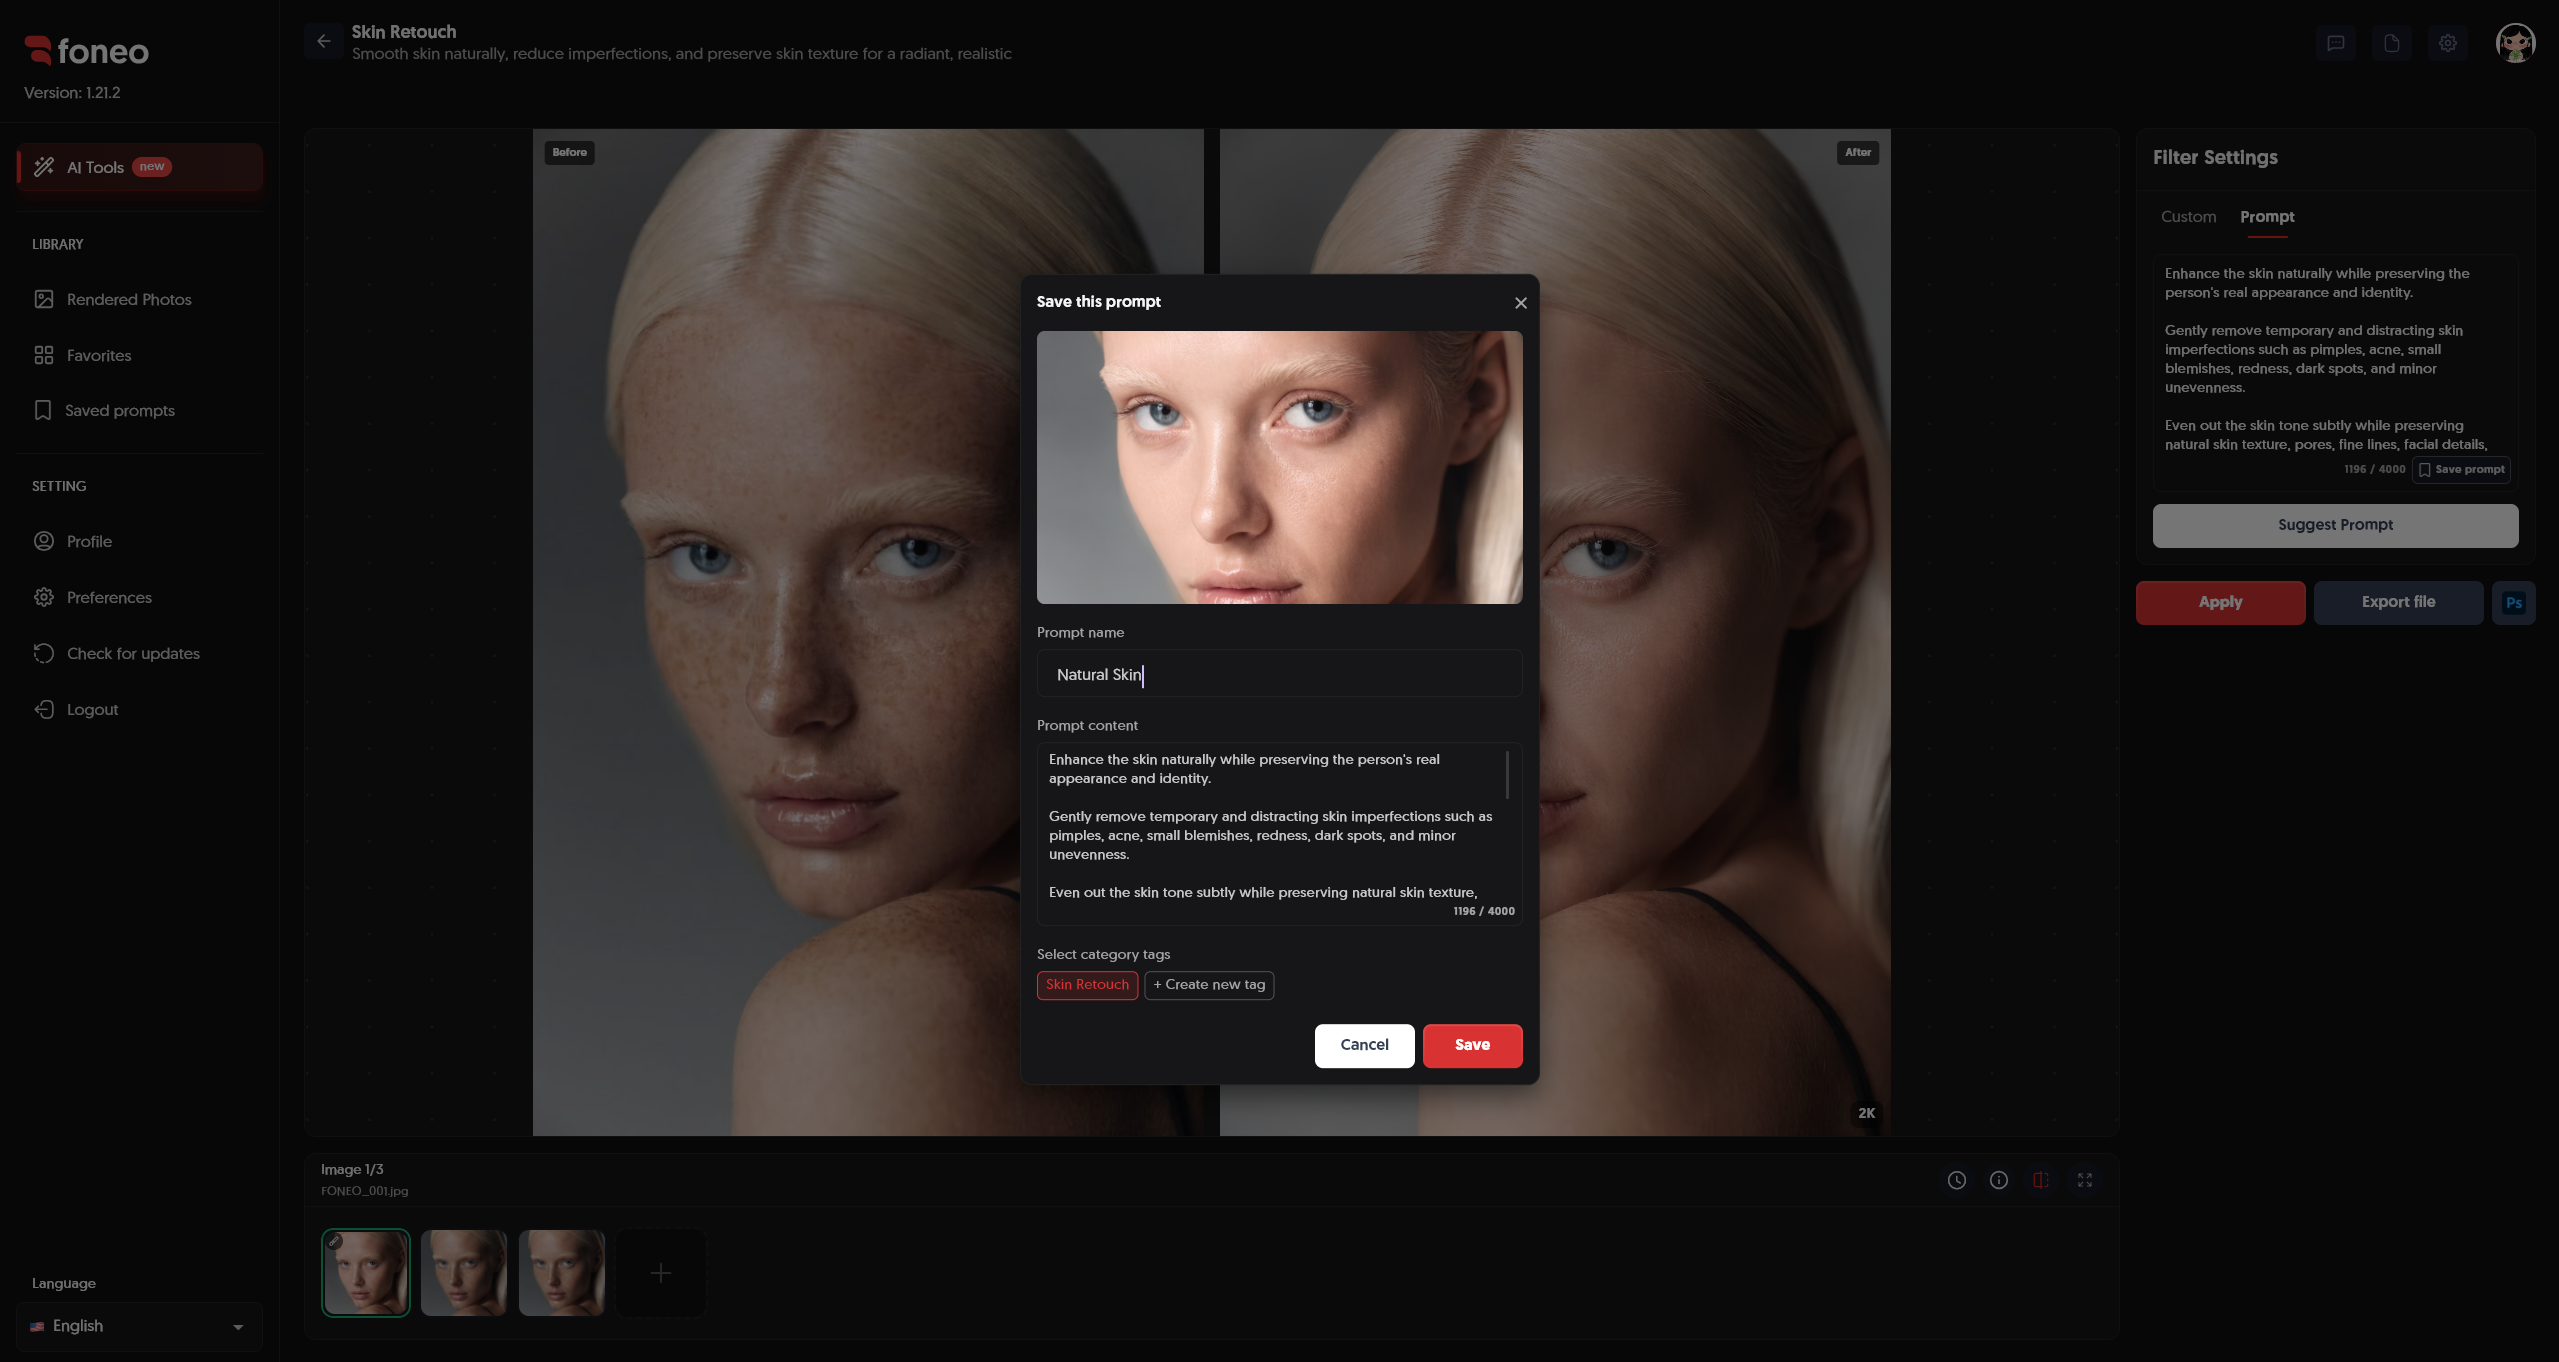
In addition to the default settings and Custom, you can switch to Prompt to directly describe how you want the skin to be retouched.
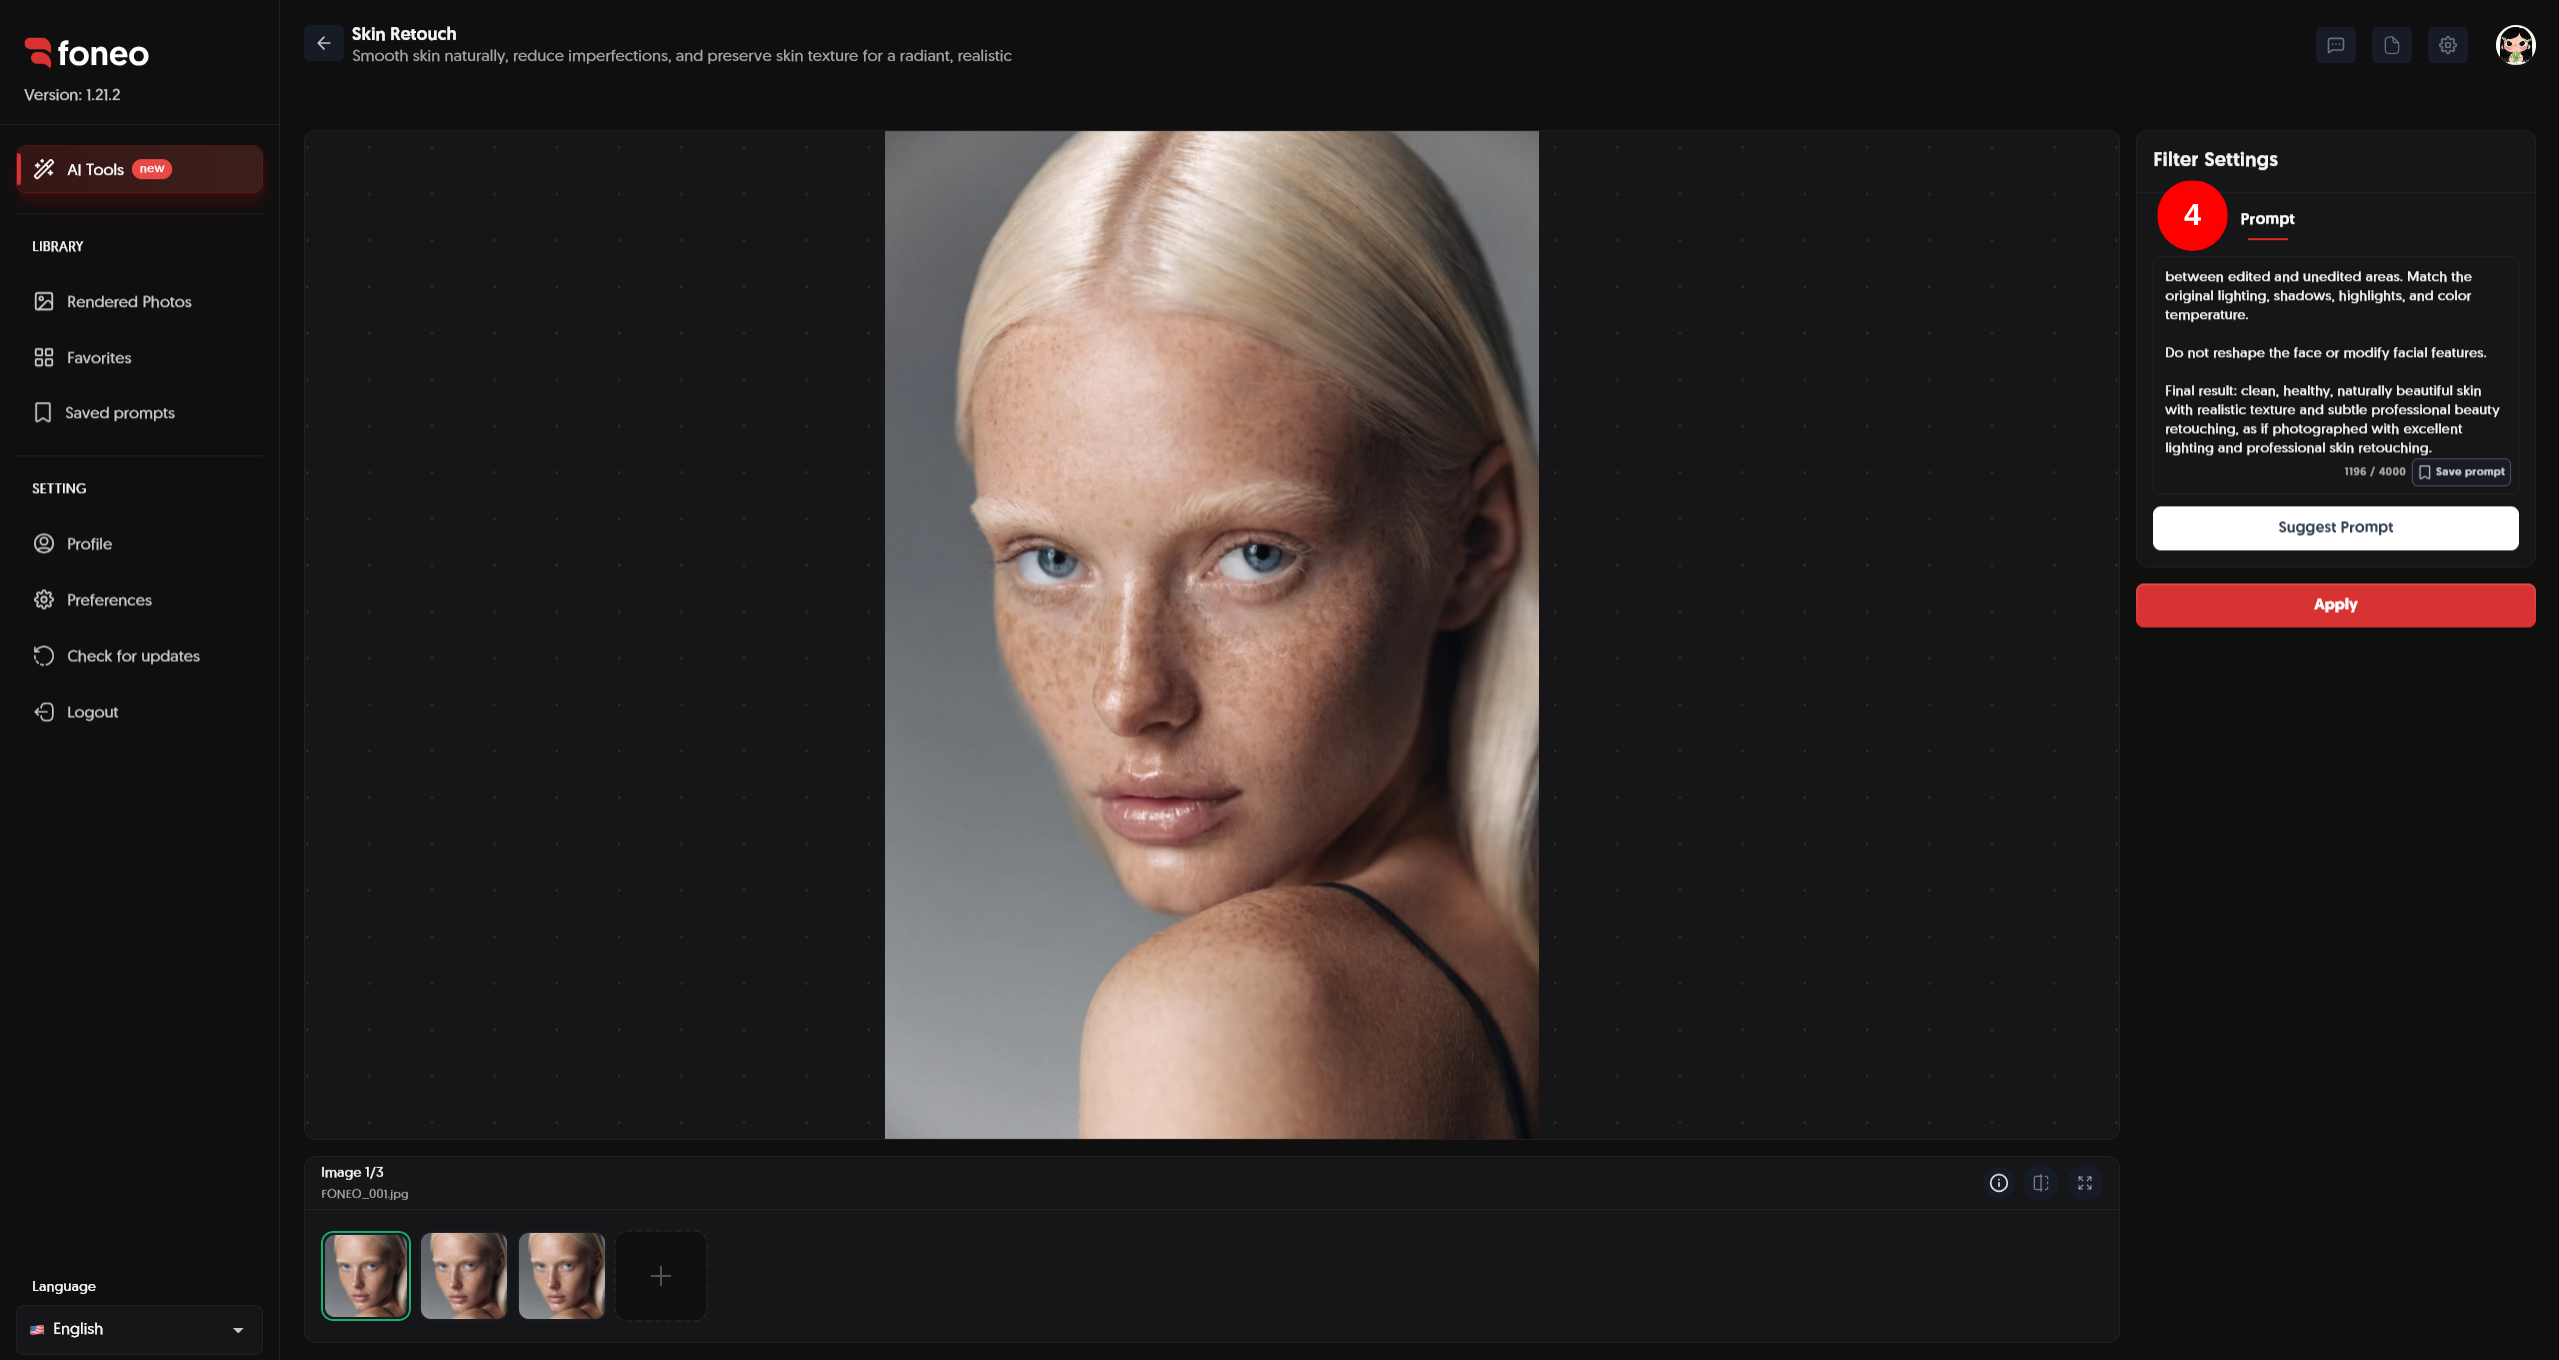
Enter your description in the Description field.
For example:
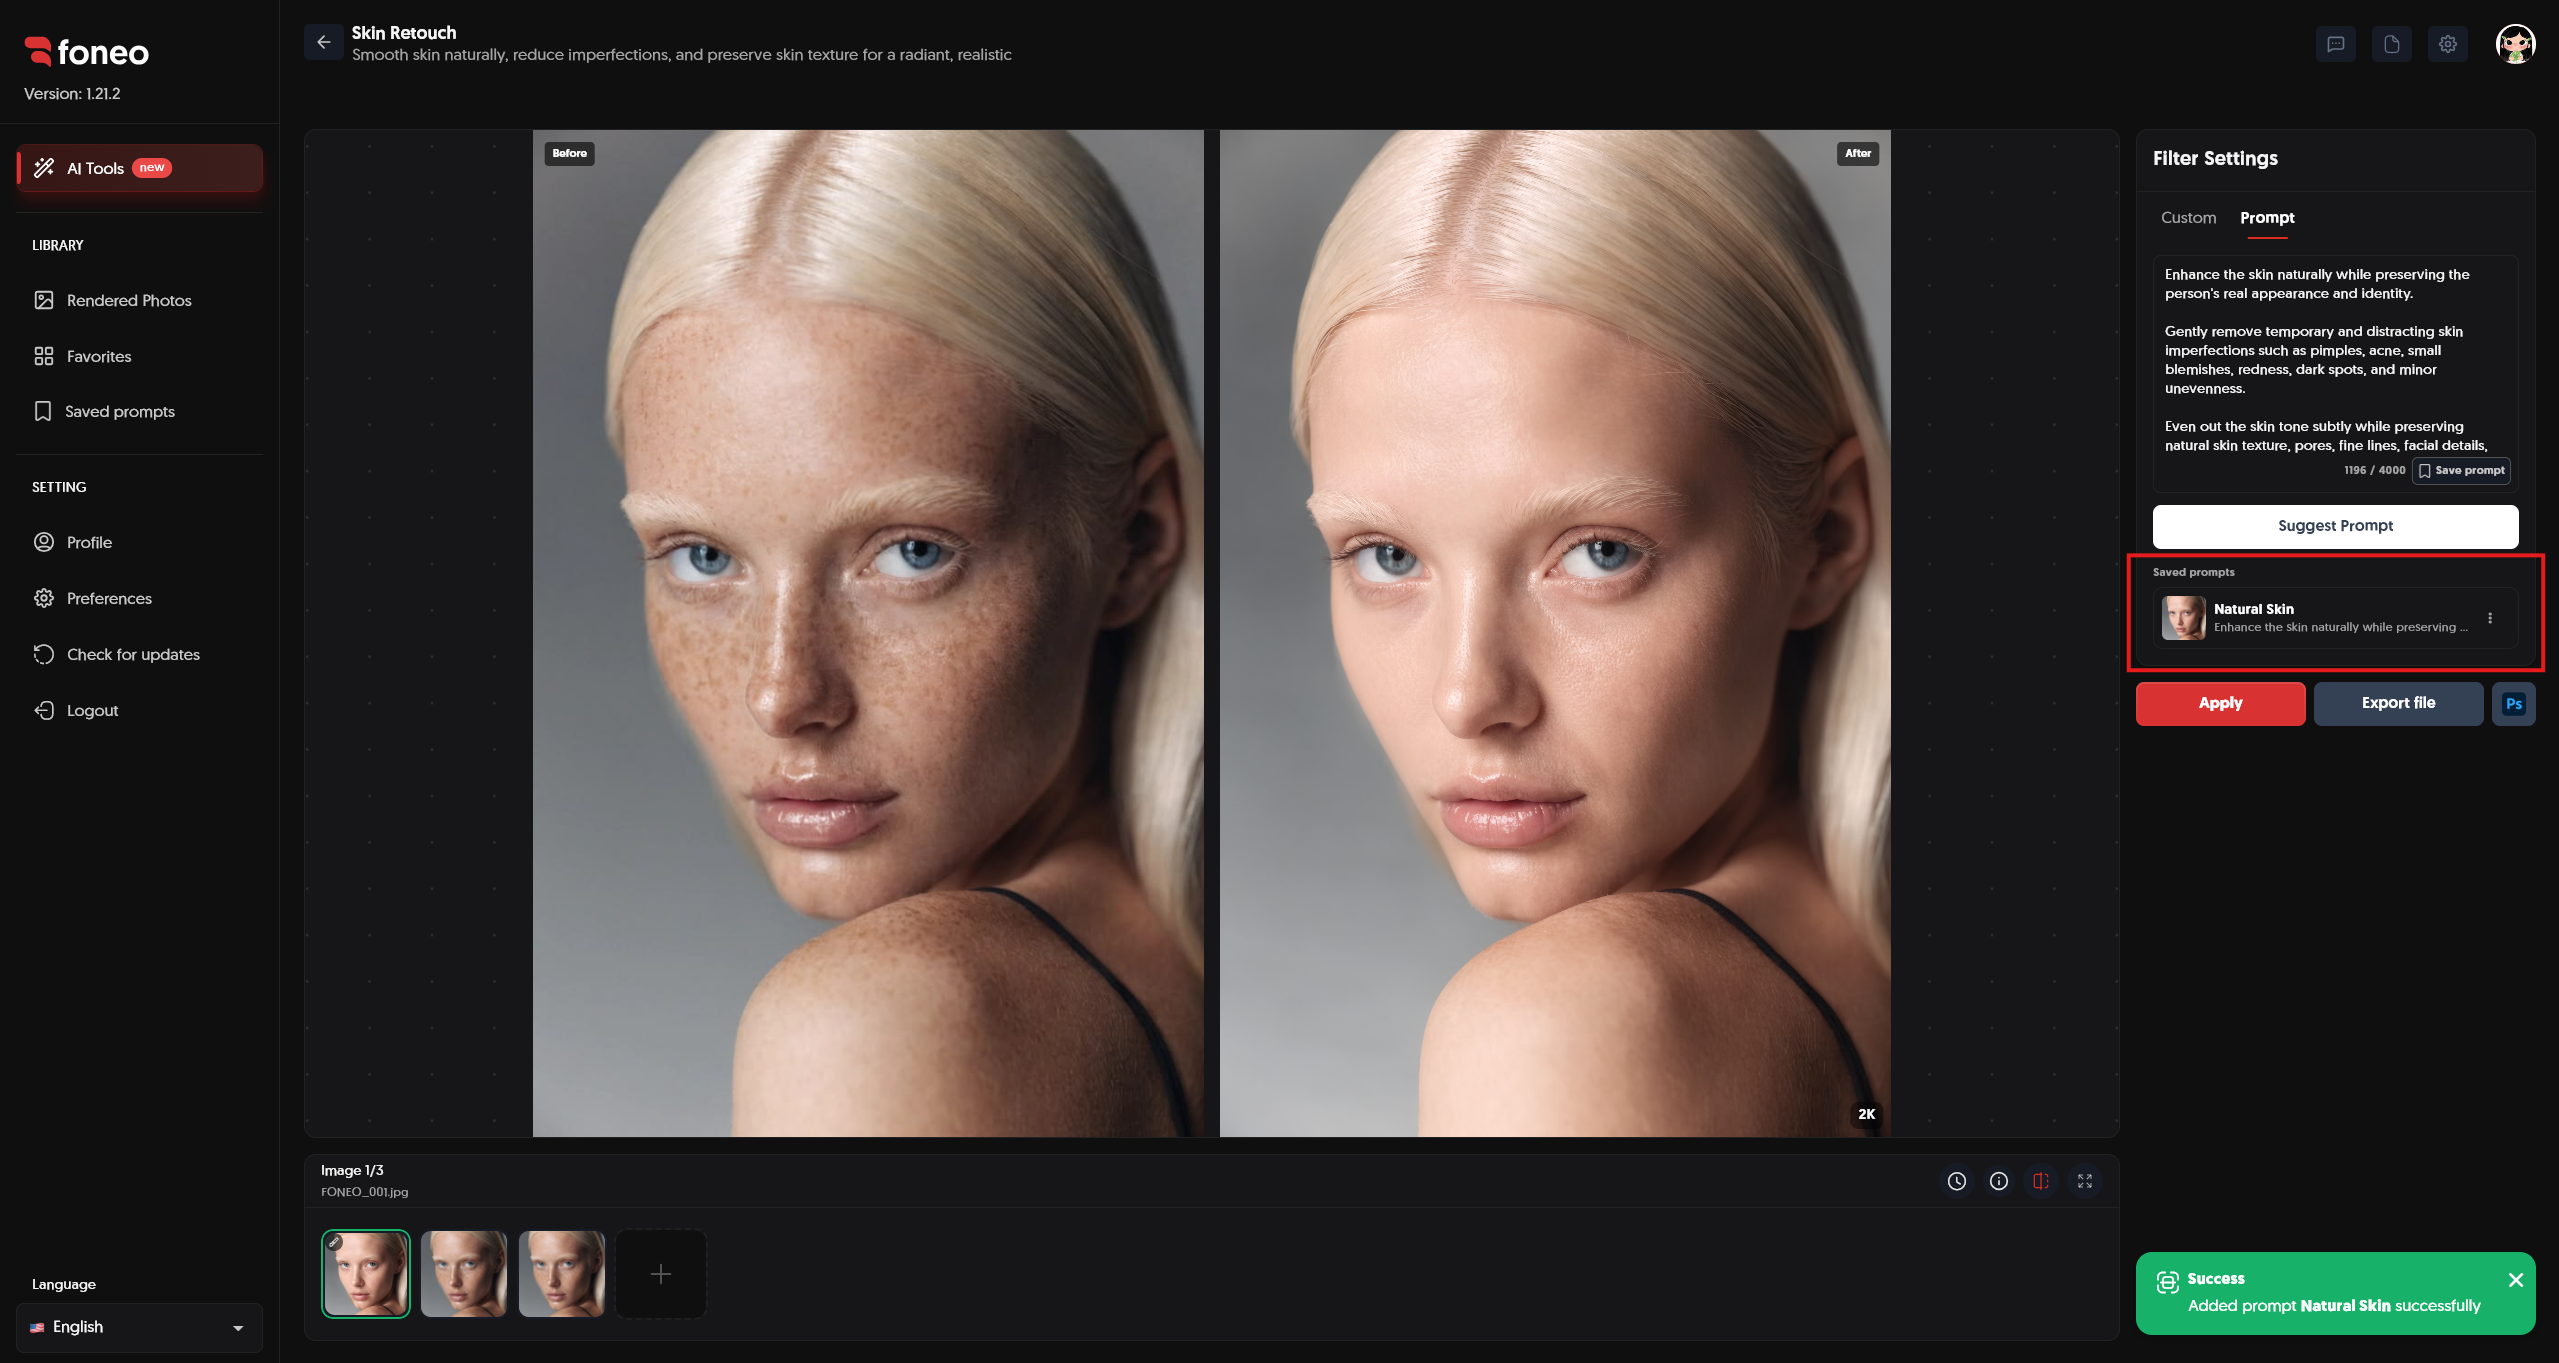
Enhance the skin naturally while preserving the person's real appearance and identity. Gently remove temporary skin imperfections and even out the skin tone while preserving natural skin texture.
You can also use Description Suggestions to help create a suitable description.
If you want to reuse the same description for future edits, you can save it for later use.
5. Apply
After selecting your image, you can click Apply immediately if you want to use the default settings.
If you have selected options in Custom or entered a Prompt, Foneo will process the image based on your chosen settings.
Foneo analyzes the face and skin areas in the image and applies AI-powered skin retouching.
During processing, the system may display a processing status.
Once processing is complete, the result will appear in the preview area.
6. Check the Result Before Exporting
After processing is complete, carefully review the result before exporting the image.
Pay particular attention to:
- Skin smoothness.
- Skin brightness and color.
- Skin tone consistency.
- Natural skin details.
- The eyes, lips, and other facial features.
- The transition between edited skin areas and surrounding areas.
If you use stronger skin enhancement settings, check the result carefully to make sure the skin still retains a natural texture and does not look overly smooth.
7. Export File / Ps
Once you are satisfied with the result, you can export the image or continue editing.
- Click Export file to export the processed image.
- Click Ps if you want to continue editing the image in Photoshop.
Before exporting, check:
- The overall appearance of the face.
- The natural look of the skin.
- Skin color.
- Skin details.
- Brightness.
- Areas surrounding the face.
How to Evaluate the Skin Retouch Result
After Foneo finishes processing, check the image at a higher zoom level for a more detailed review.
- Smoothness: The skin should look smoother while maintaining natural texture.
- Skin tone: The skin tone should look even and consistent with the overall image.
- Details: Important skin details should be preserved rather than completely blurred.
- Facial features: Check the eyes, lips, nose, and other facial features to make sure they have not been changed unexpectedly.
- Overall appearance: The result should make the skin look cleaner and more refined while maintaining the person's natural appearance.
Tips for Natural-Looking Skin Retouching
1. Use the Default Settings for Quick Results
If you do not need detailed adjustments, you do not have to select any additional options.
Simply select the image and click Apply. Foneo will automatically process the skin using AI.
2. Use Custom When You Want More Control
If you want to control the available effects, use Custom to enable the options that match your needs.
You can combine options such as Smooth Skin, Even Skin Tone, or Enhance Detail.
3. Avoid Over-Smoothing the Skin
When using Smooth Skin, check the result carefully to make sure the skin retains its natural texture.
Overly smooth skin can make the face look less natural.
4. Use Enhance Detail When You Want to Preserve Skin Details
If you want the skin to retain important details, you can use Enhance Detail.
This can be useful for high-quality portrait images with visible skin texture and details.
5. Use Prompt When You Need a Specific Description
If you want AI to process the image based on a specific description, switch to Prompt.
Your Prompt can focus on:
- The desired level of smoothing.
- Skin brightness.
- Skin tone consistency.
- Preserving natural skin texture.
- Preserving the person's appearance and facial features.
6. Check Before and After
If the interface provides a Before / After view, use it to directly compare the original image with the processed result.
This makes it easier to see how much the skin has changed after processing.
7. Check the Image Before Exporting
Before clicking Export file, review the entire face and skin one more time.
If the result is not suitable, you can change the settings or Prompt and click Apply again to reprocess the image.
Frequently Asked Questions
What is the Skin Retouch feature used for?
Skin Retouch uses AI to improve skin in photos, including smoothing, brightening, adjusting skin color, evening out skin tone, and enhancing skin details.
Do I have to select an option in Filter Settings?
No.
You can select an image and click Apply immediately without making any additional adjustments. Foneo will automatically process the image using the default settings.
Can I customize the Skin Retouch effect?
Yes.
You can use Custom to select skin enhancement options such as Smooth Skin, Skin Lighting, Even Skin Tone, or Enhance Detail.
Can I use a Prompt for Skin Retouch?
Yes.
You can switch to Prompt, enter your desired description, and click Apply to process the image according to the description.
Can I use Description Suggestions?
Yes.
In Prompt mode, you can use Description Suggestions to help create a suitable description for your image editing.
Can I save a description for future use?
Yes.
After creating a description, you can save it and reuse it for future editing sessions.
Does Skin Retouch change the face?
The feature focuses on improving the skin. However, you should still review the facial features after AI processing to make sure the result is suitable.
Can I process the image again if the result is not suitable?
Yes.
You can change the settings in Custom, modify the Prompt, or use the default settings again, then click Apply to process the image again.
Can I continue editing the image after using Skin Retouch?
Yes.
After processing, you can click Export file to export the image or click Ps to continue editing in Photoshop.
Related Articles
Foneo · AI Photo Editing
Ready to try it on your own photos?
Download the Foneo app to edit photos with AI in just a few taps, or see the plan that fits your needs.